HP ProBook 4545s HP Notebook User Guide - Linux - Page 69
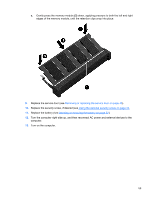
Replace the security screw, if desired see
 |
View all HP ProBook 4545s manuals
Add to My Manuals
Save this manual to your list of manuals |
Page 69 highlights
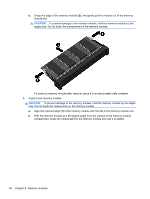
c. Gently press the memory module (3) down, applying pressure to both the left and right edges of the memory module, until the retention clips snap into place. 9. Replace the service door (see Removing or replacing the service door on page 45). 10. Replace the security screw, if desired (see Using the optional security screw on page 44. 11. Replace the battery (see Inserting or removing the battery on page 37). 12. Turn the computer right-side up, and then reconnect AC power and external devices to the computer. 13. Turn on the computer. 59
-
 1
1 -
2
-
3
-
4
-
5
-
6
-
7
-
8
-
9
-
10
-
11
-
12
-
13
-
14
-
15
-
16
-
17
-
18
-
19
-
20
-
21
-
22
-
23
-
24
-
25
-
26
-
27
-
28
-
29
-
30
-
31
-
32
-
33
-
34
-
35
-
36
-
37
-
38
-
39
-
40
-
41
-
42
-
43
-
44
-
45
-
46
-
47
-
48
-
49
-
50
-
51
-
52
-
53
-
54
-
55
-
56
-
57
-
58
-
59
-
60
-
61
-
62
-
63
-
 64
64 -
 65
65 -
 66
66 -
 67
67 -
 68
68 -
 69
69 -
 70
70 -
 71
71 -
 72
72 -
 73
73 -
 74
74 -
75
-
76
-
77
-
78
-
79
-
80
-
81
-
82
-
83
-
84
-
85
-
86
-
87
-
88
-
89
-
90
-
91
-
92
-
93
-
94
-
95
-
96
-
97
-
98
-
99
-
100
 |
 |
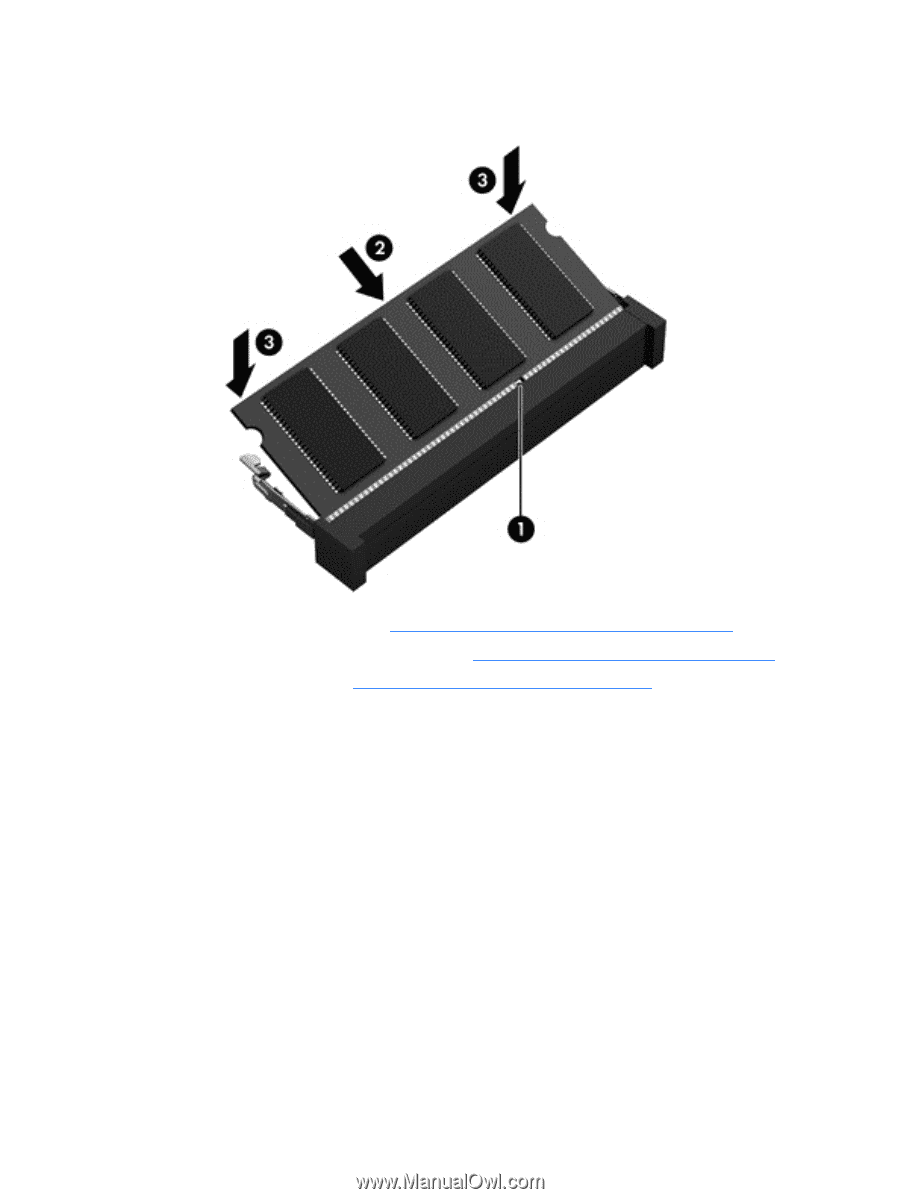
c.
Gently press the memory module
(3)
down, applying pressure to both the left and right
edges of the memory module, until the retention clips snap into place.
9.
Replace the service door (see
Removing or replacing the service door
on page
45
).
10.
Replace the security screw, if desired (see
Using the optional security screw
on page
44
.
11.
Replace the battery (see
Inserting or removing the battery
on page
37
).
12.
Turn the computer right-side up, and then reconnect AC power and external devices to the
computer.
13.
Turn on the computer.
59