HP Vs15 HP Pavilion Desktop PCs - FX75 Flat Panel Display - (English) User Gu - Page 27
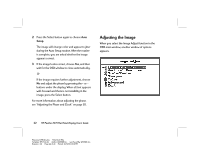
Positioning the Image - manual
 |
UPC - 829160547435
View all HP Vs15 manuals
Add to My Manuals
Save this manual to your list of manuals |
Page 27 highlights
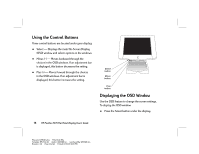
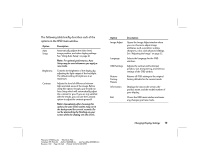
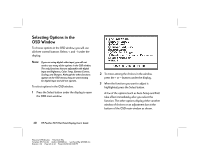
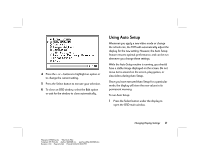
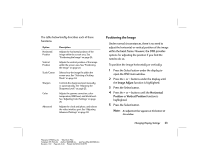
The table below briefly describes each of these functions. Option Horizontal Position Vertical Position Scale/Center Sharpen Color Advanced Description Adjusts the horizontal position of the image within the screen area. See "Positioning the Image" on page 23. Adjusts the vertical position of the image within the screen area. See "Positioning the Image" on page 23. Selects how the image fits within the screen area. See "Selecting a Scaling Mode" on page 24. Controls the sharpness level manually or automatically. See "Adjusting the Sharpness Level" on page 25. Adjusts the gamma correction, color temperature, RGB level, and black level. See "Adjusting Color Settings" on page 26. Adjusts the clock and phase, and selects the video interface port. See "Adjusting Advanced Settings" on page 30. Positioning the Image Under normal circumstances, there is no need to adjust the horizontal or vertical position of the image within the bezel frame. However, the OSD provides options for adjusting the position if you find the need to do so. To position the image horizontally or vertically: 1 Press the Select button under the display to open the OSD main window. 2 Press the + or - buttons under the display until the Image Adjust function is highlighted. 3 Press the Select button. 4 Press the + or - buttons until the Horizontal Position or Vertical Position function is highlighted. 5 Press the Select button. Note: An adjustment bar appears at the bottom of the window. Changing Display Settings 23 Filename: fx75UGrw.doc Title: Book Title Template: HP-Print.dot Author: WASSER, Inc. Last Saved By: WASSER, Inc. Revision #: 30 Page: 23 of 43 Printed: 10/16/00 03:31 PM
-
 1
1 -
2
-
3
-
4
-
5
-
6
-
7
-
8
-
9
-
10
-
11
-
12
-
13
-
14
-
15
-
16
-
17
-
18
-
19
-
20
-
21
-
 22
22 -
 23
23 -
 24
24 -
 25
25 -
 26
26 -
 27
27 -
 28
28 -
 29
29 -
 30
30 -
 31
31 -
 32
32 -
33
-
34
-
35
-
36
-
37
-
38
-
39
-
40
-
41
-
42
-
43
 |
 |
