HP Vs15 HP Pavilion Desktop PCs - FX75 Flat Panel Display - (English) User Gu - Page 35
Phase, Adjust, Clock Adjust, Selecting the Video Interface, Image Adjust, Advanced, Video, Interface
 |
UPC - 829160547435
View all HP Vs15 manuals
Add to My Manuals
Save this manual to your list of manuals |
Page 35 highlights
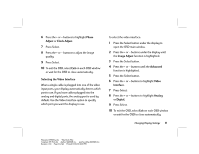
6 Press the + or - buttons to highlight Phase Adjust or Clock Adjust. 7 Press Select. 8 Press the + or - buttons to adjust the image quality. 9 Press Select. 10 To exit the OSD, select Exit on each OSD window or wait for the OSD to close automatically. Selecting the Video Interface When a single cable is plugged into one of the video input ports, your display automatically detects which port to use. If you have cables plugged into the analog and digital ports, the analog port is used by default. Use the Video Interface option to specify which port you want the display to use. To select the video interface: 1 Press the Select button under the display to open the OSD main window. 2 Press the + or - buttons under the display until the Image Adjust function is highlighted. 3 Press the Select button. 4 Press the + or - buttons until the Advanced function is highlighted. 5 Press the Select button. 6 Press the + or - buttons to highlight Video Interface. 7 Press Select. 8 Press the + or - buttons to highlight Analog or Digital. 9 Press Select. 10 To exit the OSD, select Exit on each OSD window or wait for the OSD to close automatically. Changing Display Settings 31 Filename: fx75UGrw.doc Title: Book Title Template: HP-Print.dot Author: WASSER, Inc. Last Saved By: WASSER, Inc. Revision #: 30 Page: 31 of 43 Printed: 10/16/00 03:31 PM
-
 1
1 -
2
-
3
-
4
-
5
-
6
-
7
-
8
-
9
-
10
-
11
-
12
-
13
-
14
-
15
-
16
-
17
-
18
-
19
-
20
-
21
-
22
-
23
-
24
-
25
-
26
-
27
-
28
-
29
-
 30
30 -
 31
31 -
 32
32 -
 33
33 -
 34
34 -
 35
35 -
 36
36 -
 37
37 -
 38
38 -
 39
39 -
 40
40 -
41
-
42
-
43
 |
 |