Honeywell HNVE1 Reference Guide - Page 18
Overview of Installation Procedure, HNVE1 Encoder Front and Rear Panels, Front Panel
 |
View all Honeywell HNVE1 manuals
Add to My Manuals
Save this manual to your list of manuals |
Page 18 highlights
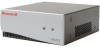
Encoder Installation Part Rack mount ear brackets Honeywell CD containing this guide, the IP Utility, and EQUIP™ Series User Guides) Printed Quick Install Guide Quantity 4 1 1 If any parts are missing or damaged, contact the dealer you purchased the HNVE1 from or call Honeywell Customer Service (see Warranty and Service on page 13). Overview of Installation Procedure Note Please familiarize yourself with the installation procedure and complete each step in the sequence given. The initial installation of an HNVE1 consists of the following steps: Step 1 Make the connections 2 Mount the HNVE1 3 Install the software 4 Configure the HNVE1 See ... Rear Panel Connectors on page 19 Mounting the HNVE1 Encoder on page 24 Installing the Honeywell IP Utility Software on page 30 Configuring Connected Devices on page 59 HNVE1 Encoder Front and Rear Panels Front Panel Figure 2-1 shows the front panel. Table 2-1 lists the LEDs and describes their functions. 18
-
 1
1 -
2
-
3
-
4
-
5
-
6
-
7
-
8
-
9
-
10
-
11
-
12
-
 13
13 -
 14
14 -
 15
15 -
 16
16 -
 17
17 -
 18
18 -
 19
19 -
 20
20 -
 21
21 -
 22
22 -
 23
23 -
24
-
25
-
26
-
27
-
28
-
29
-
30
-
31
-
32
-
33
-
34
-
35
-
36
-
37
-
38
-
39
-
40
-
41
-
42
-
43
-
44
-
45
-
46
-
47
-
48
-
49
-
50
-
51
-
52
-
53
-
54
-
55
-
56
-
57
-
58
-
59
-
60
-
61
-
62
-
63
-
64
-
65
-
66
-
67
-
68
-
69
-
70
-
71
-
72
-
73
-
74
-
75
-
76
-
77
-
78
-
79
-
80
-
81
-
82
-
83
-
84
-
85
-
86
-
87
-
88
-
89
-
90
-
91
-
92
 |
 |
