Kyocera KM-2560 IC Link User's Manual ver. 2.8 - Page 12
Multi-Part Form Creator continued
 |
View all Kyocera KM-2560 manuals
Add to My Manuals
Save this manual to your list of manuals |
Page 12 highlights
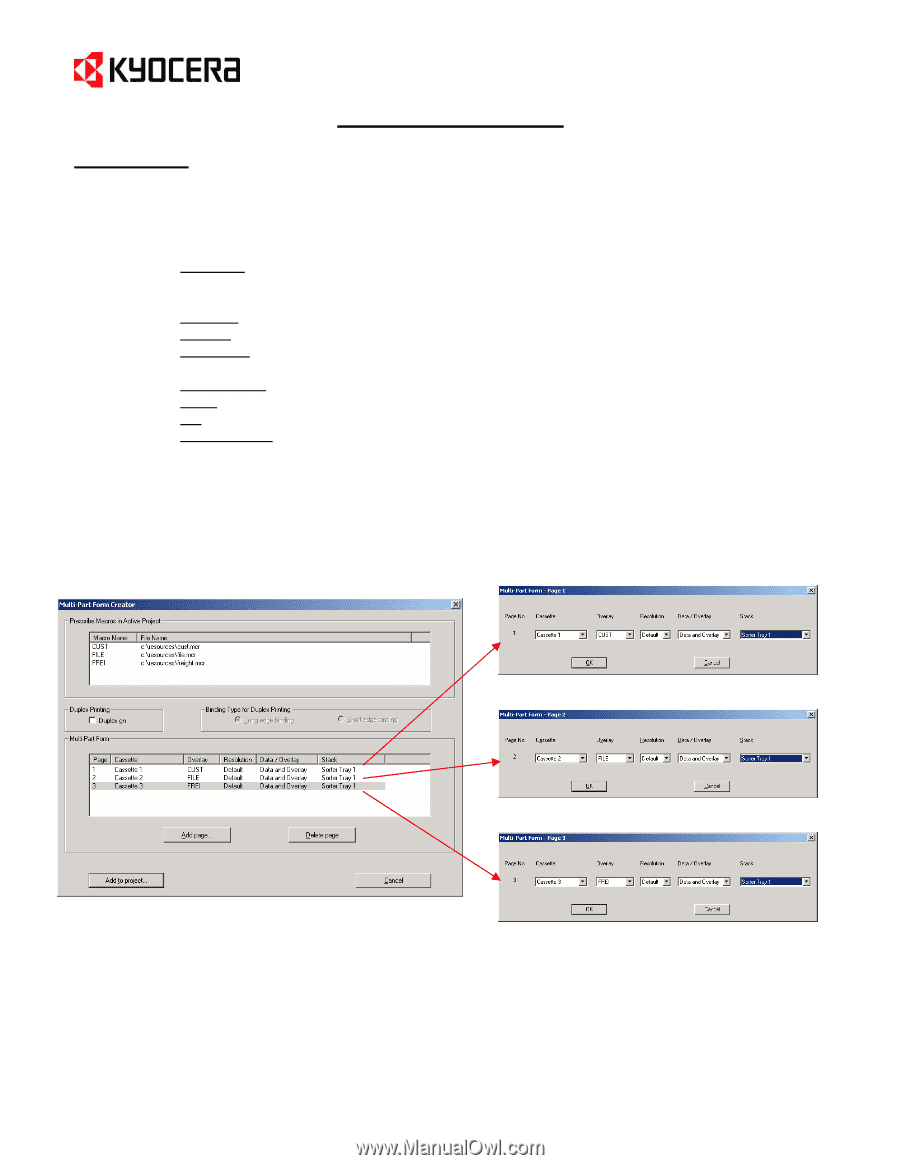
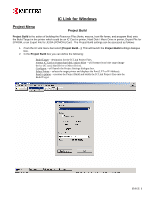
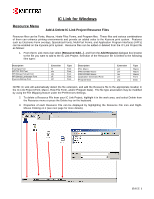
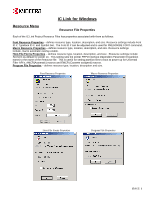
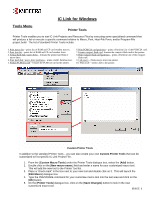
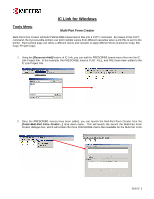
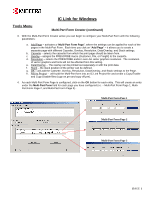
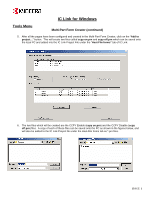
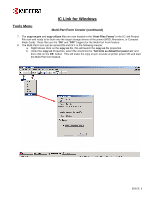
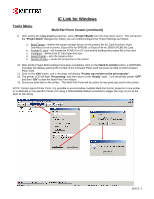
IC Link for Windows Tools Menu Multi-Part Form Creator (continued) 3. With the Multi-Part Form Creator active you can begin to configure your Multi-Part Form with the following parameters: a. Add Page - activates a "Multi-Part Form Page", where the settings can be applied for each of the pages in the Multi-Part Form. Each time you click on "Add Page" - it allows you to create a separate page with different Cassette, Overlay, Resolution, Data/Overlay, and Stack settings. b. Cassette - selects the cassette from which the print page should be taken from. c. Overlay - assigns the PRESCRIBE macro (Customer, File, or Freight) to the cassette. d. Resolution - selects the PRESCRIBE and/or Laser-Jet raster graphics resolution. The resolution of vector graphics and fonts will not be effected from this setting. e. Data/Overlay - The overlay can be printed out separately or with the print data. f. Stack - the stack position of the printer can be defined. g. OK - will add the Cassette, Overlay, Resolution, Data/Overlay, and Stack settings to the Page. h. Add to Project - will build the Multi-Part form into an IC Link Project file and create a Ccpy Enable and Ccpy Disable files (ccpy on.prn and ccpy off.prn). 4. As each Multi-Part Form Page is configured, click on the OK button for each entry. This will create an entry under the Multi-Part Form field for each page you have configured (i.e. - Multi-Part Form Page 1, MultiPart Form Page 2, and Multi-Part Form Page 3).. Multi-Part Form Page 1 Multi-Part Form Page 2 Multi-Part Form Page 3 {PAGE }
-
 1
1 -
2
-
3
-
4
-
5
-
6
-
 7
7 -
 8
8 -
 9
9 -
 10
10 -
 11
11 -
 12
12 -
 13
13 -
 14
14 -
 15
15 -
 16
16 -
 17
17 -
18
-
19
-
20
-
21
-
22
-
23
-
24
-
25
-
26
-
27
-
28
-
29
-
30
-
31
-
32
-
33
-
34
-
35
-
36
-
37
-
38
-
39
 |
 |