Kyocera KM-2560 IC Link User's Manual ver. 2.8 - Page 33
Converting *.BMP or *.JPEG Image for PRESCRIBE Macro continued
 |
View all Kyocera KM-2560 manuals
Add to My Manuals
Save this manual to your list of manuals |
Page 33 highlights
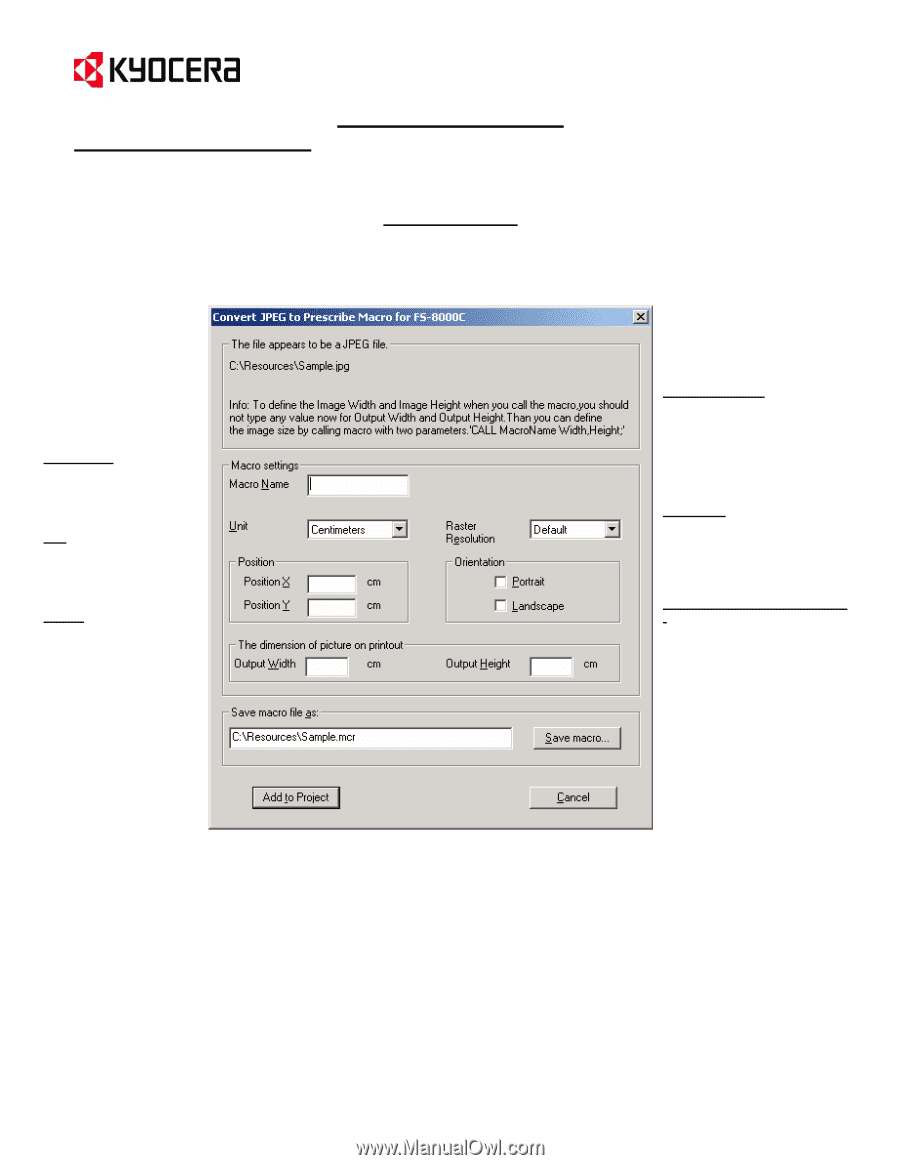
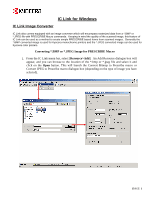
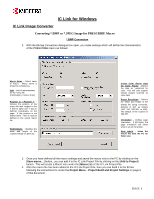
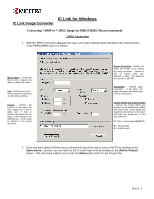
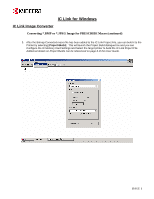
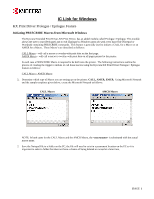
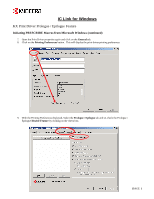
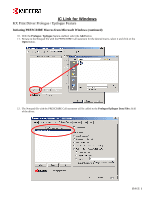
IC Link for Windows IC Link Image Converter Converting *.BMP or *.JPEG Image for PRESCRIBE Macro (continued) *.JPEG Conversion 1. With the JPEG Conversion dialogue box open, you make settings which will define the characteristics of the PRESCRIBE macro as follows: Macro Name - Defines the Macro name. Requires four letters to define the name. Unit - Defines the Unit of measurement for the Macro. Accept default settings. Position - Defines the position of the macro file with respect the X (left to right) and Y (top to bottom) coordinates on the page. If this position is not defined here - then it must be defined in the actual macro file. Raster Resolution - Defines the Width and Height of the bitmap file being converted. Defined in DPI as follows (100, 150, 200,300, or 600). The default of the scanner is 300 DPI. Orientation - Defines page orientation. If left blank, the page orientation will follow what is set on the printer. Output Width and Output Height - Defines the Image Width and Height. It is not necessary to define any values here, as the Width and Height can be defined in the Macro Call with two parameters in the Call statement. !R! CALL W,H;EXIT; W = Image Width H = Image Height 2. Once you have defined all the macro settings and saved the macro onto to the PC by clicking on the [Save macro...] button, you can add it to the IC Link Project File by clicking on the [Add to Project] button. This will create a Macro Icon under the [Macro] tab of the IC Link Project File. {PAGE }
-
 1
1 -
2
-
3
-
4
-
5
-
6
-
7
-
8
-
9
-
10
-
11
-
12
-
13
-
14
-
15
-
16
-
17
-
18
-
19
-
20
-
21
-
22
-
23
-
24
-
25
-
26
-
27
-
 28
28 -
 29
29 -
 30
30 -
 31
31 -
 32
32 -
 33
33 -
 34
34 -
 35
35 -
 36
36 -
 37
37 -
 38
38 -
39
 |
 |