Kyocera KM-2560 IC Link User's Manual ver. 2.8 - Page 4
Creating an IC Link Project
 |
View all Kyocera KM-2560 manuals
Add to My Manuals
Save this manual to your list of manuals |
Page 4 highlights
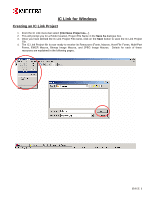
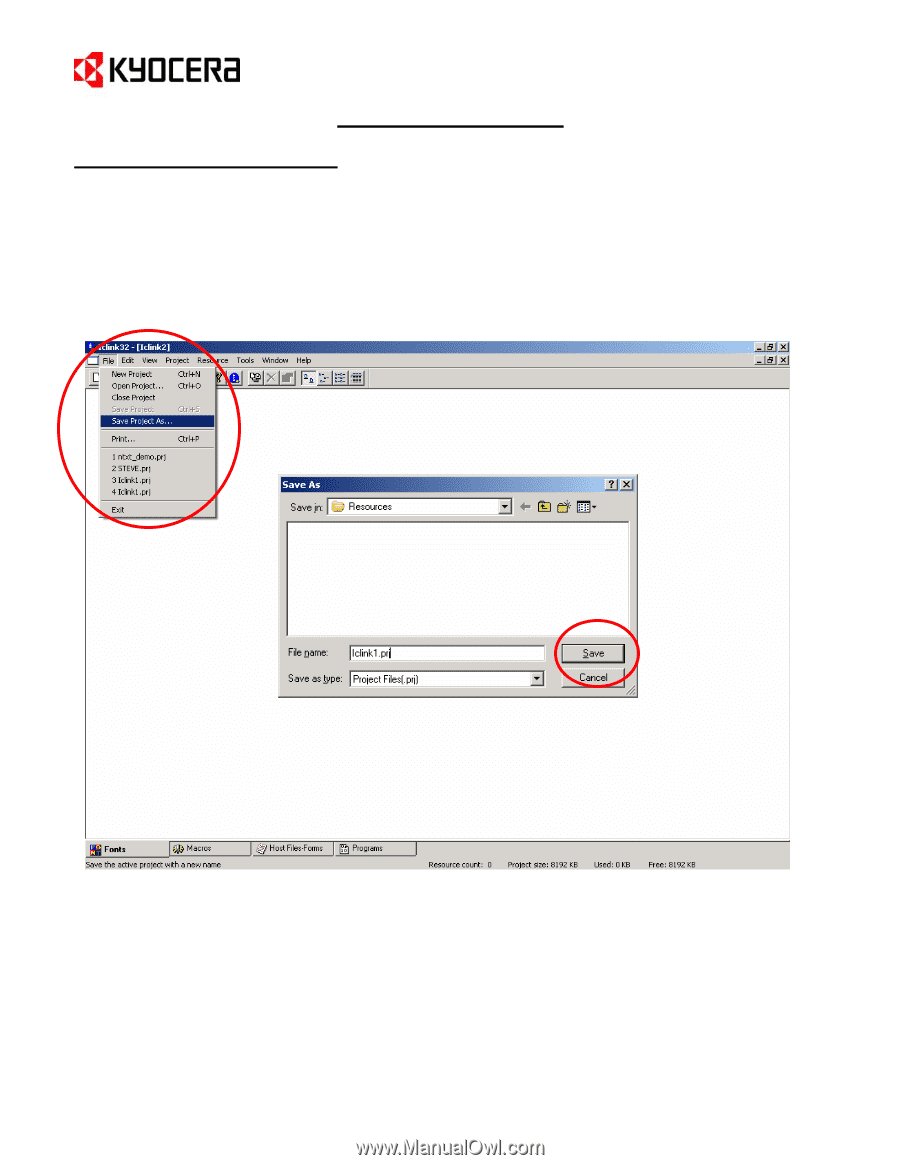
IC Link for Windows Creating an IC Link Project 1. From the IC Link menu bar select [File>Save Project As...]. 2. This will prompt you for a Folder location, Project File Name in the Save As dialogue box. 3. Once you have defined the IC Link Project File name, click on the Save button to save the IC Link Project File. 4. The IC Link Project file is now ready to receive its Resources (Fonts, Macros, Host-File Forms, Multi-Part Forms, EMCR Macros, Bitmap Image Macros, and JPEG Image Macros. Details for each of these resources are explained in the following pages. {PAGE }
-
 1
1 -
 2
2 -
 3
3 -
 4
4 -
 5
5 -
 6
6 -
 7
7 -
 8
8 -
 9
9 -
 10
10 -
11
-
12
-
13
-
14
-
15
-
16
-
17
-
18
-
19
-
20
-
21
-
22
-
23
-
24
-
25
-
26
-
27
-
28
-
29
-
30
-
31
-
32
-
33
-
34
-
35
-
36
-
37
-
38
-
39
 |
 |
IC Link for Windows
{
PAGE
}
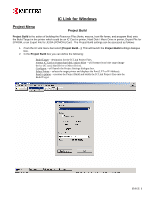
Creating an IC Link Project
1.
From the IC Link menu bar select [
File>Save Project As…
].
2.
This will prompt you for a Folder location, Project File Name in the
Save As
dialogue box.
3.
Once you have defined the IC Link Project File name, click on the
Save
button to save the IC Link Project
File.
4.
The IC Link Project file is now ready to receive its Resources (Fonts, Macros, Host-File Forms, Multi-Part
Forms, EMCR Macros, Bitmap Image Macros, and JPEG Image Macros. Details for each of these
resources are explained in the following pages.