LG 32LP1D Owners Manual - Page 81
Options
 |
UPC - 719192168534
View all LG 32LP1D manuals
Add to My Manuals
Save this manual to your list of manuals |
Page 81 highlights
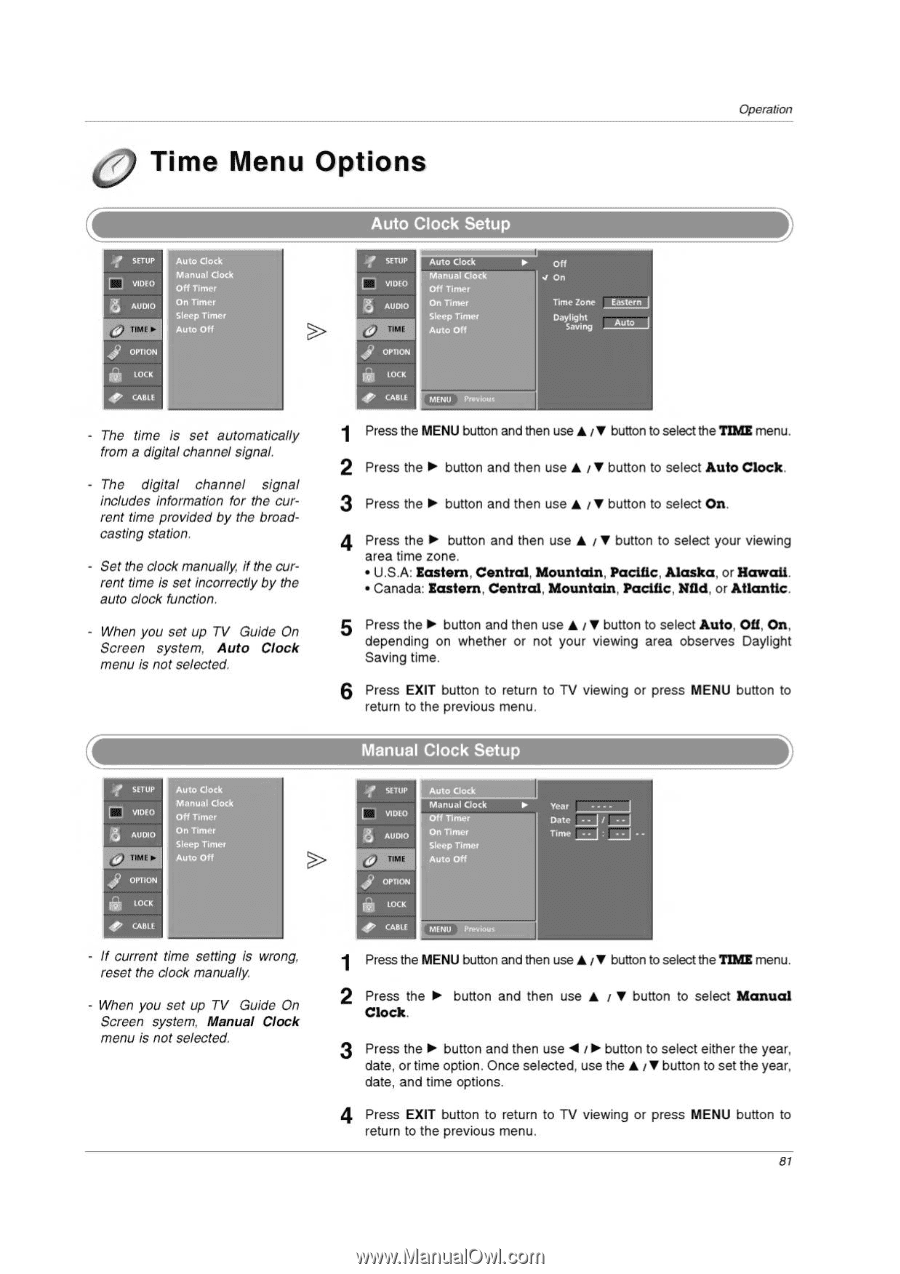
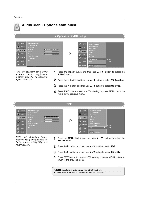
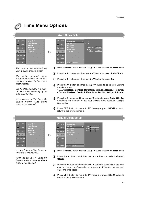
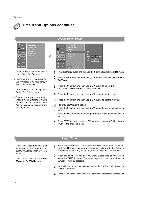
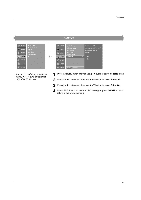
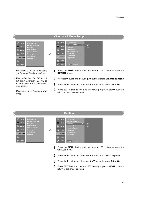
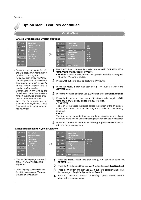
Time Menu Options Operation SETUP D VIDEO 3 AUDIO Auto Clock Manual Clock Off Timer On Timer Sleep Timer Auto Off 44? OPTION ro-- LOCK 4 0, CABLE The time is set automatically from a digital channel signal. The digital channel signal includes information for the current time provided by the broadcasting station. Set the clock manually, if the current time is set incorrectly by the auto clock function. When you set up TV Guide On Screen system. Auto Clock menu is not selected. stAup E VIDEO a AUDIO 2 TIM OPTION ei LOCK O CABLE Auto Clock Manual Clock Off Timer On Timer Sleep Timer Auto Off If current time setting is wrong, reset the clock manually. When you set up TV Guide On Screen system, Manual Clock menu is not selected. Auto Clock Setup SETUP C VIDEO a AUDIO Auto Clock - Manual Clock Off Timer On Timer Sleep Timer Auto Off 1 OPI ION iv LOCK CABLE MENU PR,ViOll, ► Off J On Time Zone Daylight Saving Eastern quto 1 Press the MENU button and then use ♦ /V button to select the TIME menu. 2 Press the ► button and then use ♦ / ♦ button to select Auto Clock. 3 Press the ► button and then use ♦ / ♦ button to select On. 4 Press the ► button and then use ♦ i ♦ button to select your viewing area time zone. • U.S.A: Eastern, Central, Mountain, Pacific, Alaska, or Hawaii. • Canada: Eastern, Central, Mountain, Pacific, Nfld, or Atlantic. 5 Press the ► button and then use ♦ / ♦ button to select Auto, Off, On, depending on whether or not your viewing area observes Daylight Saving time. 6 Press EXIT button to return to TV viewing or press MENU button to return to the previous menu. Manual Clock Setup IP SETUP [ VIDEO a AUDIO t#: I OPTION LOCK Auto Clock Manual Clock Off Timer On Timer Sleep Timer Auto Off CABLE MENU Previous Year Date / _j Time 1 Press the MENU button and then use ♦ /V button to select the TIME menu. 2 Press the ► button and then use ♦ i ♦ button to select Manual Clock. 3 Press the ► button and then use I /O. button to select either the year, date, or time option. Once selected, use the ♦ Of button to set the year, date, and time options. 4 Press EXIT button to return to TV viewing or press MENU button to return to the previous menu. 81
-
 1
1 -
2
-
3
-
4
-
5
-
6
-
7
-
8
-
9
-
10
-
11
-
12
-
13
-
14
-
15
-
16
-
17
-
18
-
19
-
20
-
21
-
22
-
23
-
24
-
25
-
26
-
27
-
28
-
29
-
30
-
31
-
32
-
33
-
34
-
35
-
36
-
37
-
38
-
39
-
40
-
41
-
42
-
43
-
44
-
45
-
46
-
47
-
48
-
49
-
50
-
51
-
52
-
53
-
54
-
55
-
56
-
57
-
58
-
59
-
60
-
61
-
62
-
63
-
64
-
65
-
66
-
67
-
68
-
69
-
70
-
71
-
72
-
73
-
74
-
75
-
 76
76 -
 77
77 -
 78
78 -
 79
79 -
 80
80 -
 81
81 -
 82
82 -
 83
83 -
 84
84 -
 85
85 -
 86
86 -
87
-
88
-
89
-
90
-
91
-
92
-
93
-
94
-
95
-
96
-
97
-
98
-
99
-
100
-
101
-
102
-
103
-
104
-
105
-
106
-
107
-
108
-
109
-
110
-
111
-
112
-
113
-
114
-
115
-
116
 |
 |