Lenovo ThinkPad 380ED English - Windows 2000 Professional Setup Guide - Page 11
Using the System Program Service Diskette for ThinkPad i Series models - ibm bios
 |
View all Lenovo ThinkPad 380ED manuals
Add to My Manuals
Save this manual to your list of manuals |
Page 11 highlights
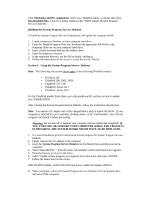
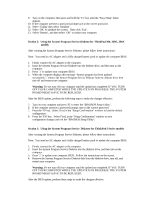
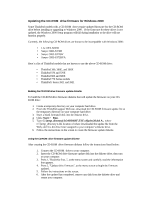
9. Turn on the computer; then press and hold the 'F1' key until the "Easy-Setup" menu appears. 10. If the computer presents a password prompt type in the correct password. 11. Select 'Config' then select 'Initialize'. 12. Select 'OK' to initialize the system. Then click 'Exit'. 13. Select 'Restart', and then select 'OK' to restart your computer. Section 2: Using the System Program Service Diskette for ThinkPad 390, 390E, 390X models After creating the System Program Service Diskette, please follow these instructions: Note: You need an AC adapter and a fully charged battery pack to update the computer BIOS. 1. Firmly connect the AC adapter to the computer. 2. Insert the System Program Service Diskette into the diskette drive, and then turn on the computer. 3. Press '1' to update your computer BIOS. 4. When the computer displays this message "System program has been updated successfully.", remove the System Program Service Diskette from the diskette drive then turn off and restart your computer. Warning: Do not turn off your computer until the update has completed. IF YOU TURN OFF YOUR COMPUTER WHILE THE UPDATE IS IN PROGRESS, THE SYSTEM BOARD MIGHT HAVE TO BE REPLACED. After the BIOS update, perform the following steps to make the changes effective: 5. Turn on your computer and press 'F1' to enter the "IBM BIOS Setup Utility". 6. If the computer presents a password prompt, type in the correct password. 7. Press the 'F9' key. Select [Yes] in the "Setup Confirmation" window to load the default configuration. 8. Press the 'F10' key. Select [Yes] in the "Setup Confirmation" window to save configuration changes and exit the "IBM BIOS Setup Utility". Section 3: Using the System Program Service Diskette for ThinkPad i Series models After creating the System Program Service Diskette, please follow these instructions: Note: You need an AC adapter and a fully charged battery pack to update the computer BIOS. 1. Firmly connect the AC adapter to the computer. 2. Insert the System Program Service Diskette into the diskette drive, and then turn on the computer. 3. Press '1' to update your computer BIOS. Follow the instructions on the screen. 4. Remove the System Program Service Diskette disk from the diskette drive, turn off, and restart your computer. Warning: Do not turn off your computer until the update has completed. IF YOU TURN OFF YOUR COMPUTER WHILE THE UPDATE IS IN PROGRESS, THE SYSTEM BOARD MIGHT HAVE TO BE REPLACED. After the BIOS update, perform these steps to make the changes effective:
-
 1
1 -
2
-
3
-
4
-
5
-
 6
6 -
 7
7 -
 8
8 -
 9
9 -
 10
10 -
 11
11 -
 12
12 -
 13
13 -
 14
14 -
 15
15 -
 16
16 -
17
-
18
-
19
-
20
-
21
-
22
-
23
-
24
-
25
-
26
-
27
-
28
-
29
-
30
-
31
-
32
-
33
-
34
-
35
-
36
-
37
-
38
-
39
-
40
-
41
-
42
-
43
-
44
-
45
-
46
-
47
-
48
-
49
-
50
-
51
-
52
-
53
-
54
-
55
-
56
-
57
-
58
-
59
-
60
-
61
-
62
-
63
-
64
-
65
-
66
-
67
-
68
-
69
-
70
 |
 |