Lexmark 23B0225 User Reference - Page 91
Clearing paper jams, Understanding jam messages, Paper jam messages
 |
UPC - 734646782265
View all Lexmark 23B0225 manuals
Add to My Manuals
Save this manual to your list of manuals |
Page 91 highlights
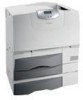
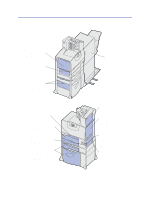
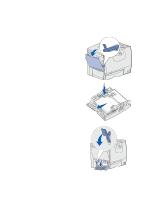
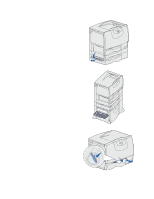
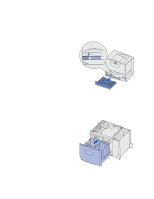
7 Clearing paper jams Understanding jam messages Note: Always clear the entire paper path when you receive any jam message. Paper jam messages Message 200 Paper Jam (tray 1 and left access door beside tray 1) 201 Paper Jam (fuser area) 202 Paper Jam (fuser area) 230 Paper Jam (duplex area) 24 Paper Jam (trays 2-4) 250 Paper Jam (multipurpose feeder) 27 Paper Jam (mailbox and output expander) 28 Paper Jam (finisher) Check Areas... What to do... A, B, T1 Follow the instructions for clearing Area A, Area B, and Area T1. If the jam message persists, paper may be caught in the image transfer unit. See Clearing image transfer unit jams for instructions. D, K, L Follow the instructions for clearing Area D, Area K, and Area L. If the jam message persists, paper may be caught in the fuser. See Clearing fuser jams for instructions. K, L Follow the instructions for clearing Area K and Area L. If the jam message persists, paper may be caught in the fuser. See Clearing fuser jams for instructions. E, J Follow the instructions for clearing Area E and Area J. C, T Follow the instructions for clearing Area C and Area T. A Follow the instructions for clearing Area A. M Follow the instructions for Clearing mailbox or output expander jams (Area M). 1, 2, 3, 4, 5, 6 Refer to the Finisher Setup & User's Guide for instructions on clearing finisher jams. 91
-
 1
1 -
2
-
3
-
4
-
5
-
6
-
7
-
8
-
9
-
10
-
11
-
12
-
13
-
14
-
15
-
16
-
17
-
18
-
19
-
20
-
21
-
22
-
23
-
24
-
25
-
26
-
27
-
28
-
29
-
30
-
31
-
32
-
33
-
34
-
35
-
36
-
37
-
38
-
39
-
40
-
41
-
42
-
43
-
44
-
45
-
46
-
47
-
48
-
49
-
50
-
51
-
52
-
53
-
54
-
55
-
56
-
57
-
58
-
59
-
60
-
61
-
62
-
63
-
64
-
65
-
66
-
67
-
68
-
69
-
70
-
71
-
72
-
73
-
74
-
75
-
76
-
77
-
78
-
79
-
80
-
81
-
82
-
83
-
84
-
85
-
 86
86 -
 87
87 -
 88
88 -
 89
89 -
 90
90 -
 91
91 -
 92
92 -
 93
93 -
 94
94 -
 95
95 -
 96
96 -
97
-
98
-
99
-
100
-
101
-
102
-
103
-
104
-
105
-
106
-
107
-
108
-
109
-
110
-
111
-
112
-
113
-
114
-
115
-
116
-
117
-
118
-
119
-
120
-
121
-
122
-
123
-
124
-
125
-
126
-
127
-
128
-
129
-
130
-
131
-
132
-
133
-
134
-
135
-
136
-
137
-
138
-
139
-
140
-
141
-
142
-
143
 |
 |
