Lexmark P450 User's Guide - Page 10
Use the, printer is on. - ink
 |
View all Lexmark P450 manuals
Add to My Manuals
Save this manual to your list of manuals |
Page 10 highlights
Use the 6 PictBridge port 7 Power button 8 Control panel 9 Display To Connect a PictBridge-enabled digital camera or USB flash drive to the printer. Turn the printer on and off. Use to turn the printer on and off. Note: .After the printer is idle for five minutes, the ink level screen appears. Operate the printer. Before attempting to use the control panel, be sure on the front of the printer is on. • Raise the display to access the control panel buttons. • Adjust the angle of the screen for viewing. • View menus, settings, messages, and photos. • Use the buttons on the control panel to select options. 10
-
 1
1 -
2
-
3
-
4
-
 5
5 -
 6
6 -
 7
7 -
 8
8 -
 9
9 -
 10
10 -
 11
11 -
 12
12 -
 13
13 -
 14
14 -
 15
15 -
16
-
17
-
18
-
19
-
20
-
21
-
22
-
23
-
24
-
25
-
26
-
27
-
28
-
29
-
30
-
31
-
32
-
33
-
34
-
35
-
36
-
37
-
38
-
39
-
40
-
41
-
42
-
43
-
44
-
45
-
46
-
47
-
48
-
49
-
50
-
51
-
52
-
53
-
54
-
55
-
56
 |
 |

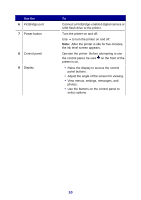
Use the
To
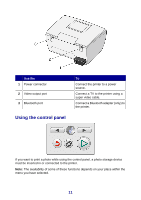
6
PictBridge port
Connect a PictBridge-enabled digital camera or
USB flash drive to the printer.
7
Power button
Turn the printer on and off.
Use
to turn the printer on and off.
Note:
.After the printer is idle for five minutes,
the ink level screen appears.
8
Control panel
Operate the printer. Before attempting to use
the control panel, be sure
on the front of the
printer is on.
9
Display
•
Raise the display to access the control
panel buttons.
•
Adjust the angle of the screen for viewing.
•
View menus, settings, messages, and
photos.
•
Use the buttons on the control panel to
select options.
10