Lexmark P450 User's Guide - Page 40
Setup, Clean Cartridge, Clean, Wiping the print cartridge nozzles and contacts
 |
View all Lexmark P450 manuals
Add to My Manuals
Save this manual to your list of manuals |
Page 40 highlights
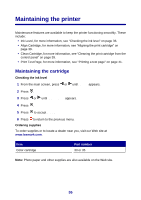
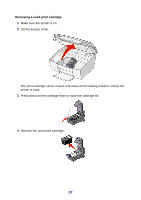
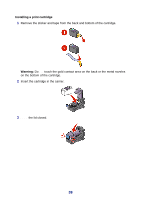
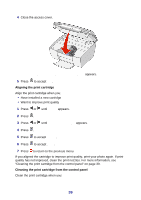
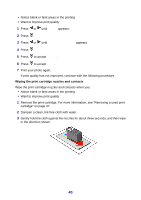
• Notice blank or faint areas in the printing • Want to improve print quality 1 Press or until Setup appears. 2 Press . 3 Press or until Clean Cartridge appears. 4 Press . 5 Press to accept Clean. 6 Press to accept Done. 7 Print your photo again. If print quality has not improved, continue with the following procedure. Wiping the print cartridge nozzles and contacts Wipe the print cartridge nozzles and contacts when you: • Notice blank or faint areas in the printing • Want to improve print quality 1 Remove the print cartridge. For more information, see "Removing a used print cartridge" on page 37. 2 Dampen a clean, lint-free cloth with water. 3 Gently hold the cloth against the nozzles for about three seconds, and then wipe in the direction shown. 40
-
 1
1 -
2
-
3
-
4
-
5
-
6
-
7
-
8
-
9
-
10
-
11
-
12
-
13
-
14
-
15
-
16
-
17
-
18
-
19
-
20
-
21
-
22
-
23
-
24
-
25
-
26
-
27
-
28
-
29
-
30
-
31
-
32
-
33
-
34
-
 35
35 -
 36
36 -
 37
37 -
 38
38 -
 39
39 -
 40
40 -
 41
41 -
 42
42 -
 43
43 -
 44
44 -
 45
45 -
46
-
47
-
48
-
49
-
50
-
51
-
52
-
53
-
54
-
55
-
56
 |
 |