LiftMaster GH GT- Logic 4 Installation Manual - Page 12
Attach The Door Arm
 |
View all LiftMaster GH manuals
Add to My Manuals
Save this manual to your list of manuals |
Page 12 highlights
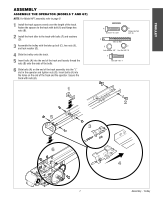
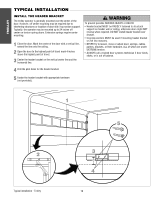
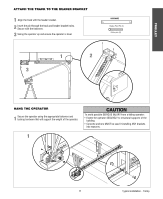
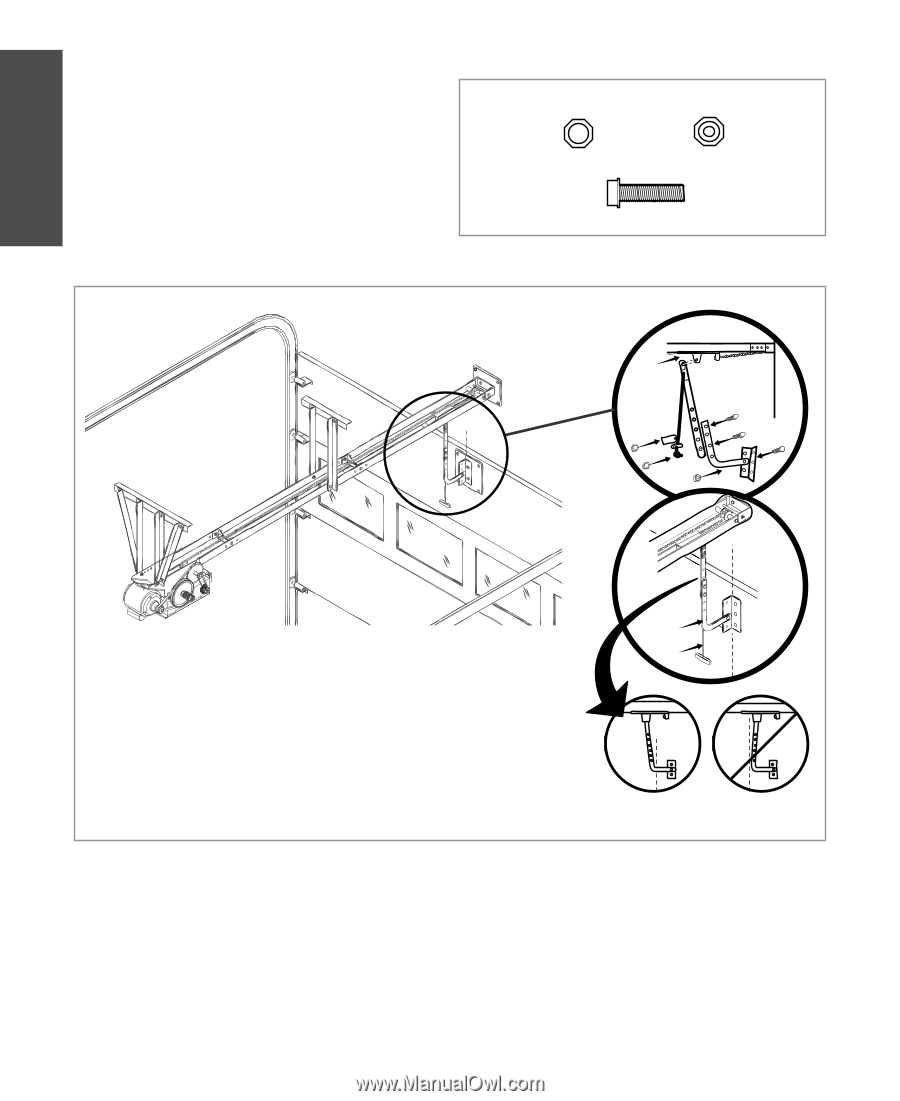
TROLLEY ATTACH THE DOOR ARM 1 Latch the door arm to the trolley. Make sure the open side of the notch on the door arm faces the door. 2 Position the door bracket to the center line of the door and attach the door bracket to the door using appropriate hardware (not included). NOTE: When properly installed and adjusted the door arm should be leaning back toward the operator slightly. Refer to door manufacturer's instructions for recommended installation guidelines. HARDWARE A Flanged Hex Nut 3/8"-16 (2) B Nylok Nut 3/8"-16 (1) Bolt 3/8"-16 x 1" (3) NOTICE 1 A B 2 Typical installation - Trolley 12
-
 1
1 -
2
-
3
-
4
-
5
-
6
-
 7
7 -
 8
8 -
 9
9 -
 10
10 -
 11
11 -
 12
12 -
 13
13 -
 14
14 -
 15
15 -
 16
16 -
 17
17 -
18
-
19
-
20
-
21
-
22
-
23
-
24
-
25
-
26
-
27
-
28
-
29
-
30
-
31
-
32
-
33
-
34
-
35
-
36
-
37
-
38
-
39
-
40
-
41
-
42
-
43
-
44
 |
 |
TROLLEY
12
Typical installation - Trolley
ATTACH THE DOOR ARM
1
2
Latch the door arm to the trolley. Make sure the open side of
the notch on the door arm faces the door.
Position the door bracket to the center line of the door and
attach the door bracket to the door using appropriate hardware
(not included).
NOTE:
When properly installed and adjusted the
door arm should be leaning back toward the operator slightly.
Refer to door manufacturer’s instructions for recommended
installation guidelines.
NO
E
C
I
T
1
2
HARDWARE
A
B
Nylok Nut 3/8"-16 (1)
Flanged Hex Nut 3/8"-16 (2)
A
B
Bolt 3/8"-16 x 1" (3)