Netgear RND2150 RND2110 User Manual - Page 37
Managing Shares, Apply., Delete
 |
UPC - 606449056822
View all Netgear RND2150 manuals
Add to My Manuals
Save this manual to your list of manuals |
Page 37 highlights
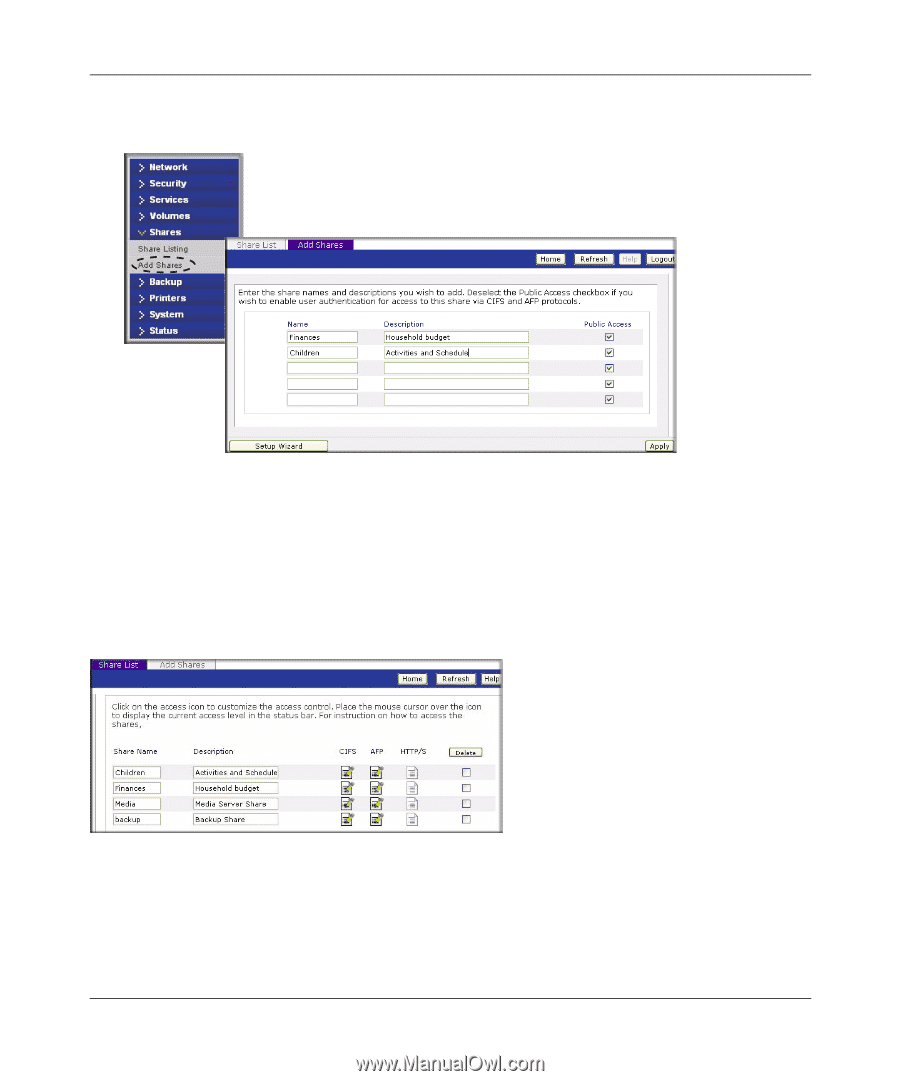
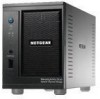
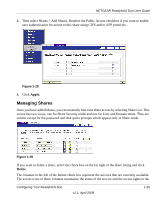
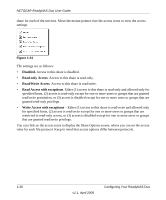
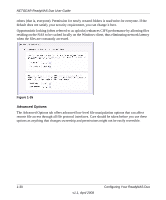
NETGEAR ReadyNAS Duo User Guide 2. Then select Shares > Add Shares. Deselect the Public Access checkbox if you want to enable user authentication for access to this share using CIFS and/or AFP protocols. Figure 1-29 3. Click Apply. Managing Shares Once you have added shares, you can manually fine-tune share access by selecting Share List. This screen has two views, one for Share Security mode and one for User and Domain mode. They are similar except for the password and disk quota prompts which appear only in Share mode. Figure 1-30 If you want to delete a share, select the check box on the far right of the share listing and click Delete. The columns to the left of the Delete check box represent the services that are currently available. The access icons in those columns summarize the status of the service and the access rights to the Configuring Your ReadyNAS Duo v1.1, April 2008 1-25
-
 1
1 -
2
-
3
-
4
-
5
-
6
-
7
-
8
-
9
-
10
-
11
-
12
-
13
-
14
-
15
-
16
-
17
-
18
-
19
-
20
-
21
-
22
-
23
-
24
-
25
-
26
-
27
-
28
-
29
-
30
-
31
-
 32
32 -
 33
33 -
 34
34 -
 35
35 -
 36
36 -
 37
37 -
 38
38 -
 39
39 -
 40
40 -
 41
41 -
 42
42 -
43
-
44
-
45
-
46
-
47
-
48
-
49
-
50
-
51
-
52
-
53
-
54
-
55
-
56
-
57
-
58
-
59
-
60
-
61
-
62
-
63
-
64
-
65
-
66
-
67
-
68
-
69
-
70
-
71
-
72
-
73
-
74
-
75
-
76
-
77
-
78
-
79
-
80
-
81
-
82
-
83
-
84
-
85
-
86
-
87
-
88
-
89
-
90
-
91
-
92
-
93
-
94
-
95
-
96
-
97
-
98
-
99
-
100
 |
 |