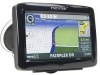
Nextar Q4-04 User Guide
Nextar Q4-04 - 4.3" Touchscreen Portable GPS Navigation System Manual
 |
UPC - 714129880886
View all Nextar Q4-04 manuals
Add to My Manuals
Save this manual to your list of manuals |
Nextar Q4-04 manual content summary:
- Nextar Q4-04 | User Guide - Page 1
instructions to safely guide you to your desired destination. Please make sure that all persons using this navigation software carefully read these precautions and the operating instructions in the Nextar Software Manual. Nextar emergency response, and the system's maps may not reflect recent changes - Nextar Q4-04 | User Guide - Page 2
your subscription to the database will aid in keeping it up-to-date. • There are situations when the navigation system will incorrectly display the vehicle's position on the map. Usually this situation will correct itself automatically. Use your own judgment at all times. If you need to reset - Nextar Q4-04 | User Guide - Page 3
cautions. Nextar is not responsible for problems resulting from failure to observe the precautions, warnings, and instructions in this manual. Store this guide where it will be accessible at all times, for example in your glove compartment. • The driver must not manually operate the software while - Nextar Q4-04 | User Guide - Page 4
of Features 6 About This Guide 7 Chapter 2 - Quick Start Examples 8 Setting a Destination Using a Street Address 8 Setting a Destination Using a Point of Interest (POI 9 Chapter 3 - GPS Basics 11 Main Screen Components 12 Changing Map Display Modes 13 Browsing the Map Display 15 Selecting - Nextar Q4-04 | User Guide - Page 5
Setting a Destination Using an Item in the History List 37 Chapter 5 - Other Options 38 Configuring Map Display Settings 38 Selecting a Language 40 Viewing GPS Status 41 Setting Default Route Calculation Criteria 42 Setting Origin 43 Previewing a Route Using Demo Mode 44 Viewing Program - Nextar Q4-04 | User Guide - Page 6
displayed in real-time on the map display. As you travel, the application's voice guidance system announces each maneuver that you need you get up and running quickly, this manual provides detailed descriptions and instructions on how to use Nextar GPS. Summary of Features • Specialized, innovative, - Nextar Q4-04 | User Guide - Page 7
steps and procedures presented in this guide represent the best practice methods for working successfully with the GPS. If you have any questions or encounter any difficulties that are not addressed in the documentation or webbased support, contact Customer Support. In addition, please note that the - Nextar Q4-04 | User Guide - Page 8
with the first letter. As you make selections, the screen displays and highlights the most likely characters based on the GPS's patentent technology. 5. Tap on the city name that matches the one you are looking for. The system next prompts you to enter the street name. 6. Enter the street name. The - Nextar Q4-04 | User Guide - Page 9
Favorites list before receiving turn-by-turn instructions. The system will prompt you to enter a location name. The system will then provide turn-by-turn instructions to that destination from your current location. and highlights the most likely characters based on the GPS's patentent technology. 9 - Nextar Q4-04 | User Guide - Page 10
GO to save the destination location in the Favorites list before receiving turn-by-turn instructions. The system will prompt you to enter a location name. The system will then provide turn-by-turn instructions to that destination from your current location. -Or- - Tap SET ORIGIN to set this location - Nextar Q4-04 | User Guide - Page 11
Basics To introduce you to key features and common functions in the GPS, this chapter covers- • Starting the GPS • Main Screen Components • Changing Map Display Modes • Browsing the Map Display • Selecting Options and Entering Data • Setting Destinations • Selecting and Working Turn-By-Turn Views - Nextar Q4-04 | User Guide - Page 12
main screen displays your current position, street names, and Point of Interest icons. (See below.) Map Display Mode Button Compass and GPS Status Current Position Icon Point of Interest Icons Map Zoom Level Buttons (+) and (-) Tap icon to view name of Current Road or Upcoming Crossroad GO TO - Nextar Q4-04 | User Guide - Page 13
19. Street name of next maneuver Current Vehicle Position Indicator Current Street / Upcoming Crossroad (Toggle) The Map Display Volume Control for the audible turn-by-turn instructions Next maneuver and distance from that maneuver. Estimated arrival time and distance to destination VIEW button - Nextar Q4-04 | User Guide - Page 14
vehicle icon faces up, i.e., forward in the direction of travel, and the map display rotates under it as the system tracks your route. (See below.) Map Display Mode - Heading Up In North Up mode, the map scrolls so that North on the map is oriented to the top of the display. The vehicle icon faces - Nextar Q4-04 | User Guide - Page 15
Note that not all map display modes are supported in all zoom levels. The map can display 3D at scales below 500 ft (Community zoom level). If the map display mode is 3D, the map switches from 3D to 2D mode when you zoom out to 500 ft. The program will not allow you to change - Nextar Q4-04 | User Guide - Page 16
make selections, the screen displays and highlights the most likely options based on the GPS patented technology. Note. Your current GPS location appears in the upper left. Items in the database that match the characters selections, tap the LIST button. To return to the main map display, tap MAP. 16 - Nextar Q4-04 | User Guide - Page 17
, tap MAP. As you enter more characters, the program lists possible matches for you to choose the desired item. When entering street names, the system works the same as when you enter city names. Street names in the database that begin to match your entry appear in a "mini-list" at - Nextar Q4-04 | User Guide - Page 18
-by-turn instructions, you must first set a destination. When calculating a route, GPS assumes that the starting point is your current GPS-determined location. system will display the destination location on the map and prompt you to select GO. (See below.) Tap GO to get turn-by-turn instructions - Nextar Q4-04 | User Guide - Page 19
voice guidance will issue the first maneuver while the screen displays route and turn-by-turn instructions. (See the example below.) Current Time Street name for next maneuver (per Current Vehicle database as follows: • The Main Turn-by-Turn View • The Split Map View • The Maneuvers List View 19 - Nextar Q4-04 | User Guide - Page 20
colors as you approach the location where you are to make the next maneuver. If you missed the voice instructions, tap on the Next Maneuver arrow to repeat the voice announcement. Split Map View The left pane displays travel progress in 3D, Heading Up, or North Up mode. The right pane displays - Nextar Q4-04 | User Guide - Page 21
changes color as you approach the location. Zooming In and Out To facilitate navigation and make it easier for you to get a sense of where you are, the GPS provides zoom options that allow you to view the map display at different levels ranging from street level all the way to country level - Nextar Q4-04 | User Guide - Page 22
that is in-progress, and then returns you to the default map display. Automatic Route Recalculation Occasionally, you may deviate from a system will automatically re-calculate a new route and update the guidance information in the turnby-turn instructions. You need not manually request the system - Nextar Q4-04 | User Guide - Page 23
your hotel. To set the home location • Choose MENU > SET AS HOME to set your current, GPS-determined location as your home location -Or- • Tap MENU > FAVORITES, and then choose SET FAVORITE tap Yes, and then tap the MAP button to return to the main display. You may now set a different location as "home". - Nextar Q4-04 | User Guide - Page 24
then tap GO when prompted. The turn-by-turn instructions in the main screen will display trip information from the alternate starting point to the end-point destination you specify. The system will restore the GPS location as the origin if the car is determined to have moved at least 300 feet. For - Nextar Q4-04 | User Guide - Page 25
a location as a destination in the GPS Favorites list- • Set a destination and then tap SAVE & GO. As prompted, enter a location name, and then tap OK. -Or- • Browse to a location on the map, tap MENU and then tap SAVE to confirm the deletion, tap Yes. Otherwise, tap No to cancel the operation. 25 - Nextar Q4-04 | User Guide - Page 26
Chapter 4-Setting Destinations This chapter describes how to set destinations. The main topics cover- • Setting a Destination Using an Address • Setting a Destination Using a Point of Interest • Setting a Destination Using Crossroads • Setting a Destination Using an Entry in the Favorites List • - Nextar Q4-04 | User Guide - Page 27
CENTER-to set a destination to the center of a city or town you specify. 4. Upon setting a destination point, tap GO to start turn-by-turn instructions to the selected location. Alternatively, tap SAVE & GO if you first want to save the destination as a location in the Favorites list before getting - Nextar Q4-04 | User Guide - Page 28
& GO to save the destination location in the Favorites list before receiving turn-by-turn instructions. The system will prompt you to enter a location name. The system will then provide turn-by-turn instructions to that destination from your current location. -Or- - Tap the Route Criteria button to - Nextar Q4-04 | User Guide - Page 29
appropriate city or town from the list of names displayed by the program. (See the example below.) Select the desired city or town • The system will next calculate a route to the desired location and display the results in the Destination Confirmation screen. (See below.) Close button returns you to - Nextar Q4-04 | User Guide - Page 30
turn-by-turn instructions. The system will prompt you to enter a location name. The system will then provide turn-by-turn instructions to that destination starting point. Note. To cancel the destination setting operation at any time, tap the MAP button located along the right edge of any data - Nextar Q4-04 | User Guide - Page 31
vehicle position - POI NEAR DESTINATION-locate a POI that is close to your destination 4. Upon setting a destination point, tap GO to start turn-by-turn instructions to the selected location; or, tap SAVE & GO to save the destination as a location in the Favorites list before getting turn-by-turn - Nextar Q4-04 | User Guide - Page 32
along the top of the screen. If you need to delete a character you may have entered incorrectly, tap the Backspace button. Within a few characters, the system lists possible matches for city names and displays them on the screen. Tap on the city name that matches the one you are looking for - Nextar Q4-04 | User Guide - Page 33
. -Or- Tap SAVE & GO to save the destination as a location in the Favorites list before receiving turn-by-turn instructions. The system will prompt you to enter a location name before continuing. -Or- Tap SET ORIGIN to set this location as the vehicle starting position. Setting a Destination - Nextar Q4-04 | User Guide - Page 34
name - START WITH STREET-to define the primary street by entering the street name 4. Upon setting a destination point, tap GO to start turn-by-turn instructions to the selected location; or, tap SAVE & GO to save the destination as a location in the Favorites list before getting turn-by-turn - Nextar Q4-04 | User Guide - Page 35
selected destination. • Tap GO to calculate the route and start the turn-by-turn instructions. -Or- Tap SAVE & GO to save the destination as a location in the Favorites list before receiving turn-by-turn instructions. The system will prompt you to enter a location name. -Or- Tap SET ORIGIN to set - Nextar Q4-04 | User Guide - Page 36
Favorite to Route To screen opens. (See the example below.) Select Favorite to Route To screen • Tap on the desired location to select it. The system next shows the Destination Confirmation screen for the selected location. 36 - Nextar Q4-04 | User Guide - Page 37
as a location in the Favorites list before receiving turn-by-turn instructions. The system will prompt you to enter a location name. -Or- Tap SET button accesses a compiled list of destinations you recently calculated in the GPS. The system saves the last 50 unique positions to this list. You may - Nextar Q4-04 | User Guide - Page 38
the options in the Settings screen to configure navigation, set preferences, cancel a route in progress, exit the application, and more. The main topics cover- • Configuring Map Display Settings • Selecting a Language • Viewing GPS Status • Setting Default Route Calculation Criteria • Setting Origin - Nextar Q4-04 | User Guide - Page 39
places the vehicle indicator arrow facing up, i.e., forward in the direction you are heading, and the map display rotates under it as the system tracks your route. - NORTH UP-This option orientates the map such that North is always on the top of the screen. The vehicle indicator icon rotates to - Nextar Q4-04 | User Guide - Page 40
settings screen opens. (See below.) Language / Voice screen 3. Select a language setting, and then tap OK. Optionally, select TTS Streets if you want the system to read street names when supplying guidance information. Note. The TTS (Text-To-Speech) Streets option is available in English only. 40 - Nextar Q4-04 | User Guide - Page 41
then SETTINGS. The Settings screen opens. (See below.) Settings screen 2. Tap the GPS STATUS button. The GPS Status screen opens. (See below.) GPS Status screen 3. When you are finished, tap the MAP button to return to the map display; or tap the Close (X) button to return to the Settings screen. 41 - Nextar Q4-04 | User Guide - Page 42
specify the measuring system-Imperial or Metric- that you want navigation software to use when displaying distance units. To set route route calculation criteria. Choose a measuring system to be used for guidance announcements and the display of distance units. Route Calc Settings screen 3. Choose - Nextar Q4-04 | User Guide - Page 43
planning and previewing a route using a starting point you specify; or, if you want to set the current car position manually when GPS data is not available. To set an alternate point of origin • Tap on the map and place the display in Browse mode, find the location you want to use as the starting - Nextar Q4-04 | User Guide - Page 44
the program simulates vehicle progress and announces turn-by-turn instructions associated with the route you set. A GPS signal is not necessary to use this mode. To preview a route using the Demo mode 1. Use the SET ORIGIN feature to manually set the origination point. (See Setting Origin on page 43 - Nextar Q4-04 | User Guide - Page 45
Viewing Program Version Information The ABOUT option in the Settings screen displays software version and copyright information. To view program version information 1. Tap MENU, and then SETTINGS. The Settings screen opens. (See below.) Settings screen 2. Tap ABOUT. The - Nextar Q4-04 | User Guide - Page 46
the Application To exit and close the GPS 1. Tap MENU, and then choose SETTINGS. The Settings screen opens. (See below.) Settings screen 2. In the Settings screen, tap EXIT APP. A confirmation message opens. (See below.) Tap here to cancel the operation. Tap Exit to close the application. Exit - Nextar Q4-04 | User Guide - Page 47
recently used destinations. NEAREST POI Tap to open the forms to select a Point of Interest (POI) closest to the location at the center of the map. ROUTE (GO) Tap to calculate a route to the location at the center of TO HERE the - Nextar Q4-04 | User Guide - Page 48
map can display 3D at the 200 ft scale (Neighborhood zoom level) and below. GPS Device Connected, but satellites are not visible The unit is connected to a GPS device but satellites are not visible and possibly obstructed by buildings, overpasses, etc. GPS normal. Unit connected and operating - Nextar Q4-04 | User Guide - Page 49
Information Button Volume icon Indicates the current car position and heading on the map display. Scroll map by pressing on the map and dragging. Pressing any location on the map will re-center the map to the selected location. Either action sets the map into "Browse mode," which results in the - Nextar Q4-04 | User Guide - Page 50
Button Description Immediately displays the main map. Auto-complete Key Button Displays only the valid next characters with the three highest probable characters. Highlighted keyboard letters Displays the full keyboard with the - Nextar Q4-04 | User Guide - Page 51
next form. VIEW Options Button GO / SAVE & GO Route Calculation Criteria button Cycles the main display through three views: Main Turn-by-Turn, Split Map, and Maneuvers List. GO: Compute route and start voice and visual guidance to the selected location. SAVE & GO: Save the selected location in - Nextar Q4-04 | User Guide - Page 52
General Turn-By-Turn Symbols Control Description Turn-by-Turn Begin Turn-by-Turn End Next Maneuver a distance away. (The arrow points left or right as appropriate.) Next Maneuver closing in. (The arrow points left or right as appropriate.) Next Maneuver imminent. (The arrow points left or - Nextar Q4-04 | User Guide - Page 53
. This cancels the current operation and returns you to the opening screen. Q. How do I switch to other applications without having to exit Nextar GPS? A. To switch to other programs on your handheld device while keeping Odyssey open, press the ENTER or Program Navigation Keys on your device as - Nextar Q4-04 | User Guide - Page 54
(Hong Kong) Limited. Nextar is a trademark and service mark of Nextar (Hong Kong) Limited. All other brand names, trademarks and service marks are property of their owners. Nextar may find it necessary to modify, amend or otherwise change or update this manual. We may reserve the right to do this
-
 1
1 -
 2
2 -
 3
3 -
 4
4 -
 5
5 -
 6
6 -
 7
7 -
8
-
9
-
10
-
11
-
12
-
13
-
14
-
15
-
16
-
17
-
18
-
19
-
20
-
21
-
22
-
23
-
24
-
25
-
26
-
27
-
28
-
29
-
30
-
31
-
32
-
33
-
34
-
35
-
36
-
37
-
38
-
39
-
40
-
41
-
42
-
43
-
44
-
45
-
46
-
47
-
48
-
49
-
50
-
51
-
52
-
53
-
54
 |
 |

1
Precautions
Very important information. Please read this section carefully before using this
product.
This product is intended to provide turn-by-turn instructions to safely guide you to your
desired destination. Please make sure that all persons using this navigation software
carefully read these precautions and the operating instructions in the Nextar Software
Manual.
Nextar cannot accept any responsibility whatsoever for accidents resulting from failure
to observe these precautions.
Your personal judgment, traffic regulations, and common sense must always take
precedence over instructions produced by the software.
•
This product is not a substitute for your driving technique, driving knowledge or
especially your personal judgment. Route suggestions made by this navigation
system should never supersede any traffic regulations, your personal judgment,
or your knowledge of safe driving practices. If you feel that a route suggestion
made by the software instructs you to perform an unsafe or illegal maneuver,
places you in an unsafe situation, or routes you into an area that you consider
unsafe, do not follow the instructions.
Your personal judgment, traffic regulations,
and common sense must always take precedence over instructions produced by
the software.
•
When your vehicle is moving, keep your eyes on the road instead of looking at
the screen. If you need to look at the screen for a prolonged time, always park
the car in a safe manner and in accordance with all traffic regulations.
•
Do not select or input destinations, change settings or otherwise manually
operate this software unless you have parked your car in a safe manner,
observing all traffic regulations.
•
If you are responding to an emergency, it may not be prudent to rely on this
system unless you have no other means to obtain accurate directions. The
database does not include all of the facilities and streets necessary for
emergency response, and the system’s maps may not reflect recent changes in
roads, traffic controls and driving conditions. Use your own judgment in these
situations.