Nikon COOLPIX P510 User Manual - Page 216
Charge by Computer, Reset File Numbering, AB AB
 |
View all Nikon COOLPIX P510 manuals
Add to My Manuals
Save this manual to your list of manuals |
Page 216 highlights
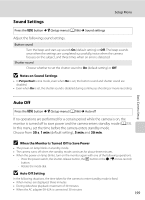
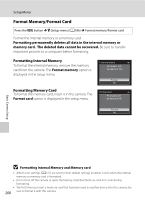
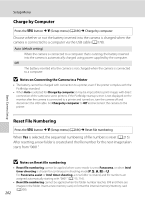
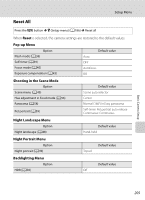
Basic Camera Setup Setup Menu Charge by Computer Press the d button M z (Setup menu) (A186) M Charge by computer Choose whether or not the battery inserted into the camera is charged when the camera is connected to a computer via the USB cable (A178). Auto (default setting) When the camera is connected to a computer that is running, the battery inserted into the camera is automatically charged using power supplied by the computer. Off The battery inserted into the camera is not charged when the camera is connected to a computer. B Notes on Connecting the Camera to a Printer • The battery cannot be charged with connection to a printer, even if the printer complies with the PictBridge standard. • When Auto is selected for Charge by computer, it may be impossible to print images with direct connection of the camera to some printers. If the PictBridge startup screen is not displayed on the monitor after the camera is connected to a printer and turned on, turn the camera off and disconnect the USB cable. Set Charge by computer to Off and reconnect the camera to the printer. Reset File Numbering Press the d button M z (Setup menu) (A186) M Reset file numbering When Yes is selected, the sequential numbering of file numbers is reset (A215). After resetting, a new folder is created and the file number for the next image taken starts from "0001." B Notes on Reset file numbering • Reset file numbering cannot be applied when scene mode is set to Panorama, or when Intvl timer shooting is chosen for continuous in shooting mode j, k, l, m or M. For Panorama assist or Intvl timer shooting, a new folder is created, and file numbers are assigned automatically starting with "0001" (A215, 216). • Reset file numbering cannot be applied when the folder number reaches 999 and there are images in the folder. Insert a new memory card, or format the internal memory/memory card (A200). 202
-
 1
1 -
2
-
3
-
4
-
5
-
6
-
7
-
8
-
9
-
10
-
11
-
12
-
13
-
14
-
15
-
16
-
17
-
18
-
19
-
20
-
21
-
22
-
23
-
24
-
25
-
26
-
27
-
28
-
29
-
30
-
31
-
32
-
33
-
34
-
35
-
36
-
37
-
38
-
39
-
40
-
41
-
42
-
43
-
44
-
45
-
46
-
47
-
48
-
49
-
50
-
51
-
52
-
53
-
54
-
55
-
56
-
57
-
58
-
59
-
60
-
61
-
62
-
63
-
64
-
65
-
66
-
67
-
68
-
69
-
70
-
71
-
72
-
73
-
74
-
75
-
76
-
77
-
78
-
79
-
80
-
81
-
82
-
83
-
84
-
85
-
86
-
87
-
88
-
89
-
90
-
91
-
92
-
93
-
94
-
95
-
96
-
97
-
98
-
99
-
100
-
101
-
102
-
103
-
104
-
105
-
106
-
107
-
108
-
109
-
110
-
111
-
112
-
113
-
114
-
115
-
116
-
117
-
118
-
119
-
120
-
121
-
122
-
123
-
124
-
125
-
126
-
127
-
128
-
129
-
130
-
131
-
132
-
133
-
134
-
135
-
136
-
137
-
138
-
139
-
140
-
141
-
142
-
143
-
144
-
145
-
146
-
147
-
148
-
149
-
150
-
151
-
152
-
153
-
154
-
155
-
156
-
157
-
158
-
159
-
160
-
161
-
162
-
163
-
164
-
165
-
166
-
167
-
168
-
169
-
170
-
171
-
172
-
173
-
174
-
175
-
176
-
177
-
178
-
179
-
180
-
181
-
182
-
183
-
184
-
185
-
186
-
187
-
188
-
189
-
190
-
191
-
192
-
193
-
194
-
195
-
196
-
197
-
198
-
199
-
200
-
201
-
202
-
203
-
204
-
205
-
206
-
207
-
208
-
209
-
210
-
 211
211 -
 212
212 -
 213
213 -
 214
214 -
 215
215 -
 216
216 -
 217
217 -
 218
218 -
 219
219 -
 220
220 -
 221
221 -
222
-
223
-
224
-
225
-
226
-
227
-
228
-
229
-
230
-
231
-
232
-
233
-
234
-
235
-
236
-
237
-
238
-
239
-
240
-
241
-
242
-
243
-
244
-
245
-
246
-
247
-
248
-
249
-
250
-
251
-
252
 |
 |