Panasonic AG-HMX100 Operating Instructions - Page 29
Setting the Back Matte [BACK MATTE], To set the back matte video color
 |
View all Panasonic AG-HMX100 manuals
Add to My Manuals
Save this manual to your list of manuals |
Page 29 highlights
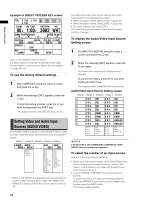
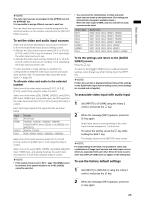
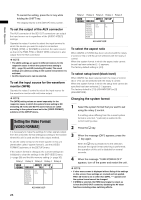
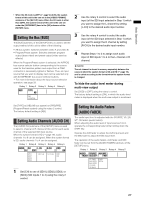
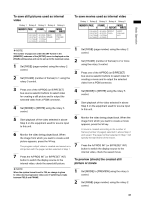
Basic Operation Use the rotary 1 control to set the internal video output type to back matte video ([BACK MATTE]) or color bar output ([COLOR BAR]). If [MEMORY] is selected, an external video input source can be saved in internal memory and used as internal video ( page 30). Setting the Back Matte [BACK MATTE] To create back matte video as internal video, use the [BACK MATTE] submenu of the [INT VIDEO] menu. Rotary 1 Rotary 2 Rotary 3 Rotary 4 Rotary 5 BACK COLOR LEVEL PATTERN GRADE MATTE WHITE 255 H1 0 WHITE YELLOW CYAN GREEN MAGENTA RED BLUE BLACK CUSTOM1 CUSTOM2 LEVEL 0-255 SET BACK M WASH OFF H1 H2 H3 V1 V2 V3 DIAG1 DIAG2 0-255 To set the back matte video color 1 To check the back matte video color, press the A/PROG INT (or B/PROG INT) button to set the currently displayed bus to the internal video. 2 Use the rotary 2 control to set [COLOR] to one of the colors shown in the table below. Setting [WHITE] (factory default setting) [YELLOW] [CYAN] [GREEN] [MAGENTA] [RED] [BLUE] [BLACK] [CUSTOM1] or [CUSTOM2] Color White Yellow Cyan Green Magenta Red Blue Black Grey as the factory default setting The PB, PR, and Y values are shown in the joystick and rotary Z control settings, and 3D display display area ( page 20). 4 If [CUSTOM1] or [CUSTOM2] is selected in Step 2, use the joystick and rotary Z control to set the [PB] and [PR] values in the range of 0 to 255 and the [Y] value in the range of 16 to 235 for selecting the back matte video color. If other than [CUSTOM1] and [CUSTOM2] is selected, set the color level (the Y signal level for white) using the rotary 3 control. To set the color gradation for back matte video 1 To check the back matte video color, press the A/PROG INT (or B/PROG INT) button to set the currently displayed bus to the internal video. 2 Use the rotary 2 control to set [COLOR] to one of the colors shown in the table below. Setting [WHITE] (factory default setting) [YELLOW] [CYAN] [GREEN] [MAGENTA] [RED] [BLUE] [BLACK] [CUSTOM1] or [CUSTOM2] Color White Yellow Cyan Green Magenta Red Blue Black Grey as the factory default setting The PB, PR, and Y values are shown in the joystick and rotary Z control, and 3D display settings display area ( page 20). 3 Set [PATTERN] (gradation pattern) using the rotary 4 control. Setting [OFF] [H1] [H2] [H3] [V1] [V2] [V3] [DIAG1] [DIAG2] Gradation pattern No gradation Horizontal gradation 1 Horizontal gradation 2 Horizontal gradation 3 Vertical gradation 1 Vertical gradation 2 Vertical gradation 3 Diagonal gradation 1 Diagonal gradation 2 3 If [CUSTOM1] or [CUSTOM2] is selected in 4 If [CUSTOM1] or [CUSTOM2] is selected Step 2, set [SET] to [BACK M] (back matte) in Step 2, set [SET] to [WASH] (wash color using the rotary 3 control and set [PATTERN] to meaning companion color for gradation) using [OFF] using the rotary 4 control. the rotary 3 control. 29
-
 1
1 -
2
-
3
-
4
-
5
-
6
-
7
-
8
-
9
-
10
-
11
-
12
-
13
-
14
-
15
-
16
-
17
-
18
-
19
-
20
-
21
-
22
-
23
-
 24
24 -
 25
25 -
 26
26 -
 27
27 -
 28
28 -
 29
29 -
 30
30 -
 31
31 -
 32
32 -
 33
33 -
 34
34 -
35
-
36
-
37
-
38
-
39
-
40
-
41
-
42
-
43
-
44
-
45
-
46
-
47
-
48
 |
 |
