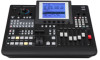
Panasonic AG-HMX100 Operating Instructions - Page 32
Using Video Input from PC [PC1], To execute auto setup of analog input
 |
View all Panasonic AG-HMX100 manuals
Add to My Manuals
Save this manual to your list of manuals |
Page 32 highlights
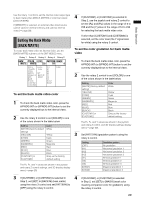
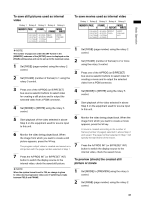
Basic Operation 3 Set [FRAME] to the number of frames to preview using the rotary 3 control. To preview the movie, select a value equivalent to or smaller than the number of frames of the movie. 4 To preview the still picture, select [FRAME] (frame display) or [FIELD] (field display) using the rotary 4 control. To preview the movie, select [REPEAT] (repeat playback) or [ONCE] (only-once playback) using the rotary 4 control. 5 Press the key. During still picture preview, the still picture on the page selected in above Step 2 is displayed. During movie preview, the movie contains frames the number of which is selected in Step 2 is played back. NOTE • Upon save of a still picture or movie, set [MODE] to [EXIT] to prevent the saved data from being overwritten. • If you select [EXIT] during playback of a saved movie and press the key, the image of the last frame is displayed and the playback of the movie stops. • Even if other internal video (back matte or color bar) is selected in the [INT VIDEO] menu, [MEMORY] can be selected again to call the previously saved still picture or movie. However, the saved still pictures and movies are deleted when the power is turned off. To start/stop playback of a movie without using the [INT VIDEO] menu 1 Press the . (period) key while holding the SHIFT key. 2 Start playback in the confirmed playback method for internal video. 3 To stop playback, press the . (period) key while holding the SHIFT key again. Using Video Input from PC [PC1] Video can be input from PC to this unit via the DVI-I IN connector. For using video created on PC, it is necessary to allocate the DVI-I input to an input source number in the [AUDIO VIDEO] submenu of the [SETUP] menu in advance ( page 24). The source input from PC is set from the [PC1] submenu of the [SETUP] menu. Rotary 1 Rotary 2 Rotary 3 Rotary 4 Rotary 5 PC1 FORMAT ANALOG SXGA A.SET ON ANALOG XGA _ _ DIGITAL WXGA ON SXGA OFF 1080/50p 1080/60p To select the DVI-I IN connector input Select [ANALOG] or [DIGITAL] using the rotary 2 control. To select the input signal format Set [FORMAT] using the rotary 3 control. The source input from PC is displayed in the selected signal format. However, it is resized according to the settings of the video format ( page 26). To execute auto setup of analog input Select ON using the rotary 5 control, and press the key. When the message [OK?] appears, press the key again. To cancel the execution, press the key while holding down the SHIFT key. NOTE • When switching is being made between [ANALOG] and [DIGITAL], the message "Please Wait..." appears, and disappears upon completion of switching. • When auto setup is executed, the image must be shown in the entire display area of the screen. When auto setup is being executed, the message "Please Wait..." appears, and disappears upon completion of auto setup. If auto setup is not successful, * appears under [A.SET]. Auto setup may become unsuccessful due to insufficient automatic screen adjustment depending on the input image. In this case, use the rotary 1 control to select [PC2] and adjust [H POSI], [V POSI], [PHASE], and [CLOCK]. • If the system format is 1080/50p or 1080/60p when DIGITAL or ANALOG is selected, auto setup is disabled. In this case, "---" appears under [A.SET]. 32
-
 1
1 -
2
-
3
-
4
-
5
-
6
-
7
-
8
-
9
-
10
-
11
-
12
-
13
-
14
-
15
-
16
-
17
-
18
-
19
-
20
-
21
-
22
-
23
-
24
-
25
-
26
-
 27
27 -
 28
28 -
 29
29 -
 30
30 -
 31
31 -
 32
32 -
 33
33 -
 34
34 -
 35
35 -
 36
36 -
 37
37 -
38
-
39
-
40
-
41
-
42
-
43
-
44
-
45
-
46
-
47
-
48
 |
 |
