Panasonic PT-D7700U-K Dlp Projector - English/ French - Page 80
SETTING FUNC1, PASSWORD, Option settings, continuing
 |
UPC - 791871111000
View all Panasonic PT-D7700U-K manuals
Add to My Manuals
Save this manual to your list of manuals |
Page 80 highlights
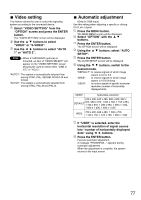
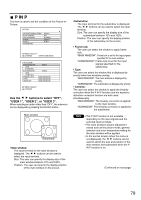
RGB input YCbCr input YPbPr input RGB input YCbCr input YPbPr input VIDEO input S-VIDEO input RGB input RGBrealiry input YCbCr input YPbPr input LINE input Y / C input YCbCr input ET-MD95SD1 ET-MD95SD2 ET-MD95SD3 ET-MD75DV ET-MD75NT Option settings P IN P (continuing) List of P IN P Subwindow RGB1 RGB2 AUX ET-MD95RGB ET-MD95VM2 Main window RGB1 RGB2 AUX RGB input YCbCr input YPbPr input RGB input YCbCr input YPbPr input VIDEO input S-VIDEO input RGB input ET-MD96RGB RGBrealiry input YCbCr input YPbPr input LINE input ET-MD95VM2 Y / C input YCbCr input ET-MD95SD1 ET-MD95SD2 ET-MD95SD3 ET-MD75DV ET-MD75NT : P in P (Picture in Picture) combinations are enabled : P in P (Picture in Picture) combinations are disabled P IN P for the RGBreality input signals is enabled only with the 480i, 576i, 480p and 576p formats. Setting FUNC1 The user can specify the function of the "FUNC 1" button on the remote control. FUNC1 P IN P LAMP POWER SIZE "P IN P": Enables setting of P IN P to OFF, USER 1, USER 2, or USER 3. (refer to page 79). "LAMP POWER": Enables the lamp power to be switched between high and low (refer to page 73). "SIZE": Enables the picture size to be selected (refer to page 58). 80 Password This function is used when a service person. Input the password with the numeric buttons (0 to 9) of the remote control and press ENTER button to confirm the entry.
-
 1
1 -
2
-
3
-
4
-
5
-
6
-
7
-
8
-
9
-
10
-
11
-
12
-
13
-
14
-
15
-
16
-
17
-
18
-
19
-
20
-
21
-
22
-
23
-
24
-
25
-
26
-
27
-
28
-
29
-
30
-
31
-
32
-
33
-
34
-
35
-
36
-
37
-
38
-
39
-
40
-
41
-
42
-
43
-
44
-
45
-
46
-
47
-
48
-
49
-
50
-
51
-
52
-
53
-
54
-
55
-
56
-
57
-
58
-
59
-
60
-
61
-
62
-
63
-
64
-
65
-
66
-
67
-
68
-
69
-
70
-
71
-
72
-
73
-
74
-
 75
75 -
 76
76 -
 77
77 -
 78
78 -
 79
79 -
 80
80 -
 81
81 -
 82
82 -
 83
83 -
 84
84 -
 85
85 -
86
-
87
-
88
-
89
-
90
-
91
-
92
-
93
-
94
-
95
-
96
-
97
-
98
-
99
-
100
-
101
-
102
-
103
-
104
-
105
-
106
-
107
-
108
-
109
-
110
-
111
-
112
-
113
-
114
-
115
-
116
 |
 |
