Pfaff hobby 303 Owner's Manual
Pfaff hobby 303 Manual
 |
View all Pfaff hobby 303 manuals
Add to My Manuals
Save this manual to your list of manuals |
Pfaff hobby 303 manual content summary:
- Pfaff hobby 303 | Owner's Manual - Page 1
©Ebby 3©3 Livro de instruçOes Instruction Book Instrucciones de manejo Kulfanma talimatnamesi - Pfaff hobby 303 | Owner's Manual - Page 2
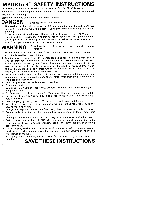
a 15-watt light bulb in the sewing lamp. d) The drive belt must never be adjusted by anyone but an authorized agent. Safety rules for United Kingdom see page 3. Important safety instructions for USA see page 2. 4 Normas sobre medidas de seguridad para máquinas de coser domésticas segün IEC 335 - Pfaff hobby 303 | Owner's Manual - Page 3
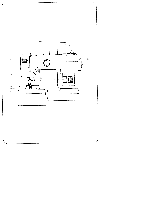
Mandos y elementos principales de a maquina de coser Palanca tirahilos 2 Tensor del devanador 3 Asa 4 Espigas portacarretes (Se encuentran en los accesorios) 5 Devanador (bobinadora) 6 Volante 7 Disco de desembrague 8 Regulador del argo de puntada 9 Superficie de costura variable con compartimento - Pfaff hobby 303 | Owner's Manual - Page 4
- Pfaff hobby 303 | Owner's Manual - Page 5
8 Stitch length control 9 Detachable work support with accessories box 10 Free-arm cover, enclosing sewing hook 11 Needle plate 12 Sewing foot holder with sewing foot 13 Needle holder with retaining screw 14 Thread guides 15 Threading slots 16 Needle thread tension 17 Free arm 18 Presser bar with - Pfaff hobby 303 | Owner's Manual - Page 6
, changing needle, threading bobbin, or changing presser foot, etc. 16. Always unplug sewing machine from the electrical outlet when removing covers, lubricating, or when making any other user servicing adjustments mentioned in the instruction manual. winding. SAVE THESE INSTRUCTIONS 17, Hold plug - Pfaff hobby 303 | Owner's Manual - Page 7
definitiva mente nos orificios previstos para este efeito, no corpo da maquina. Inserting the spool pins: Two spool pins are included in the accessories. Insert these in the holes provided in the machine. Colocaciôn de los portacarretes: En los accesorios se encuentran dos portacarretes. ColOquelos - Pfaff hobby 303 | Owner's Manual - Page 8
da parede Electrical connection: Set the foot control on the floor. Insert plug A in the machine and plug B in the wall socket. Conexiôn eléctrica: Coloque el pedal en el suelo. lntroduzca Ia clavija A en Ia maquina, y Ia clavija B en el enchufe de Ia red. Elektrik balantisi: Mari yere koyunuz - Pfaff hobby 303 | Owner's Manual - Page 9
- - ç Preparar as canelas: Colocar a mao por baixo da caixa de arrumacão 9 e retirá Ia para a esquerda. Bobbin winding preparations: Reach under work support 9 and pull it out towards the left. Preparación para el devanado: Meta Ia mano izquierda por debajo del brazo 9 y desvaelo hacia Ia izquierda - Pfaff hobby 303 | Owner's Manual - Page 10
Segurar o volante 6 e rodar o disco 7 para a frente, Disengaging the sewing mechanism: Hold hand wheel 6 firmly and turn knob Desconexindel mecanismo del costura: con una mano el volante 6 y gire con Ia otra el disco de desem brague 7 hacia el frente. Diki mekanizmasini kapatmak: El carye disk 7yi - Pfaff hobby 303 | Owner's Manual - Page 11
to the left, remove it and cut the thread. Devanado del hilo (bobinado): Tome el hilo desde el carrete, páselo por el tensor 2, Ilévelo hacia Ia canilla, introdüzcalo en uno de sus agujeros y sujételo. Pise el pedal y comience a devanar. Después de unas vueltas do devanado, suelte el hilo. Una - Pfaff hobby 303 | Owner's Manual - Page 12
Engaging the sewing mechanism: Hold the balance wheel firmly and turn knob 7 away from you. Conexión del mecanismo de costura: Sujete thread hanging down at back (A), pull it into slot B, under the spring and out of spring C. Colocaciôn de Ia canilla en Ia cápsula: Coloque Ia canilla en Ia cápsula de - Pfaff hobby 303 | Owner's Manual - Page 13
da tensão; rotação para a direita:aumento da tensão. Checking the bobbin thread tension: With a brief sharp upward movement of your hand, the bobbin right for a tighter tension.) Comprobación de Ia tension del hilo inferior: Suspendiendo Ia cápsula con Ia canilla de su propio hilo, a capsula no - Pfaff hobby 303 | Owner's Manual - Page 14
thread into guide A, slot B. behind guide C. upwards into slot D, into take-up lever 1, back through slot D, into guides E, F and into the right guide ranura B, por detrás de a chapa guóa C, hacia arriba en a ranura D hasta Ilegar a Ia palanca tirahilos 1 A continuaciOn páselo de nuevo por Ia ranura - Pfaff hobby 303 | Owner's Manual - Page 15
. Ust iplikle, alt iplii yukariya dou çekiniz. - // ePapsosrarbaoisxododios fios para calcador. trás, pela direita Place both threads towards the right under the sewing foot. debaodelprensat&as Fechar a tampa 10. Close free-arm cover 10. Cierre a tapa 10. Kapak klapesini (10) kapatiniz. - Pfaff hobby 303 | Owner's Manual - Page 16
detachable work support onto the machine (guide pin in hole). Acople el suplemento a Ia maquina de forrna que el perno guéa encaje en el orificio. Diki yüzeyini makinaya doru sürünüz (kilavuz pimini delik icerisine). Colocar o tecido debaixo do calcador. Place fabric under the sewing foot. Coloque - Pfaff hobby 303 | Owner's Manual - Page 17
. Coser alguns pontos. Os fios devem-se enlacar dentro da espessura do tecido, 4 Checking the needle thread tension: The normal setting is in the white range between 3 and 5. The higher the number, the tighter the tension. To check the tension, set the machine at a wide zigzag stitch. Sew a short - Pfaff hobby 303 | Owner's Manual - Page 18
Comprobación de Ia tenslén del hilo: La regulaciOn normal se halla en Ia zona blanca entre fenda e puxá-los para baixo. V Thread cutter A: Draw the threads into the slot and pull them downwards. Cortahilos A. Coloque los hilos en Ia ranura y tire de ellos hacia abajo. Iplik kesici A. Iplikleri - Pfaff hobby 303 | Owner's Manual - Page 19
de puntada (8): Gire el botOn hasta quo el argo do puntada deseado entre 0 y 4 coincida con a marca A. La zona roja entre 0 y 1 so usa para coser quina cose para trás enquanto premir esta tecla. Reverse sewing: Press down control 21 The machine sews backwards as long as the control key is held down. - Pfaff hobby 303 | Owner's Manual - Page 20
9 f 4 N J Z!u!J!Ae3 ap)i)eS )86 EuI ulu -!8JS! JAE ' iuiQeuiO I1Eq ua!pe flZJ :(O) isowbnp ieAe-euo I)eg V 3JEW I UO3 piU!O3 opeasep epeund op odi pe enb ewioj Op U9O JO OJ! :o sepewnd op iooaies u9jog :v jiew o oqwAs 1pIS poiinboi oq uini :o qouN welled 'ims v eDiew op oeôoeiip eu opelesep ouod - Pfaff hobby 303 | Owner's Manual - Page 21
table Stitch Straight stitch, middle position Straight stitch, left needle position Zigzag stitch range ill 2 iJD ff Simbolos para casear Ponto de concha Buttonhole symbols Shell-edging stitch Ponto invisivel elástico Elastic blind stitch - .c:: s----- Ponto zig-zag elástico Elastic seam - Pfaff hobby 303 | Owner's Manual - Page 22
em posicao C = arrastador em posicão baixa; aiavanca em posicao B = arrastador em posicao de costura. Dropping the feed: Open free-arm cover 10. Push the drop-feed control to C = feed disengaged, and to B again for sewing. Ocultación del transpoador: Abra Ia tapa 10 del brazo al aire. Corriendo Ia - Pfaff hobby 303 | Owner's Manual - Page 23
de forma a que 0 veio B se introduza na ranhura C. Attaching the sewing foot: Lower the presser bar litter and at the same time reposition the sewing calcador. Hole E and screw D are used for attaching an edge guide, while screw F is the sewing foot holder srew. D y E sirven para fijar guóas. F sirve - Pfaff hobby 303 | Owner's Manual - Page 24
para coser fechos de correr Sewing feet (standard accessories) 1 Ordinary sewing 3 Blindstitch foot foot 4 Zipper 2 Clear-view foot da caixa de arrumaçao 9 para encontrar Os acessOrios. Accessory compartment: To open accessory compartment raise cover of work support 9. Compartimento para - Pfaff hobby 303 | Owner's Manual - Page 25
- Pfaff hobby 303 | Owner's Manual - Page 26
correcta e alinhada. ('opstitching: Sewing foot: Ordinary sewing foot or clear-view foot and edge guide (special accessory): Stitch: straight stitch Edge guide A can be used with nearly all sewing feet. Fitting the edge guide (Special accessory): Push edge guide A through hole B and secure - Pfaff hobby 303 | Owner's Manual - Page 27
): Pase a guOa A por el agujero 8 y fOjela con el tornillo C. La guøa se puede ajustar. segun a labor, a Ia distancia deseada. Con Ia ayuda de Ia guOa se pueden coser con toda facilidad costuras paralelas o pespuntes al canto. En tales casos, Ia guOa marcha a lo largo del borde (fig. D) o a Ic largo - Pfaff hobby 303 | Owner's Manual - Page 28
do tecido superior (fig. C e D). Realizar prirneiramente uma costura de ensaio, num retalho de tecido. Elastic blind stitch: Sewing foot: blindstitch foot Tension: needle thread tension a little slack. Thread: ordinary sewing thread Stitch: elastic blind stitch Stitch length: 3-4 Needle - Pfaff hobby 303 | Owner's Manual - Page 29
forma que al clavarse Ia aguja por Ia zquierda solo prenda un hilo del borde (fig. C y D). Haga prrr°ramente una costura de prueba sobre un retal. f Elastik kör-diki: Diki ayai: KOr dikii ayai Gerginlik: Ust iplik biraz daha gevek Bati: Elastik kOr-dikis Dikis uzunIuu: 3-4 lne: Kalinlii - Pfaff hobby 303 | Owner's Manual - Page 30
o botão 20 na posicão e coser alguns pontos de rernate. 6. Abnr a casa corn o abre-casas (aces sOrio extra). 4 Sewing buttonholes: Sewing toot: clear-view sewing toot Tension: needle thread tension a little slack Thread: fine machine embroidery thread Stitch length: buttonhole range (red - Pfaff hobby 303 | Owner's Manual - Page 31
argo que el primero. Eleve Ia aguja. 4. Ponga el botOn 20 en y haga de 4 a 6 puntadas de presilla. Eleve a aguja. 5. Ponga el botOn 20 en 6D y haga unas puntadas de remate. 6. Abra el ojal con el descosedor (accesorto especial). - Ihkler: Dik ayaI: Gerginlik: Iplik: Batis uzunluu: Ine: eftaf - Pfaff hobby 303 | Owner's Manual - Page 32
cm de fio. Passar Os fios sobre o tecido (C) e enrolá-los sobre os fios debaixo do botão para formar o pe (D). Dar urn no nos fios. 4 Sewing on buttons: Sewing foot: without sewing foot or with clear-view foot Stitch: straight stitch, left needle position Feed: dropped Thread: fine sewing - Pfaff hobby 303 | Owner's Manual - Page 33
hasta que a aguja, al girar el volante, se dave en el agujero derecho del botOn Haga de 6 a 8 puntos en zig zag y unas puntadas de remate en el agujero zquierdo (fig. A). Botón con cuello (costura de botones grandes en géneros pesados): Clave Ia aguja en el agujero zquierdo del botón. Coloque un - Pfaff hobby 303 | Owner's Manual - Page 34
: Fio para coser Colocaçao da base do calcador para fechos: ntroduzir 0 perno de trás, da Sewing in zippers: Sewing foot: zipper sewing foot Stitch length: 2 to 3 Stitch: Straight stitch, middle needle position Thread: sewing thread This is how the zipper toot is engaged: Insert the foot - Pfaff hobby 303 | Owner's Manual - Page 35
prensatelas y cierre Ia cremallera (fig. C) Baje el prensate(as, termine de hacer Ia costura y haga a costura lateral do remate Cosa el segundo lado do Ia cremallera paralela mente y a Ia misma distancia. Poco antes del final de a costura, deje clavada Ia aguja en Ia tela. Alce el pren satelas. abra - Pfaff hobby 303 | Owner's Manual - Page 36
this edge. Move the zipper foot to the middle so that the needle stit ches into the middle opening. The zip teeth run into the left guiding groove in the foot (Fig. C). At the beginning of the seam lift up the teeth a little to feed them into the guiding groove. Sew the seam to the end - Pfaff hobby 303 | Owner's Manual - Page 37
alfiler, y fije dicha cinta con un alfiler a Ia costura, como muestra Ia fig. E. Los dientes de Ia cremallera dis curren ahora por a ranura derecha del prensatelas (fig. F), Termine de coser a cremallera. Pespuntee ahora Ia cinta de a cremallera sobre Ia costura al ancho del prensatelas. Los dientes - Pfaff hobby 303 | Owner's Manual - Page 38
the zip. The zip teeth run along the right guiding edge of the foot (Fig. A). Shortly before the end of the seam leave the needle down in the fabric, raise the zipper foot, open the zip, lower the zipper foot again and finish sewing the seam. Close the zip. Pin the overlapping edge along the - Pfaff hobby 303 | Owner's Manual - Page 39
seinora: (Para Ia preparaciOn do Ia maquina, véase Pág. 30). Corra el pie para cremalleras hacia Ia izquierda hasta el tope. Doble y planche los bordes do a abertura. Hilvane Ia cremallera cerrada por debajo del ado derecho doblado de forma quo quedon visibles los dientes do a cromallera. Fije ahora - Pfaff hobby 303 | Owner's Manual - Page 40
: Preparing the machine: Sewing foot: Darning foot (special accessory) Stitch type: Straight stitch Needle position: Centre Tension: Ease needle thread tension Thread: Fine rnachine ernbroidery thread Needle: Size 70 How to fit the darning toot: Remove the sewing foot holder, then - Pfaff hobby 303 | Owner's Manual - Page 41
primeramente el hilo inferior. Sujete ambos hilos por Ia punta al comenzar a coser. Haga ahora unas puntadas en Ia tela. Extienda los hilos bien pegados otros y zurza el trozo dainado (fig. D). Zurza en redondo al final de cada costura (fig. E). Tan pronto como esté recubierto uniforme mente el trozo - Pfaff hobby 303 | Owner's Manual - Page 42
A do carril para a exterior. Retirar a aro B e a lancadeira C. Limpar a carril. De vez em quando pôr urna gota de Oleo no carril da Iancadeira. Atencao! Não deixar cair a lanca deira C. 7Cleaning and oiling: Raise the needle and the sewing foot. Remove the two needle plate screws and take off the - Pfaff hobby 303 | Owner's Manual - Page 43
Mudanca da lampada: Desligar a máquina da ficha. Empurrar a lampada para cima, rodá-Ia no sentido A e retirá-la. Colocar a lampada nova de manetra que Os seus espigoes penetrem nas fendas C. Empurar a lampada para O alto e rodá-la no sentido B. Changing the bulb: Pull out the mains plug. Push - Pfaff hobby 303 | Owner's Manual - Page 44
da agulha: 70/80 Ponta esférica fina Aguiha, normal para tecidos sintéticos. a, maiha fina, linho 1mb, chiffon, cambraia de linho, organdi, tecidos de veludos para costuras de ornamentaçao e bordados. 130/705 H-SUK Grossura da agulha:_70/110 130/705 H-PS Grossura cia agulha: 75+90 130/705 - Pfaff hobby 303 | Owner's Manual - Page 45
Utilisaçoes entre aguihas 1,6 mm 2,0 mm nervuras normals 2,5 mm 3,0 mm 4,0 mm nervuras largas extra-largas Costuras de ornamentaçào corn aguihas duplas Antes da costura de ornamentação, rodar o volante lentamente e controlar se as aguihas penetram perfeitamente na chapa da aguiha. Assim - Pfaff hobby 303 | Owner's Manual - Page 46
__ Imitation leathers, plastic materials, plastic sheeting and oilcloth. Light ball point, Seams topstitched with buttonhole silk long eye or No. 30/3 synthetic thread, 130/705 H-WING 100 - C - Hemstitching point Attractive hemstitching on heavily dressed materials, organdy and glass cambric. - Pfaff hobby 303 | Owner's Manual - Page 47
5mm 3.0 mm 4.0mm Suitable for Medium-wide cording Wide cording Extra wide cording Extra-wide cording Decorative designs sewn with twin needles Before you start sewing, turn the handwheel and check to make sure the needles stitch into the fabric properly. In this way, needle breakage can be largely - Pfaff hobby 303 | Owner's Manual - Page 48
trabajo, lino pesado, vaqueros, lona ligera. 130/705 H-I_I.. N° 70 -120 Punta cortante al Ia derecha Cuero, ante, box-calf, piel de cabra (cabritilla). 130/705 H-PCI.. N° 80 -110 __- 130 H-N N° 100 -110 -< 130/705 H-WiNG N° 100 ,__----- Punta cortante a Cuero sintético, plastico, hule. Ia - Pfaff hobby 303 | Owner's Manual - Page 49
mm 3,0 mm 4,0 mm 'Lorzas anchas Lorzas muy anchas Motivas decorativos con agujas gemelas Antes de comenzar a labor deseada, gire el volante con Ia se clavan pertectamente; de esa forma evitará a rotura de mano para as agujas. comprobar silas agujas ni AdomoslZigzag AI 3,005 H-ZWI I N° 80 - Pfaff hobby 303 | Owner's Manual - Page 50
__L _______ 4euIatauIukko )ikea neulan vahnta varmistaa parhaan >mpelutuloksen. ____ Kangaslaatu T ohut - Neula 60 70 75 KangaaatJT keskipaksu Neula 80 90 Kangaslaatu paksu Neula 100 110 120 Neulalajit ja neulankärjen muodot Neulalaji Muoto Neulan kärki ja silmä Sopli käytettävaksl - Pfaff hobby 303 | Owner's Manual - Page 51
leulataulukko ___ Neula(aji 130/705 H-ZWI KB 130/705H-ZWI Koko 80 I Koko 90 Koko 100 - Piston pituus Piston leveys Neulaväli Sopli käytettävaksi - - - - 2,5 mm 1.6 mm z m - r s n r j n Hiuslaskos Hiuslaskos 2,5mm 2,5 mm 3,0 mm I J - - - 2,5mm 3,0 mm 4,0 mm Leveä - Pfaff hobby 303 | Owner's Manual - Page 52
plads. Der er sat en forkert nál I. Nálen er bejet eller stump. Maskinen ikke trdet korrekt. Nlen er for fin til garnet. 2. Overtrden knkker Af de fornvnte grunde. For strk trdspnding. For dârligt eHer knudret garn, efler garn, som er blevet for tørt gennem lang tids lagring. 3. Nélen knkker Nlen er - Pfaff hobby 303 | Owner's Manual - Page 53
Arsag: AfhjIpning: 5. Maskinen transporterer ikke eller kun uregetmssigt Der har samlet sig for meget systøv sammen mellem transporterens tandrkker. Stingpladen aftages, og systøvet fjornes med en pens& Transporteren er snket. (Omskifteren for transportersnknng star til hejre). Omskifteren for - Pfaff hobby 303 | Owner's Manual - Page 54
according to Needle Chart. See par. 1 above. Regulate thread tensions. Use only good-quality thread. Insert new needle and push it up as far as it will go. Insert new needle. See Needle Chart. Let machine feed the work alone. Only guide the material lightly. When inserting the bobbin case, push it - Pfaff hobby 303 | Owner's Manual - Page 55
and put a drop of oil into hook raceway. 7. Important notes: Never foot. If run you a threaded machine unless have to leave the machine, there even is a for piece of fabric under a short while, be sure the to sewing switch off the master switch. This is particularly important when children - Pfaff hobby 303 | Owner's Manual - Page 56
no está colocada debidamente. Compruebe si está introducida hasta el tope. Coloque una aguja nueva. Siga las normas de Ia tabla do agujas. La tela deberá ser arrastrada ünicamente por Ia maquina. Al colocar Ia cápsula con Ia canilla deborã presionarse un poco hasta que encajo perfectamonte. 4. La - Pfaff hobby 303 | Owner's Manual - Page 57
aguja y impie con un pincel el transportador. Ponga Ia palanca a a izquierda. 6. La maquina va forzada En Ia pista del garfio hay restos de hilos. Limpie Ia pista del garfio y ponga una gota de aceite. 7. Nota importante No ponga en marcha Ia máquina enhe brada sin haber colocado antes una pieza - Pfaff hobby 303 | Owner's Manual - Page 58
DikiSs arozalarø ye bunlaron giderilmesi Nedini: Giderilmesi: 1. Makina diki atlatiyor Ine doru takilmamistir. Yanhis ine takilmistir. ne egri veya küttür. p11k makinaya doru takilmamitir. lne, p11k cm çok incedir. ineyi dayanaa kadar yukariya doru sürünüz. Basik olan dip kismi arkaya doru - Pfaff hobby 303 | Owner's Manual - Page 59
Nedeni: Giderilmesi: 5.. Makina kumai yUrUtmüyor veya düzensiz bir ekilde yUrUtUyor Transportärun (taslyicinin) di siralan arasinda diki tozu sikica bastiriImitir. Bati Ievhasiru kaldiriniz; diki tozunu firçayla gideriniz. Transportor (taslyici) gömulmustur. Gämme sürgüsünü sol tarafa ç - Pfaff hobby 303 | Owner's Manual - Page 60
corn turn redondo 98-694 803-00 paracao Ahnhavar e costuras sobre tecidos muito boos e rnacios (jersey de seda) Calcador para sobrecoser 4.5 rnrn Calcador para sobrecoser 6,5 rnrn 93-035946-91 93-035948-91 Costuras sobrecosidas Calcador para casear Calcador para franzir Calcador - Pfaff hobby 303 | Owner's Manual - Page 61
para acessOrios 20 Pespontar 22 Ponto invisIvel elástico 24 Casas 26 Colocacao de botOes 28 Costura de fechos de correr 30 Costura de fecho de correr invisIvel 32 Costura de fecho de correr para calcas de senhora 34 Cerzir (pontear) 36 Limpeza e lubrificaçao 38 Mudanca da Iampáda - Pfaff hobby 303 | Owner's Manual - Page 62
jobs. They can %ccessory Binder (remove sewing foot holder) Cording foot, 5 grooves (twin needle with 1.8-2.5 mm needle gauge) Cording foot, 7 grooves (twin needle with 1.4-1,8 mm needle gauge) Fringe sewing foot Edge guide Part No. Sewing Operation 98-053484-91 For binding edges - Pfaff hobby 303 | Owner's Manual - Page 63
Thread cutter Setting the stitch length Reverse sewing Stitch pattern knob Stitch pattern table Changing the needle Dropping the feed Changing the sewing foot Sewing feet Accessory compartment Top-stitching Elastic blind stitch Sewing buttonholes Sewing on buttons Inserting zippers - Pfaff hobby 303 | Owner's Manual - Page 64
aguja con agujero redondo 98-802422-00jrapespunteados(acolchados) I 98-694803-00 - en préparaclOn Para pespuntear y para coser telas muy finas y blandas (género de punto a base de seda, etc.) Sobrecargador 4,5 mm Sobrecargador 6,5 mm 93-035946-91 - 93-035948-91 Para costuras sobrecargadas Pie - Pfaff hobby 303 | Owner's Manual - Page 65
Indice Accesosios especiales Accionamiento del pedal BotOn selector de puntadas Cambio de a aguja Cambio de Ia bombilla Cambio del pie prensatelas Colocación de Ia canilla en Ia capsula Colocación de Ia capsula con Ia canilla COmo quitar Ia maleta-funda Compartimento para accesorios - Pfaff hobby 303 | Owner's Manual - Page 66
)zel ilãve parcalar: )zel have parçalar, özel diki hIerb içindir. Bunlar Mazasindan temin olunabhlbr. eparcaIar Sent cevinlci (Sent ayagl tutamagini uzakiaStinin) Nervur ayai, 5 OIlJkIU (kiz igne, ignearaligi 1,8-2,5) Nervür ayagi, 7 oluklu (Ikizigne, igne aralmgm 1.4-1,8) Sacak (pOskO[) ayagi - Pfaff hobby 303 | Owner's Manual - Page 67
içindekiler Alt p11k gerginliinin kontrol edilmesi Alt ipliin yukariya getirilmesi Ampul deitirmek Batis örnei-cetveli Bati ornei-ayar dümesi Bati uzunluunun ayarlanmasi Cantayi çikarmak Dikis arizalari ye bunlann giderilmesi Diki ayaklari Diki ayaklarini deitirmek Diki makanizmasini
-
 1
1 -
 2
2 -
 3
3 -
 4
4 -
 5
5 -
 6
6 -
 7
7 -
8
-
9
-
10
-
11
-
12
-
13
-
14
-
15
-
16
-
17
-
18
-
19
-
20
-
21
-
22
-
23
-
24
-
25
-
26
-
27
-
28
-
29
-
30
-
31
-
32
-
33
-
34
-
35
-
36
-
37
-
38
-
39
-
40
-
41
-
42
-
43
-
44
-
45
-
46
-
47
-
48
-
49
-
50
-
51
-
52
-
53
-
54
-
55
-
56
-
57
-
58
-
59
-
60
-
61
-
62
-
63
-
64
-
65
-
66
-
67
 |
 |
©Ebby
3©3
Livro
de
instruçOes
Instruction
Book
Instrucciones
de
manejo
Kulfanma
talimatnamesi