Pfaff hobby 303 Owner's Manual - Page 40
Pfaff hobby 303 Manual
 |
View all Pfaff hobby 303 manuals
Add to My Manuals
Save this manual to your list of manuals |
Page 40 highlights
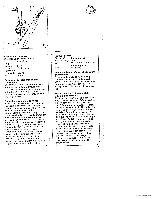
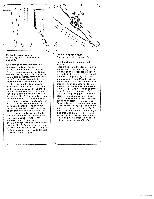
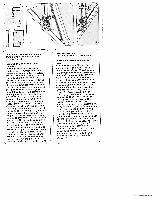
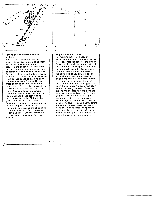
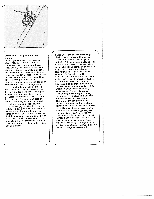
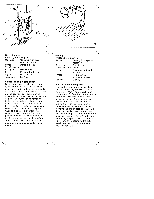
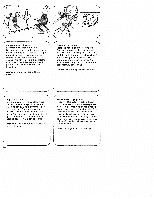
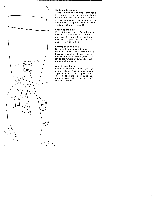
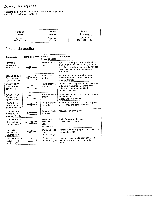
Cerzir (pontear): Preparaçao da rnaquina: Calcador: Calcador para cerzir (acessOrio extra) Ponto: Ponto a direito Tensão do tb da agulha: Menos forte Fio: Fio para bordar fino Agulha: Grossura 70 Arrastador: Em baixo Colocacao do pé para cerzir: Retirar o suporte do calcador: corn a ajuda do parafuso A. fixar o calcador para cerzir. verificando se a alavanca B encosta na parte superior do perno C do prende-aguiha. Fazer subir o fio da canela. No inicio da costura, segurar nos dois fios. Executar alguns pontos no tecido, encostando Os dois fios urn ao outro e cobrir a zona estragada (ver fig. D). No tim de cada linha de costura fazer urn arco, corno indica a figura D. Quando a zona estiver totalrnente coberta, rodar o tecido 9O e coser per pendicularrnente as costuras anteriores (fig. E). ate cobrir por cornpleto toda a zona. Durante esta operacão o compri mento do ponto é cornandado rnanual mente. .' 4 *4 % %. N.. *4% *4 %*. 'S *4% *4*4 *4% " D Darning: Preparing the machine: Sewing foot: Darning foot (special accessory) Stitch type: Straight stitch Needle position: Centre Tension: Ease needle thread tension Thread: Fine rnachine ernbroidery thread Needle: Size 70 How to fit the darning toot: Remove the sewing foot holder, then secure the darning foot with screw A, making sure that wire B is resting on screw shank C. First draw up the bobbin thread and hold both threads when beginning to sew. Then make a few stitches in the material. Stitch back and forth over the damaged area in serpentine fashion, as shown in Fig. D, rounding the end of each line. When the damaged spot is covered evenly, turn the fabric through 90 and darn over the preceding rows of stitches (Fig. E) until the damaged spot is covered. On this type of work you determine the stitch length yourself by moving the fabric back and forward.
-
 1
1 -
2
-
3
-
4
-
5
-
6
-
7
-
8
-
9
-
10
-
11
-
12
-
13
-
14
-
15
-
16
-
17
-
18
-
19
-
20
-
21
-
22
-
23
-
24
-
25
-
26
-
27
-
28
-
29
-
30
-
31
-
32
-
33
-
34
-
 35
35 -
 36
36 -
 37
37 -
 38
38 -
 39
39 -
 40
40 -
 41
41 -
 42
42 -
 43
43 -
 44
44 -
 45
45 -
46
-
47
-
48
-
49
-
50
-
51
-
52
-
53
-
54
-
55
-
56
-
57
-
58
-
59
-
60
-
61
-
62
-
63
-
64
-
65
-
66
-
67
 |
 |
