Pioneer AVH-P4400BH Owner's Manual - Page 88
Installing the microphone For, AVH-P4400BH/AVH-P3400BH, AVH-P2400BT model
 |
View all Pioneer AVH-P4400BH manuals
Add to My Manuals
Save this manual to your list of manuals |
Page 88 highlights
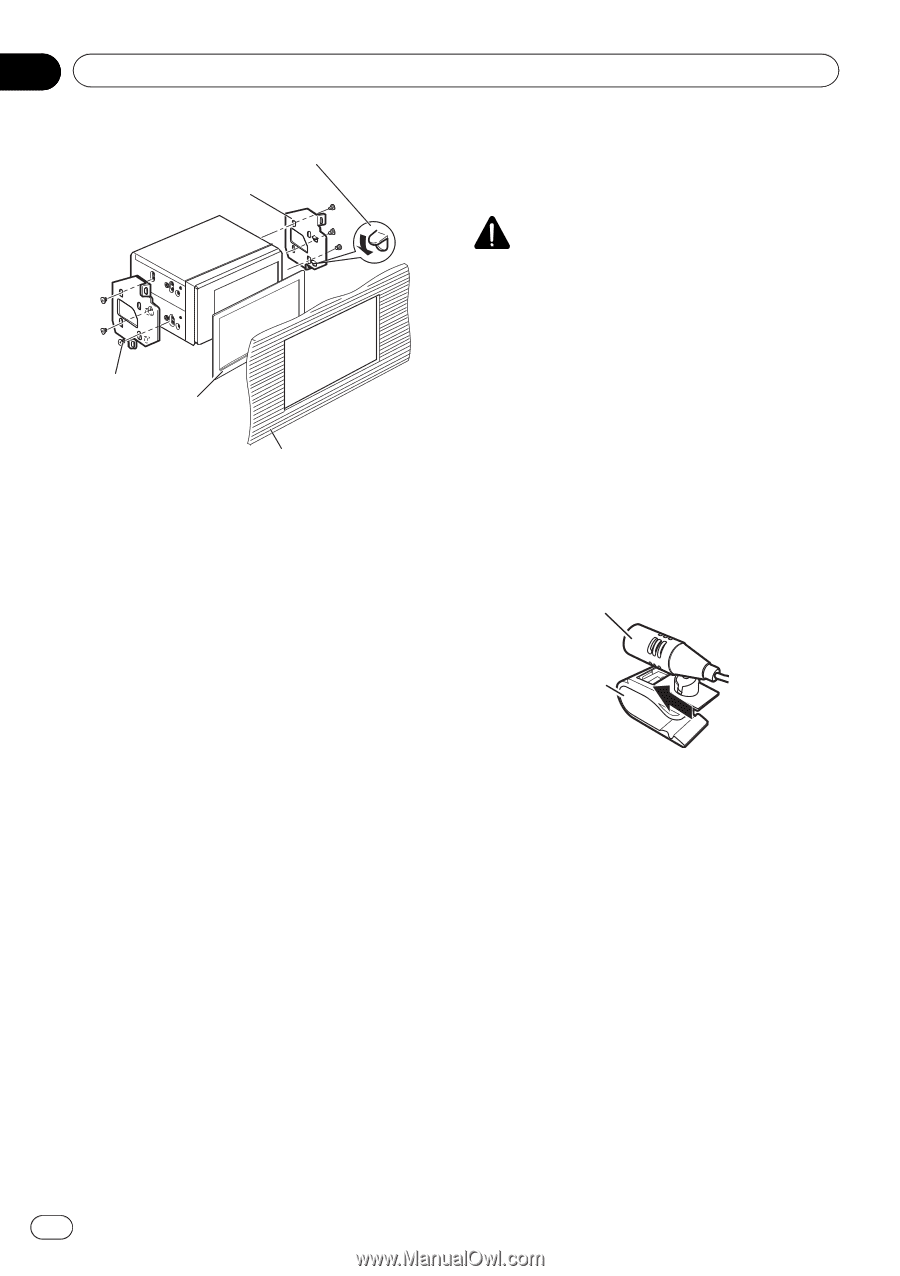
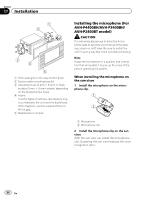
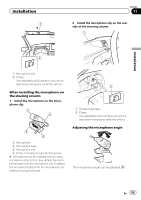
Section 17 Installation 1 2 3 4 5 1 If the pawl gets in the way, bend it down. 2 Factory radio mounting bracket 3 Use either truss (5 mm × 8 mm) or flush surface (5 mm × 9 mm) screws, depending on the bracket screw holes. 4 Frame In some types of vehicles, discrepancy may occur between the unit and the dashboard. If this happens, use the supplied frame to fill the gap. 5 Dashboard or console Installing the microphone (For AVH-P4400BH/AVH-P3400BH/ AVH-P2400BT model) CAUTION It is extremely dangerous to allow the microphone lead to become wound around the steering column or shift lever. Be sure to install the unit in such a way that it will not obstruct driving. Note Install the microphone in a position and orientation that will enable it to pick up the voice of the person operating the system. When installing the microphone on the sun visor 1 Install the microphone on the microphone clip. 1 2 1 Microphone 2 Microphone clip 2 Install the microphone clip on the sun visor. With the sun visor up, install the microphone clip. (Lowering the sun visor reduces the voice recognition rate.) 88 En
-
 1
1 -
2
-
3
-
4
-
5
-
6
-
7
-
8
-
9
-
10
-
11
-
12
-
13
-
14
-
15
-
16
-
17
-
18
-
19
-
20
-
21
-
22
-
23
-
24
-
25
-
26
-
27
-
28
-
29
-
30
-
31
-
32
-
33
-
34
-
35
-
36
-
37
-
38
-
39
-
40
-
41
-
42
-
43
-
44
-
45
-
46
-
47
-
48
-
49
-
50
-
51
-
52
-
53
-
54
-
55
-
56
-
57
-
58
-
59
-
60
-
61
-
62
-
63
-
64
-
65
-
66
-
67
-
68
-
69
-
70
-
71
-
72
-
73
-
74
-
75
-
76
-
77
-
78
-
79
-
80
-
81
-
82
-
 83
83 -
 84
84 -
 85
85 -
 86
86 -
 87
87 -
 88
88 -
 89
89 -
 90
90 -
 91
91 -
 92
92 -
 93
93 -
94
-
95
-
96
-
97
-
98
-
99
-
100
-
101
-
102
-
103
-
104
-
105
-
106
-
107
-
108
-
109
-
110
-
111
-
112
 |
 |