Pioneer DEH-P710BT Owner's Manual - Page 48
Adjusting initial settings, Selecting the language, Setting the date, Initial Settings, English - software update
 |
UPC - 012562943534
View all Pioneer DEH-P710BT manuals
Add to My Manuals
Save this manual to your list of manuals |
Page 48 highlights
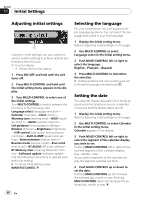
Section 11 Initial Settings Adjusting initial settings 1 Using the initial settings, you can customize various system settings to achieve optimal performance from this unit. 1 Function display ! Shows the function status. 1 Press SRC/OFF and hold until the unit turns off. 2 Press MULTI-CONTROL and hold until the initial setting menu appears in the display. 3 Turn MULTI-CONTROL to select one of the initial settings. Turn MULTI-CONTROL to switch between the functions in the following order. Language select (language selection)- Calendar (calendar)-Clock (clock)- Warning tone (warning tone)-AUX1 (auxiliary input 1)-AUX2 (auxiliary input 2)- List guidance (voice guidance setting)- Dimmer (dimmer)-Brightness (brightness) -S/W control (rear output and subwoofer controller)-Built-in AMP (power amp setting)-Demonstration (feature demo)- Reverse mode (reverse mode)-Ever-scroll (ever scroll)-BT AUDIO (BT audio setting)- BT Memory clear (clearing Bluetooth memory)-Software update (software update) Use the following instructions to operate each particular setting. # To cancel initial settings, press BAND/ESC/CANCEL. Selecting the language For your convenience, this unit equips multiple language guidance. You can select the language best suited to your first language. 1 Display the initial setting menu. Refer to Adjusting initial settings on this page. 2 Use MULTI-CONTROL to select Language select in the initial setting menu. 3 Push MULTI-CONTROL left or right to select the language. English-Français-Español 4 Press MULTI-CONTROL to determine the selection. # Display guidance and voice guidance are set to the same language simultaneously. Setting the date The calendar display adjusted in this mode appears when the telephone source is selected or sources and the feature demo are off. 1 Display the initial setting menu. Refer to Adjusting initial settings on this page. 2 Use MULTI-CONTROL to select Calendar in the initial setting menu. Calendar appears in the display. 3 Push MULTI-CONTROL left or right to select the segment of the calendar display you wish to set. Pushing MULTI-CONTROL left or right will select one segment of the calendar display: Day-Month-Year As you select segments of the calendar display the segment selected will blink. 4 Push MULTI-CONTROL up or down to set the date. Pushing MULTI-CONTROL up will increase the selected day, month or year. Pushing MULTI-CONTROL down will decrease the selected day, month or year. 48 En
-
 1
1 -
2
-
3
-
4
-
5
-
6
-
7
-
8
-
9
-
10
-
11
-
12
-
13
-
14
-
15
-
16
-
17
-
18
-
19
-
20
-
21
-
22
-
23
-
24
-
25
-
26
-
27
-
28
-
29
-
30
-
31
-
32
-
33
-
34
-
35
-
36
-
37
-
38
-
39
-
40
-
41
-
42
-
 43
43 -
 44
44 -
 45
45 -
 46
46 -
 47
47 -
 48
48 -
 49
49 -
 50
50 -
 51
51 -
 52
52 -
 53
53 -
54
-
55
-
56
-
57
-
58
-
59
-
60
-
61
-
62
-
63
-
64
-
65
-
66
-
67
-
68
-
69
-
70
-
71
-
72
-
73
-
74
-
75
-
76
-
77
-
78
-
79
-
80
-
81
-
82
-
83
-
84
-
85
-
86
-
87
-
88
-
89
-
90
-
91
-
92
-
93
-
94
-
95
-
96
-
97
-
98
-
99
-
100
-
101
-
102
-
103
-
104
-
105
-
106
-
107
-
108
-
109
-
110
-
111
-
112
-
113
-
114
-
115
-
116
-
117
-
118
-
119
-
120
-
121
-
122
-
123
-
124
-
125
-
126
-
127
-
128
-
129
-
130
-
131
-
132
-
133
-
134
-
135
-
136
-
137
-
138
-
139
-
140
-
141
-
142
-
143
-
144
-
145
-
146
-
147
-
148
-
149
-
150
-
151
-
152
-
153
-
154
-
155
-
156
-
157
-
158
-
159
-
160
-
161
-
162
-
163
-
164
-
165
-
166
-
167
-
168
-
169
-
170
-
171
-
172
-
173
-
174
-
175
-
176
-
177
-
178
-
179
-
180
-
181
-
182
-
183
-
184
-
185
-
186
-
187
-
188
-
189
-
190
-
191
-
192
-
193
-
194
-
195
-
196
-
197
-
198
-
199
-
200
-
201
-
202
-
203
-
204
-
205
-
206
-
207
-
208
-
209
-
210
-
211
-
212
-
213
-
214
-
215
-
216
-
217
-
218
-
219
-
220
-
221
-
222
-
223
-
224
-
225
-
226
-
227
-
228
-
229
-
230
-
231
-
232
-
233
-
234
-
235
-
236
-
237
-
238
-
239
-
240
-
241
-
242
-
243
-
244
-
245
 |
 |
