Pioneer DEH-P710BT Owner's Manual - Page 53
Using the AUX source, Turning the clock display, on or off, Switching the display - owners manual
 |
UPC - 012562943534
View all Pioneer DEH-P710BT manuals
Add to My Manuals
Save this manual to your list of manuals |
Page 53 highlights
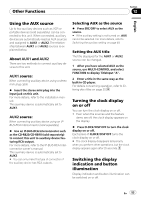
Other Functions Section 12 English Using the AUX source Up to two auxiliary devices such as VCR or portable devices (sold separately) can be connected to this unit. When connected, auxiliary devices are automatically read as AUX sources and assigned to AUX1 or AUX2. The relationship between AUX1 and AUX2 sources is explained below. About AUX1 and AUX2 There are two methods to connect auxiliary devices to this unit. AUX1 source: When connecting auxiliary device using a stereo mini plug cable % Insert the stereo mini plug into the input jack on this unit. For more details, refer to the installation manual. This auxiliary device is automatically set to AUX1. AUX2 source: When connecting auxiliary device using an IPBUS-RCA Interconnector (sold separately) % Use an IP-BUS-RCA Interconnector such as the CD-RB20/CD-RB10 (sold separately) to connect this unit to auxiliary device featuring RCA output. For more details, refer to the IP-BUS-RCA Interconnector owner's manual. This auxiliary device is automatically set to AUX2. # You can only make this type of connection if the auxiliary device has RCA outputs. Selecting AUX as the source % Press SRC/OFF to select AUX as the source. # If the auxiliary setting is not turned on, AUX cannot be selected. For more details, refer to Switching the auxiliary setting on page 49. Setting the AUX title The title displayed for the AUX1 or AUX2 source can be changed. 1 After you have selected AUX as the source, use MULTI-CONTROL and select FUNCTION to display TitleInput "A". 2 Enter a title in the same way as the built-in CD player. For details concerning operation, refer to Entering disc titles on page 20. Turning the clock display on or off You can turn the clock display on or off. ! Even when the sources and the feature demo are off, the clock display appears on the display. % Press CLOCK/DISP OFF to turn the clock display on or off. Each press of CLOCK/DISP OFF turns the clock display on or off. # The clock display disappears temporarily when you perform other operations, but the clock display appears again after 25 seconds. Switching the display indication and button illumination Display indication and button illumination can be switched on or off. En 53
-
 1
1 -
2
-
3
-
4
-
5
-
6
-
7
-
8
-
9
-
10
-
11
-
12
-
13
-
14
-
15
-
16
-
17
-
18
-
19
-
20
-
21
-
22
-
23
-
24
-
25
-
26
-
27
-
28
-
29
-
30
-
31
-
32
-
33
-
34
-
35
-
36
-
37
-
38
-
39
-
40
-
41
-
42
-
43
-
44
-
45
-
46
-
47
-
 48
48 -
 49
49 -
 50
50 -
 51
51 -
 52
52 -
 53
53 -
 54
54 -
 55
55 -
 56
56 -
 57
57 -
 58
58 -
59
-
60
-
61
-
62
-
63
-
64
-
65
-
66
-
67
-
68
-
69
-
70
-
71
-
72
-
73
-
74
-
75
-
76
-
77
-
78
-
79
-
80
-
81
-
82
-
83
-
84
-
85
-
86
-
87
-
88
-
89
-
90
-
91
-
92
-
93
-
94
-
95
-
96
-
97
-
98
-
99
-
100
-
101
-
102
-
103
-
104
-
105
-
106
-
107
-
108
-
109
-
110
-
111
-
112
-
113
-
114
-
115
-
116
-
117
-
118
-
119
-
120
-
121
-
122
-
123
-
124
-
125
-
126
-
127
-
128
-
129
-
130
-
131
-
132
-
133
-
134
-
135
-
136
-
137
-
138
-
139
-
140
-
141
-
142
-
143
-
144
-
145
-
146
-
147
-
148
-
149
-
150
-
151
-
152
-
153
-
154
-
155
-
156
-
157
-
158
-
159
-
160
-
161
-
162
-
163
-
164
-
165
-
166
-
167
-
168
-
169
-
170
-
171
-
172
-
173
-
174
-
175
-
176
-
177
-
178
-
179
-
180
-
181
-
182
-
183
-
184
-
185
-
186
-
187
-
188
-
189
-
190
-
191
-
192
-
193
-
194
-
195
-
196
-
197
-
198
-
199
-
200
-
201
-
202
-
203
-
204
-
205
-
206
-
207
-
208
-
209
-
210
-
211
-
212
-
213
-
214
-
215
-
216
-
217
-
218
-
219
-
220
-
221
-
222
-
223
-
224
-
225
-
226
-
227
-
228
-
229
-
230
-
231
-
232
-
233
-
234
-
235
-
236
-
237
-
238
-
239
-
240
-
241
-
242
-
243
-
244
-
245
 |
 |
