Samsung SPH-M340 User Manual (user Manual) (ver.f5) (English) - Page 53
Pictures, Options, Details, Number/Emai, Subject, Locking and Unlocking Picture Files, Picture Details
 |
View all Samsung SPH-M340 manuals
Add to My Manuals
Save this manual to your list of manuals |
Page 53 highlights
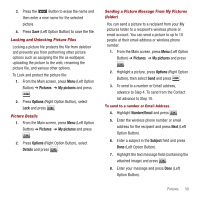
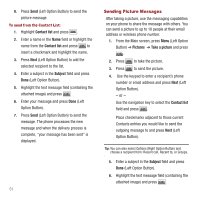
3. Press the Button to erase the name and then enter a new name for the selected picture. 4. Press Save (Left Option Button) to save the file. Locking and Unlocking Picture Files Locking a picture file protects the file from deletion and prevents you from performing other picture options such as assigning the file as wallpaper, uploading the picture to the web, renaming the picture file, and various other options. To Lock and protect the picture file: 1. From the Main screen, press Menu (Left Option Button) ➔ Pictures ➔ My pictures and press . 2. Press Options (Right Option Button), select Lock and press . Picture Details 1. From the Main screen, press Menu (Left Option Button) ➔ Pictures ➔ My pictures and press . 2. Press Options (Right Option Button), select Details and press . Sending a Picture Message From My Pictures (folder) You can send a picture to a recipient from your My pictures folder to a recipient's wireless phone or email account. You can send a picture to up to 10 people at their email address or wireless phone number. 1. From the Main screen, press Menu (Left Option Button) ➔ Pictures ➔ My pictures and press . 2. Highlight a picture, press Options (Right Option Button), then select Send and press . 3. To send to a number or Email address, advance to Step 4. To send from the Contact list advance to Step 10. To send to a number or Email Address 4. Highlight Number/Email and press . 5. Enter the wireless phone number or email address for the recipient and press Next (Left Option Button). 6. Enter a subject in the Subject field and press Done (Left Option Button). 7. Highlight the text message field (containing the attached image) and press . 8. Enter your message and press Done (Left Option Button). Pictures 50
-
 1
1 -
2
-
3
-
4
-
5
-
6
-
7
-
8
-
9
-
10
-
11
-
12
-
13
-
14
-
15
-
16
-
17
-
18
-
19
-
20
-
21
-
22
-
23
-
24
-
25
-
26
-
27
-
28
-
29
-
30
-
31
-
32
-
33
-
34
-
35
-
36
-
37
-
38
-
39
-
40
-
41
-
42
-
43
-
44
-
45
-
46
-
47
-
 48
48 -
 49
49 -
 50
50 -
 51
51 -
 52
52 -
 53
53 -
 54
54 -
 55
55 -
 56
56 -
 57
57 -
 58
58 -
59
-
60
-
61
-
62
-
63
-
64
-
65
-
66
-
67
-
68
-
69
-
70
-
71
-
72
-
73
-
74
-
75
-
76
-
77
-
78
-
79
-
80
-
81
-
82
-
83
-
84
-
85
-
86
-
87
-
88
-
89
-
90
-
91
-
92
-
93
-
94
-
95
-
96
-
97
-
98
-
99
-
100
-
101
-
102
-
103
-
104
-
105
-
106
 |
 |