Seagate BlackArmor WS 110 BlackArmor PS User Guide - Page 79
Removing backup archives, Proceed, Remove
 |
View all Seagate BlackArmor WS 110 manuals
Add to My Manuals
Save this manual to your list of manuals |
Page 79 highlights
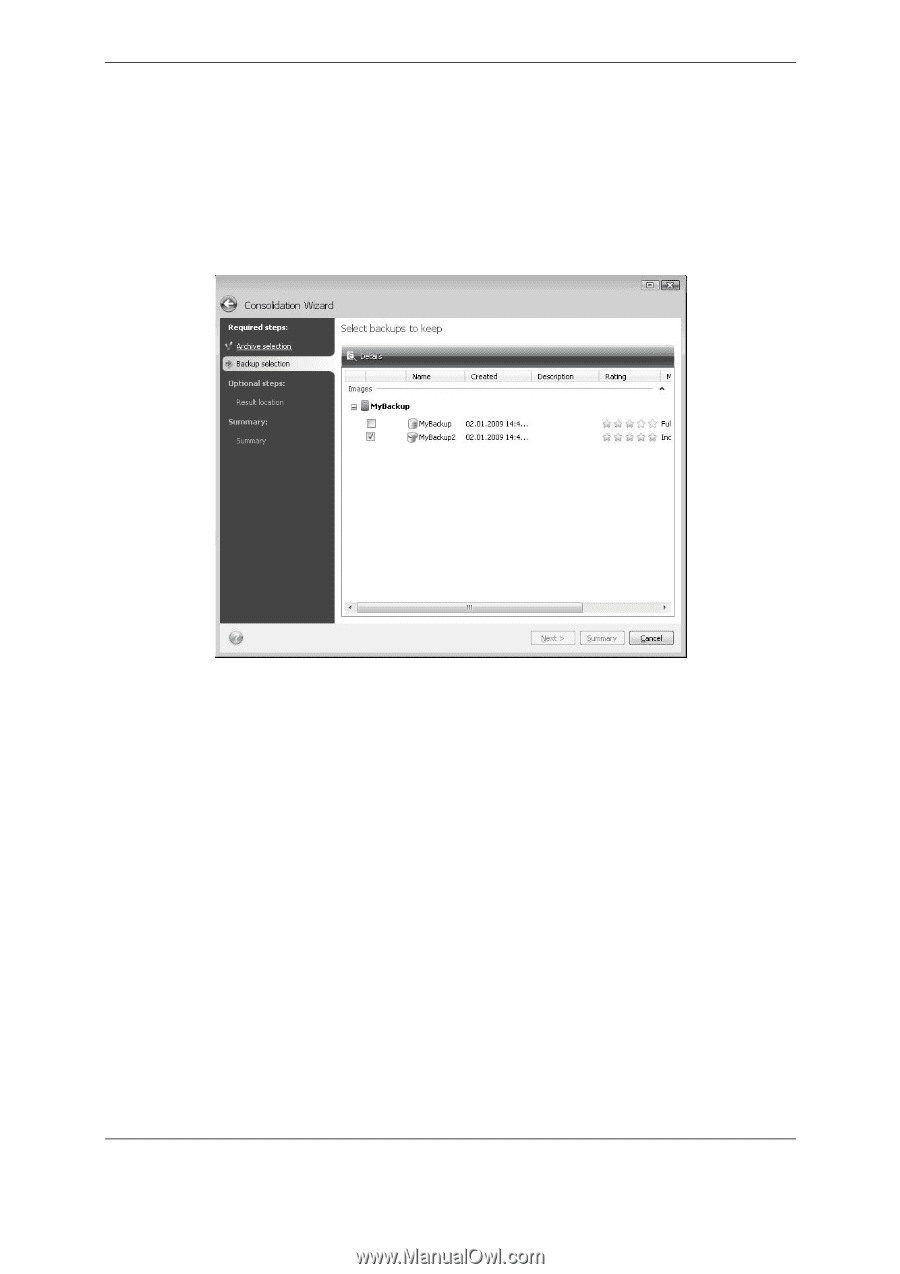
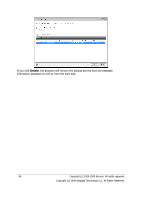
5. The program displays the summary window. Click Proceed to start consolidation. In our example, when consolidation is complete, disk G will contain two new archives MyBackup and MyBackup2. MyBackup is a full backup containing data as of November 25, 2008, 9:40:23 AM. MyBackup2 is an incremental backup containing data as of November 25, 2008, 10:21:12 AM. You can make sure of this by starting the consolidation wizard again, selecting the archive MyBackup and proceeding to the next window. 11.5 Removing backup archives You may want to remove backups and backup archives you no longer need. Because Seagate BlackArmor Backup stores information on the backup archives in a metadata information database, deleting unneeded archive files using Windows Explorer will not delete information about these archives from the database and Seagate BlackArmor Backup will consider that they still exist. This will result in errors when the program tries to perform operations on the backups that no longer exist. So you must only remove obsolete backups and backup archives using the tool provided by Seagate BlackArmor Backup. To remove the entire backup archive, select it and click Remove on the toolbar or right-click on the full backup of the backup archive and choose Remove in the shortcut menu. To remove an incremental or a differential backup, select it and click Remove on the toolbar or right-click on the selected backup and choose Remove in the shortcut menu. In this case all other successive incremental and differential backups created later than the selected incremental or differential backup will be also deleted. The following screen appears: Copyright (c) 2000-2009 Acronis. All rights reserved. Copyright (c) 2009 Seagate Technology LLC. All Rights Reserved. 79
-
 1
1 -
2
-
3
-
4
-
5
-
6
-
7
-
8
-
9
-
10
-
11
-
12
-
13
-
14
-
15
-
16
-
17
-
18
-
19
-
20
-
21
-
22
-
23
-
24
-
25
-
26
-
27
-
28
-
29
-
30
-
31
-
32
-
33
-
34
-
35
-
36
-
37
-
38
-
39
-
40
-
41
-
42
-
43
-
44
-
45
-
46
-
47
-
48
-
49
-
50
-
51
-
52
-
53
-
54
-
55
-
56
-
57
-
58
-
59
-
60
-
61
-
62
-
63
-
64
-
65
-
66
-
67
-
68
-
69
-
70
-
71
-
72
-
73
-
 74
74 -
 75
75 -
 76
76 -
 77
77 -
 78
78 -
 79
79 -
 80
80 -
 81
81 -
 82
82 -
 83
83 -
 84
84 -
85
-
86
-
87
-
88
-
89
-
90
-
91
-
92
-
93
-
94
-
95
-
96
-
97
-
98
-
99
-
100
-
101
-
102
-
103
-
104
-
105
-
106
-
107
-
108
-
109
-
110
-
111
-
112
-
113
-
114
-
115
-
116
-
117
-
118
-
119
-
120
-
121
-
122
-
123
-
124
-
125
-
126
-
127
-
128
 |
 |