Sony DSC-T2/P Cyber-shot® Handbook - Page 73
To stamp, To add a frame, To change the color of the line, To make corrections, Erasing all painting
 |
View all Sony DSC-T2/P manuals
Add to My Manuals
Save this manual to your list of manuals |
Page 73 highlights
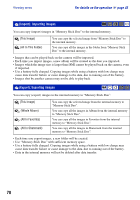
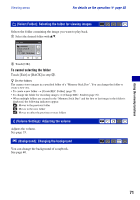
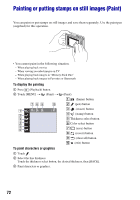
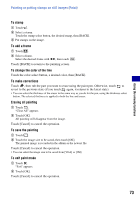
Using the viewing functions Painting or putting stamps on still images (Paint) To stamp 1 Touch . 2 Select a stamp. Touch the stamp select button, the desired stamp, then [BACK]. 3 Put stamps on the image. To add a frame 1 Touch . 2 Select a frame. Select the desired frame with b/B, then touch . Touch [BACK] to return to the painting screen. To change the color of the line Touch the color select button, a desired color, then [BACK]. To make corrections Touch , then rub the part you want to erase using the paint pen. Otherwise, touch to revert to the previous state (if you touch again, it returns to the latest state). • You can select the thickness of the eraser in the same way as you do for the pen, using the thickness select button. The selected thickness is applied to both the line and eraser. Erasing all painting 1 Touch . "Clear All" appears. 2 Touch [OK]. All painting will disappear from the image. Touch [Cancel] to cancel the operation. To save the painting 1 Touch . 2 Touch the image size to be saved, then touch [OK]. The painted image is recorded in the album as the newest file. Touch [Cancel] to cancel the operation. • You can select the image size to be saved from [VGA] or [3M]. To exit paint mode 1 Touch . "Exit" appears. 2 Touch [OK]. Touch [Cancel] to cancel the operation. 73
-
 1
1 -
2
-
3
-
4
-
5
-
6
-
7
-
8
-
9
-
10
-
11
-
12
-
13
-
14
-
15
-
16
-
17
-
18
-
19
-
20
-
21
-
22
-
23
-
24
-
25
-
26
-
27
-
28
-
29
-
30
-
31
-
32
-
33
-
34
-
35
-
36
-
37
-
38
-
39
-
40
-
41
-
42
-
43
-
44
-
45
-
46
-
47
-
48
-
49
-
50
-
51
-
52
-
53
-
54
-
55
-
56
-
57
-
58
-
59
-
60
-
61
-
62
-
63
-
64
-
65
-
66
-
67
-
 68
68 -
 69
69 -
 70
70 -
 71
71 -
 72
72 -
 73
73 -
 74
74 -
 75
75 -
 76
76 -
 77
77 -
 78
78 -
79
-
80
-
81
-
82
-
83
-
84
-
85
-
86
-
87
-
88
-
89
-
90
-
91
-
92
-
93
-
94
-
95
-
96
-
97
-
98
-
99
-
100
-
101
-
102
-
103
-
104
-
105
-
106
-
107
-
108
-
109
-
110
-
111
-
112
-
113
-
114
-
115
-
116
-
117
-
118
-
119
-
120
-
121
-
122
-
123
-
124
-
125
-
126
-
127
-
128
-
129
-
130
-
131
 |
 |