Sony PEG-NZ90 Read This First Operating Instructions
Sony PEG-NZ90 - Personal Entertainment Organizer Manual
 |
View all Sony PEG-NZ90 manuals
Add to My Manuals
Save this manual to your list of manuals |
Sony PEG-NZ90 manual content summary:
- Sony PEG-NZ90 | Read This First Operating Instructions - Page 1
Charging your Sony CLIÉ™ handheld 3 Performing the initial settings 4 Basic operations of your Sony CLIÉ™ handheld 5 Taking images/movies 6 Using your CLIÉ™ handheld with your computer Enjoying your CLIÉ™ handheld Using applications Personal Entertainment Organizer PEG-NZ90 © 2003 Sony Corporation - Sony PEG-NZ90 | Read This First Operating Instructions - Page 2
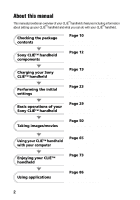
the package contents Page 10 Make sure that all the accessories are supplied in the package. Sony CLIÉ™ handheld components Page 12 Learn about the parts of your CLIÉ handheld and other accessories. Charging your Sony CLIÉ™ handheld Performing the initial settings Page 19 Be sure to charge - Sony PEG-NZ90 | Read This First Operating Instructions - Page 3
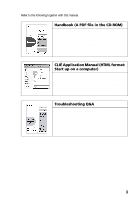
on a computer) The manual explains about how to use the supplied applications in detail. For details on using the manual, refer to "Using CLIÉ Application Manual" on page 86 in this manual. Troubleshooting Q&A The manual helps in solving problems that you may face while using your CLIÉ handheld. 3 - Sony PEG-NZ90 | Read This First Operating Instructions - Page 4
is for FCC-related matters only. Declaration of Conformity Trade Name: SONY Model No.: PEG-NZ90/U Responsible Party: Sony Electronics Inc. Address: 680 Kinderkamack Road, Oradell, NJ 07649 USA Telephone No.: 201-930-6972 This device complies with part 15 of the FCC Rules. Operation is subject to the - Sony PEG-NZ90 | Read This First Operating Instructions - Page 5
that, due to continued efforts to improve quality, the software specifications may be changed without notice. • The software library incorporated in CLIÉ handheld is based in part on the work of the Independent JPEG Group. Program © 2002 Sony Corporation, © 2002 Palm, Inc., or its subsidiaries. All - Sony PEG-NZ90 | Read This First Operating Instructions - Page 6
number only signifies that Industry Canada technical specifications were met. Le terme ‹‹IC›› avant empêcher que cet appareil cause du brouillage au service faisant l'objet d'une licence, il doit être equipped with CLIÉ handheld is valid only in those countries where CLIÉ handheld is sold. • - Sony PEG-NZ90 | Read This First Operating Instructions - Page 7
.rbrc.org/). When you dispose of a CLIÉ handheld, remove the battery for recycling. How to remove the Battery Pack (Lithium-Ion battery) Follow "Inserting/Replacing the battery" (page 19) to remove the battery. How to remove a rechargeable button battery 1 Remove the screw from the side of your - Sony PEG-NZ90 | Read This First Operating Instructions - Page 8
10 Sony CLIÉ™ handheld components 12 Locating the parts of your Sony CLIÉ handheld 12 Changing the operating style 15 Locating cradle components 17 Locating the controls on the supplied audio remote control 18 Charging your Sony CLIÉ™ handheld 19 Step 1: Inserting/Replacing the battery 19 - Sony PEG-NZ90 | Read This First Operating Instructions - Page 9
those files are normally saved in your CLIÉ handheld or a "Memory Stick" media. No guarantee for lost data or damaged data Sony does not provide any guarantee for lost data or damaged data caused by improper operations. Copyrights Television programs, films, video tapes, and other materials may be - Sony PEG-NZ90 | Read This First Operating Instructions - Page 10
Checking the package contents Please check the accessories in the package before you start. CLIÉ handheld (1) Cradle (1) AC power adapter (1) Headphones (1) Stylus (1) The stylus is stored in your CLIÉ handheld at the factory. 10 Audio remote control (1) - Sony PEG-NZ90 | Read This First Operating Instructions - Page 11
protection card is stored in your CLIÉ handheld at the factory. Read This First - Operating Instructions (1, this manual) Troubleshooting Q&A (1) Customer Registration Guide (1) Customer Registration card (Warranty) Graffiti label (1) Software license agreement (1) Other printed materials Make sure - Sony PEG-NZ90 | Read This First Operating Instructions - Page 12
following. Locating the parts of your Sony CLIÉ handheld Front panel A POWER LED (Page 32) B IR port (Page 35) C Jog Dial™ navigator (Page 30) D BACK Button (Page 34) E VOICE REC Button (Page 33, 74) F RESET Button (Page 40) G Stylus (Page 29) H Bluetooth LED (Page 82) I "Memory Stick" LED (Page - Sony PEG-NZ90 | Read This First Operating Instructions - Page 13
Cover (Page 33) F Application Buttons (Page 48) G Application Buttons (Page 48) Available only when your CLIÉ handheld is set to the turned style. H Bluetooth LED (Page 82) I "Memory Stick" LED (Page 36) J Scroll Button (Page 35) K Hardware Keyboard (Page 37) L Wireless Communication Slot (Page 38 - Sony PEG-NZ90 | Read This First Operating Instructions - Page 14
B Flash Photometric Sensor C Flash (Page 58) D CAPTURE Button (Page 32, 50, 52, 62) E Headphone Jack (Page 75) F Battery Cover (Page 19) G HOLD Switch (Page 34) H POWER Switch (Page 31) I "Memory Stick" Slot (Page 36) J REC LED (Page 33) K Camera Lens (Page 33) L Lens Cover Lever (Page 33) M Strap - Sony PEG-NZ90 | Read This First Operating Instructions - Page 15
Sony CLIÉ™ handheld components Changing the operating style Your CLIÉ handheld can be used with the display panel set in three different styles. Carrying style Set your CLIÉ handheld to the "carrying style," when carrying it around in your baggage or pocket to guard the screen from damage. Opened - Sony PEG-NZ90 | Read This First Operating Instructions - Page 16
Turned style Set your CLIÉ handheld to "turned style" to make it compact when you operate it with the Stylus or use it in the Camera mode. bb Open the display and rotate it as indicated by an arrow until it clicks into place Fold - Sony PEG-NZ90 | Read This First Operating Instructions - Page 17
Sony CLIÉ™ handheld components Locating cradle components A Interface Connector (Page 22) B AV output jack You can connect the supplied AV cable to view the screen of "CLIE Album" with your television (page 90). C USB Cable Connector You can connect the supplied USB cable to connect the cradle - Sony PEG-NZ90 | Read This First Operating Instructions - Page 18
such as Audio Player or Movie Player. A ./> Button C N/x Button B Volume Control Button D HOLD Switch b For details on operating each application, refer to the "CLIÉ Application Manual" installed on your computer. 18 - Sony PEG-NZ90 | Read This First Operating Instructions - Page 19
data stored on your CLIÉ handheld or data being recorded to a "Memory Stick" media may be deleted. 1 Open the battery cover. 2 Insert the battery. You can easily insert the battery by sliding the battery release knob with the tip of the battery. Face the battery terminal towards the display panel - Sony PEG-NZ90 | Read This First Operating Instructions - Page 20
by the arrow and remove the battery. Tip About the built-in rechargeable button battery Your CLIÉ handheld uses the built-in rechargeable button battery to maintain data stored in the built-in memory while replacing the Battery Pack. The rechargeable button battery is automatically charged while you - Sony PEG-NZ90 | Read This First Operating Instructions - Page 21
Charging your Sony CLIÉ™ handheld About the Battery Pack ■ Supplied Battery Pack The "Smart Lithium" function enables to exchange information about battery conditions between your CLIÉ handheld and the Battery Pack. Your CLIÉ handheld calculates the discharge rate according to the battery condition - Sony PEG-NZ90 | Read This First Operating Instructions - Page 22
will require less time. Notes • If the battery in your CLIÉ handheld is fully discharged, all data stored in the memory on your CLIÉ handheld will be lost. • Insert your CLIÉ handheld into the cradle completely until the POWER LED indicator of your CLIÉ handheld turns on. • When you remove your CLI - Sony PEG-NZ90 | Read This First Operating Instructions - Page 23
instructions to configure the initial settings and to get accustomed to operations on your CLIÉ handheld. 1 Slide the POWER switch. Your CLIÉ handheld handheld following the steps on page 19? b For details, refer to the supplied manual "Troubleshooting Q&A." • If you cannot turn on your CLIÉ handheld - Sony PEG-NZ90 | Read This First Operating Instructions - Page 24
data or to select applications. Take out the Stylus Notes • Always use the point of the stylus for tapping or making strokes on the CLIÉ handheld screen. Never use a real pen, pencil, or other sharp object to write on the screen. • When you put the stylus back in its holder, push it in until - Sony PEG-NZ90 | Read This First Operating Instructions - Page 25
on-screen instruction, tap the center of the displayed mark. Note If the digitizer is not configured correctly, the scroll bar may not operate properly, "tapping" may not work as expected, or other problems may occur. For re-configuring the digitizer, refer to "Customizing your Sony CLIÉ handheld - Sony PEG-NZ90 | Read This First Operating Instructions - Page 26
8 Tap the Set Date box. The Set Date screen is displayed. 9 Tap the arrow b or B next to the year to select the current year. 10 Tap the current month and then tap the current date. The Set Date screen closes. 11 Tap the Time Zone box. The Set Time Zone screen is displayed. 26 - Sony PEG-NZ90 | Read This First Operating Instructions - Page 27
Performing the initial settings 12 Tap the region to set the time zone and then tap OK. 13 Tap the arrow V next to Daylight Saving and select ON or OFF. 14 Tap Next. Continued on next page 27 - Sony PEG-NZ90 | Read This First Operating Instructions - Page 28
15 Tap Next and Done. b The initial settings are complete, and the CLIE Launcher screen is displayed. Initial settings are complete. 28 - Sony PEG-NZ90 | Read This First Operating Instructions - Page 29
Basic operations of your Sony CLIÉ™ handheld Basic operations of your Sony CLIÉ™ handheld This chapter describes how to start applications, enter data, and perform other basic operations. Basic operations Using the stylus With your CLIÉ handheld, you can use the supplied stylus to enter characters - Sony PEG-NZ90 | Read This First Operating Instructions - Page 30
or move objects on your computer, you can use the stylus to drag an item on the screen of your CLIÉ handheld. Press the stylus lightly on the item, and move it along the screen Jog Dial™ navigator Some applications support operations executed by rotating while pressing the Jog Dial™ navigator. 30 - Sony PEG-NZ90 | Read This First Operating Instructions - Page 31
Basic operations of your Sony CLIÉ™ handheld Functions of parts POWER Switch Turning on your CLIÉ handheld Slide the POWER switch. Your CLIÉ handheld turns on and the last screen you viewed is displayed. POWER Switch When your CLIÉ handheld turns on, the POWER LED (page 32) indicator lights green. - Sony PEG-NZ90 | Read This First Operating Instructions - Page 32
its color. LED Lights green Lights orange Blinks orange Blinks green (three times) OFF The status of your CLIÉ handheld The power is ON. The battery is being charged. Alarm notifies you at a given time if you have made an alarm setting in an application, such as Date Book. The HOLD - Sony PEG-NZ90 | Read This First Operating Instructions - Page 33
Basic operations of your Sony CLIÉ™ handheld Camera CLOSE OPEN You can take still images voice memo. b For details, refer to the explanation of each application in the "CLIÉ Application Manual" installed on your computer. VOICE REC Button Press the button to record sounds. b For details, - Sony PEG-NZ90 | Read This First Operating Instructions - Page 34
handheld. If you slide this switch while the power is on, the screen display turns off, even during an operation. Note If you cannot turn on or operate your CLIÉ handheld to turn on your CLIÉ handheld while the HOLD switch is in to the CLIE Launcher screen. b For details, refer to the - Sony PEG-NZ90 | Read This First Operating Instructions - Page 35
are assigned. b For details, refer to the explanation of each application in the "CLIÉ Application Manual" installed on your computer. IR port You can beam data between your CLIÉ handheld and another CLIÉ handheld or Palm OS® PDA. b For details, refer to "Beaming" in the "Handbook." Direct your CLI - Sony PEG-NZ90 | Read This First Operating Instructions - Page 36
Memory Stick" media into this slot. The "Memory Stick" LED blinks orange while your CLIÉ handheld is writing data to or reading data from "Memory Stick" media. b For details, refer to "Using "Memory Stick®" media" in the "Handbook." Inserting "Memory Stick" media "Memory Stick" LED The "Memory Stick - Sony PEG-NZ90 | Read This First Operating Instructions - Page 37
reading data from "Memory Stick" media (the "Memory Stick" LED is not blinking) before removing it. If you remove "Memory Stick" media while the "Memory Stick" LED is blinking, recorded data may be deleted or damaged. Hardware Keyboard Basic operations of your Sony CLIÉ™ handheld You can use the - Sony PEG-NZ90 | Read This First Operating Instructions - Page 38
+ Ctrl + Shift + Ctrl + Tab Ctrl + Shift + Tab Pastes the selected text. Deletes the selected text. Turns the backlight on and off. Switches to the CLIE Launcher screen. Displays the menu. Opens the Find dialog box. Same as rotating the Jog Dial™ navigator upwards. Same as rotating the Jog Dial - Sony PEG-NZ90 | Read This First Operating Instructions - Page 39
your CLIÉ handheld is not working properly, remove the network card once, and insert the network card again. • There may be some data network services that may not be used, depending on the network card and provider that you are using. For details, refer to the operating instructions of your network - Sony PEG-NZ90 | Read This First Operating Instructions - Page 40
, you can perform a soft reset to solve the problem. Follow the procedure below to reset your CLIÉ handheld. Performing a soft reset All records and entries stored in your CLIÉ handheld are retained even after performing a soft reset. 1 Take out the stylus pin by unscrewing the metal barrel from the - Sony PEG-NZ90 | Read This First Operating Instructions - Page 41
a hard reset only if a soft reset does not solve your problem. You can restore your CLIÉ handheld data if you have made a backup on your computer or "Memory Stick" media. b For details, refer to "Backing up your Sony CLIÉ™ handheld data" in the "Handbook." 1 Slide the POWER switch. 2 While sliding - Sony PEG-NZ90 | Read This First Operating Instructions - Page 42
4 Press the v button on the keyboard panel of your CLIÉ handheld. Press the v button A hard reset is performed on your CLIÉ handheld. After restarting, the system displays "palm powered," "CLIÉ," and "SONY," followed by the Welcome screen. Refer to "Performing the initial settings" on page 23. After - Sony PEG-NZ90 | Read This First Operating Instructions - Page 43
of your Sony CLIÉ™ handheld A CLIE Launcher Groups List The list of CLIE Launcher groups Indicator J Graffiti® Writing Area This is the area for manually entering data with Graffiti® characters. K Calculator (page 96 . M Graffiti/Software Keyboard Icon (page 46) N Resize Icon If you tap this - Sony PEG-NZ90 | Read This First Operating Instructions - Page 44
this icon to display the CLIE Launcher screen. Tap this Battery status Remaining charge of the battery Estimated time for charging and operation Tap this icon to display the information for the "Memory Stick" media inserted in your CLIÉ handheld. When the Data Protection switch of the "Memory Stick - Sony PEG-NZ90 | Read This First Operating Instructions - Page 45
for System sound, Alarm sound, and Game sound. The setting affects the General in the Preferences. b For details, refer to "Customizing your Sony CLIÉ handheld (Preferences): Setting sounds" in the "Handbook." Displays the current time. To change the display format, tap Time at the Formats in the - Sony PEG-NZ90 | Read This First Operating Instructions - Page 46
Info : Delete b For details, refer to "Sony CLIÉ™ handheld basic operations: Using "CLIE Launcher": Application manager icon" in the "Handbook." be used without minimizing the current screen. Tip To switch the software keyboard display You can switch the keyboard display by tapping the following - Sony PEG-NZ90 | Read This First Operating Instructions - Page 47
You can also tap the desired application icon in the CLIE Launcher screen to start the application. b For details, refer to "Sony CLIÉ™ handheld basic operations: Starting an application" or "Sony CLIÉ™ handheld basic operations: Using 'CLIE Launcher'" in the "Handbook." Basic operations of your - Sony PEG-NZ90 | Read This First Operating Instructions - Page 48
application button. b For details, refer to "Customizing your Sony CLIÉ handheld (Preferences): Assigning applications to application buttons" in the icon or press the application button. Tip You do not need to manually save data when you quit an application. All the changes in the application that - Sony PEG-NZ90 | Read This First Operating Instructions - Page 49
data using the on-screen keyboard, refer to "Entering data in your Sony CLIÉ™ handheld: Practicing entering data using the on-screen keyboard" in the "Handbook." z Software keyboard (page 46) The working of the software keyboard is the same as the on-screen keyboard, however the applications can - Sony PEG-NZ90 | Read This First Operating Instructions - Page 50
starts after a few seconds. Tip You can also select the CLIE Cam S icon in "CLIE Launcher" (page 47) to start "CLIE Camera S." 3 Capture the subject in the viewfinder and press and hold the CAPTURE button half way down. Your CLIÉ handheld beeps and focuses on the subject. 4 Press the CAPTURE button - Sony PEG-NZ90 | Read This First Operating Instructions - Page 51
Album." K Album Select Button Tap the button to select the album where the taken images are located. L Viewer Start Button Starts "CLIE Viewer" to display the taken images. M Image Size/Quality Select Button (Page 53) N Delete Button Deletes an image selected in the image thumbnail display. O Rotate - Sony PEG-NZ90 | Read This First Operating Instructions - Page 52
Using functions Using the self-timer 1 Tap the Setup screen. button to display the Camera Setup 2 Tap Self Timer and select On. Tap the OK button. (Self-timer) is displayed on the screen. b 3 Capture the subject in the viewfinder and press the CAPTURE button fully down. Countdown starts and the - Sony PEG-NZ90 | Read This First Operating Instructions - Page 53
a larger amount of memory. This means the number of images you can save in the memory of your CLIÉ handheld or "Memory Stick" media will be reduced. Select the image size and image quality that suits your purpose. b For details, refer to "CLIE Camera S" in the "CLIÉ Application Manual" installed on - Sony PEG-NZ90 | Read This First Operating Instructions - Page 54
images will be saved in the memory of your CLIÉ handheld. Even if the free space of an inserted "Memory Stick" media is insufficient, captured images will not be saved in the memory of your CLIÉ handheld. (Default) Captured images will be saved on "Memory Stick" media. Captured images will be saved - Sony PEG-NZ90 | Read This First Operating Instructions - Page 55
Selecting the scene mode When taking images of scenes or people at night, you can use the scene mode to enhance the impact of the image. 1 Tap the Setup screen. button to display the Camera Setup 2 Tap Scene to select the scene mode. Taking images/movies Normal Twilight Twilight Portrait - Sony PEG-NZ90 | Read This First Operating Instructions - Page 56
Assigning a function to the custom button You can assign your favorite function to the custom button. 1 Tap the Setup screen. button to display the Camera Setup Custom button The icon varies depending on the assigned function. 2 Tap Custom Button and to select a function you want to assign. 56 - Sony PEG-NZ90 | Read This First Operating Instructions - Page 57
Selecting the shutter sound You can select the volume and tone quality of the shutter sound. 1 Tap the Setup screen. button to display the Camera Setup 2 Tap Shutter Sound Vol to set the volume of the shutter sound. Tap Shutter Sound to select the tone quality of the shutter sound. Taking images - Sony PEG-NZ90 | Read This First Operating Instructions - Page 58
Selecting the flash mode You can select the flash mode according to the situation. 1 Tap the flash mode button and select a flash mode. The Flash mode icon is displayed. Auto The flash works automatically in poor light conditions. (Default) On The flash works every time. (Flashes forcibly) Off - Sony PEG-NZ90 | Read This First Operating Instructions - Page 59
Taking images/movies Other functions b For details, refer to "CLIE Camera S" in the "CLIÉ Application Manual" installed on your computer. Main screen Zoom Tap the adjustment. EV Adjustment Tap the button to switch between the two stages of / button to adjust - Sony PEG-NZ90 | Read This First Operating Instructions - Page 60
the list CLIE Viewer page 90 Using features Managing image files in albums CLIE Album page 90 Importing image files from your CLIÉ handheld to your computer Address page 94 Sending image files by e-mail CLIE Mail page 96 Transferring image files to your computer Memory Stick Import page 98 60 - Sony PEG-NZ90 | Read This First Operating Instructions - Page 61
and open the camera lens cover. Tip Set your CLIÉ handheld to the opened style when you record movies of yourself. 2 Insert the "Memory Stick" media to which you want to save movie files. s 3 Select Movie Rec start. icon in "CLIE Launcher" (page 47) to The application starts after a few seconds - Sony PEG-NZ90 | Read This First Operating Instructions - Page 62
movie files from your computer Image Converter page 89 Giga Pocket Plugin page 90 Viewing/Selecting Viewing/selecting a movie file after searching from the list CLIE Viewer page 90 Playing movies Movie Player page 92 Sending Sending movie files by e-mail - Sony PEG-NZ90 | Read This First Operating Instructions - Page 63
play back voice memos saved on your CLIÉ handheld. b For details, refer to the "CLIÉ Application Manual" installed on your computer. Opening/Playing back files 1 Tap the Home screen. icon to display the CLIE Launcher 2 Select the CLIE Viewer icon to start "CLIE Viewer." Tip You can also start - Sony PEG-NZ90 | Read This First Operating Instructions - Page 64
Selecting/Deleting files You can select a file from the list screen in CLIE Viewer when attaching image files or movie files of your CLIÉ handheld to e-mails, when using the image files in "PhotoStand" (page 91), "CLIE Album" (page 90) and "Photo Editor" (page 92), or when deleting files. 1 Start " - Sony PEG-NZ90 | Read This First Operating Instructions - Page 65
handheld Step 1: Install the software on your computer Do not connect the supplied cradle to your computer before installing the software. The software may not be installed properly. The "Palm™ Desktop for CLIÉ" software software properly, follow the installation procedure described in this manual. - Sony PEG-NZ90 | Read This First Operating Instructions - Page 66
the Palm Desktop for CLIÉ software. The setup program starts and the Welcome screen is displayed. 4 Click Next. The Palm™ Desktop for CLIÉ software installation begins. Follow the on-screen instructions. 5 Select the software you will use to synchronize your CLIÉ handheld with your computer. If you - Sony PEG-NZ90 | Read This First Operating Instructions - Page 67
Using your CLIÉ™ handheld with your computer 11 Click Next. The Ready to Install the Program dialog box is displayed, Click Install to start installation. 12 Follow the on-screen instructions to finish installing the Palm™ Desktop for CLIÉ software. 13 Click Finish. Installation of the Palm™ - Sony PEG-NZ90 | Read This First Operating Instructions - Page 68
to your computer When you have completed the Palm™ Desktop for CLIÉ software installation, connect the cradle to a USB port of your computer so you can use your CLIÉ handheld with your computer. Connect the cradle to your computer To a USB port of your computer To a wall outlet Note Be sure to - Sony PEG-NZ90 | Read This First Operating Instructions - Page 69
Step 3: Enter a user name for your CLIÉ handheld 1 Place your CLIÉ handheld in the cradle. 2 Press the HotSync button on the cradle. Press the HotSync button The USB Driver installation starts automatically. Using your CLIÉ™ handheld with your computer Continued on next page 69 - Sony PEG-NZ90 | Read This First Operating Instructions - Page 70
from the one you use for another CLIÉ handheld. If you set an identical user name to multiple CLIÉ handhelds, improper operation may occur. Tip When you import data from another CLIÉ handheld Refer to "Using data with another Sony CLIÉ handheld" in the "Handbook." 4 Click OK on the computer - Sony PEG-NZ90 | Read This First Operating Instructions - Page 71
you to synchronize data between your CLIÉ handheld and your computer, back up the data of your CLIÉ handheld on your computer, and install add-on ® operation The following procedure explains how to synchronize data between your CLIÉ handheld and computer, using "Date Book" as an example. 1 Turn on - Sony PEG-NZ90 | Read This First Operating Instructions - Page 72
for CLIÉ" icon on the Windows desktop. You can also click Start, select Programs (All Programs in Windows XP), Sony handheld, and click Palm Desktop for CLIÉ to start the application. The Palm™ Desktop for CLIÉ software starts. 6 Click the Date Book icon. The Date Book window is displayed. If - Sony PEG-NZ90 | Read This First Operating Instructions - Page 73
CLIÉ handheld or converted using the Image Converter software), MPEG Movie format (MPEG1 format movies taken with a Sony Digital Still Camera or Handycam) For formats of pictures that can be taken with your "Memory Stick" compliant devices, refer to their respective operating instructions. 1 Insert - Sony PEG-NZ90 | Read This First Operating Instructions - Page 74
memo A voice memo can be played using "Voice Recorder" or "CLIE Viewer." b For details about "Voice Recorder," refer to "Voice Recorder" in the "CLIÉ Application Manual" installed on your computer. b For details about "CLIE Viewer," refer to "Viewing/Playing back files (CLIE Viewer)" on page 63. 74 - Sony PEG-NZ90 | Read This First Operating Instructions - Page 75
b For details, refer to "Music" in the "CLIÉ Application Manual" installed on your computer. 2 Connect the supplied remote control and headphones to the CLIÉ handheld. Enjoying your CLIÉ™ handheld 3 Select the AudioPlayer icon in the CLIE Launcher screen (page 47) and start it. 4 Tap the playback - Sony PEG-NZ90 | Read This First Operating Instructions - Page 76
Managing schedules (Date Book) Entering a schedule 1 Press the button to start "Date Book." 2 Tap New and set the start time and end time of the schedule. 1 Tap to set the start time. 2 Tap to set the end time. 3 Tap to determine the settings. 4 Tap to select "hour." 5 Tap to select "minute." 3 - Sony PEG-NZ90 | Read This First Operating Instructions - Page 77
Deleting a schedule 1 Tap a schedule you want to delete and tap the Menu icon from the Date Book list screen. 2 Tap Delete Event... from the Record menu. The confirmation message is displayed. 3 Tap OK. 77 Enjoying your CLIÉ™ handheld - Sony PEG-NZ90 | Read This First Operating Instructions - Page 78
Managing addresses and telephone numbers (Address) Entering a new address 1 Press the button to start "Address". 2 Tap New and enter details. Tip You can scroll the screen by tapping the v/V arrow in the bottom right-hand corner. Deleting an address entry 1 Tap an address you want to delete and tap - Sony PEG-NZ90 | Read This First Operating Instructions - Page 79
Tip The Intellisync Lite software can be installed with the option "Using your CLIÉ handheld" of the installer menu screen. b For details on how to start and setup, refer to the help of "Intellisync Lite." To view help, click Programs (In case of Windows XP, click All Programs) from the Start menu - Sony PEG-NZ90 | Read This First Operating Instructions - Page 80
documents to the "Memory Stick" media inserted into the slot of your CLIÉ handheld. 3 Start "Picsel Viewer for CLIE" on your CLIÉ handheld and view the documents transferred from your computer. b For details, refer to "Picsel Viewer for CLIE" in the "CLIÉ Application Manual" installed on your - Sony PEG-NZ90 | Read This First Operating Instructions - Page 81
Tip For details on how to set up a network card, refer to the manual of each network card. Connecting to the Internet 1 Insert the network card into your CLIÉ handheld. 2 Select the desired application in "CLIE Launcher" (page 47) and start it. 3 Start browsing websites, sending or receiving e-mail - Sony PEG-NZ90 | Read This First Operating Instructions - Page 82
on factors such as obstacles between devices, radio wave conditions, or specifications of a target device. The Bluetooth™ function enables wireless communication within b For details, refer to "Customizing your Sony CLIÉ handheld (Preferences): Setting the Bluetooth™ function" in the "Handbook." 82 - Sony PEG-NZ90 | Read This First Operating Instructions - Page 83
data such as image files or Date Book data to another CLIÉ handheld with the built-in Bluetooth function or Bluetooth Module (optional) 1 Select a file. Sending an image file, movie file, voice memo, or handwritten memo Start CLIE Viewer (page 63), tap the Menu icon, select Send... from the Data - Sony PEG-NZ90 | Read This First Operating Instructions - Page 84
displayed on both CLIÉ handhelds. Follow the on-screen instructions. Tip If you have renamed a target Bluetooth™ compatible device registered on CLIÉ handheld, the device may be To view or edit received data/files, applications supporting each data/file must be installed on the CLIÉ handheld. 84 - Sony PEG-NZ90 | Read This First Operating Instructions - Page 85
in the "Handbook." For information about Bluetooth™ compatible computers, refer to the Sony CLIÉ handheld Support website (http://www.ita.sel.sony.com/support/clie/). Using the Bluetooth function between your CLIÉ handheld and other Bluetooth compliant devices You can make full use of the Bluetooth - Sony PEG-NZ90 | Read This First Operating Instructions - Page 86
Prior to using applications, refer to "Installing the software on your computer" on page 65 to install the Palm™ Desktop for CLIÉ software. The "CLIÉ Application Manual" will be installed at the same time. • The "CLIÉ Application Manual" requires "Microsoft Internet Explorer Version 5.0" or later to - Sony PEG-NZ90 | Read This First Operating Instructions - Page 87
window is displayed. 2 Select the manual by following the on-screen instructions. Tips • To close the "CLIÉ Application Manual," click the icon in the top right-hand corner in the CLIÉ Application Manual window. • You can minimize the CLIÉ Application Manual window by clicking the icon in the - Sony PEG-NZ90 | Read This First Operating Instructions - Page 88
, install the Palm™ Desktop for CLIÉ software on your computer with the supplied Installation CD-ROM and connect the cradle to your computer. Note The add-on applications are designed to operate on PEG-NZ90 only. Compatibility with other CLIÉ handheld or Palm OS PDAs is not guaranteed. 1 Quit all - Sony PEG-NZ90 | Read This First Operating Instructions - Page 89
formats of pictures on your computer so that they can be viewed on your CLIÉ handheld. Preparation for use: Must be installed Requires a "Memory Stick" media Installation CD-ROM Menu "CLIÉ Image" b For details, refer to the "CLIÉ Application Manual" installed on your computer. 89 Using applications - Sony PEG-NZ90 | Read This First Operating Instructions - Page 90
use: Installed b For details, refer to the "CLIÉ Application Manual" installed on your computer. Managing image files in albums Application to be used CLIE Album CLIÉ handheld Summary For managing image files saved on your CLIÉ handheld or "Memory Stick" media, in an album format. You can print out - Sony PEG-NZ90 | Read This First Operating Instructions - Page 91
• Exchanges data created using the CLIE Album application between your CLIÉ handheld and computer. Preparation for use: Must be installed Requires a "Memory Stick" media Installation CD-ROM Menu "CLIÉ Image" b For details, refer to the "CLIÉ Application Manual" installed on your computer. Displaying - Sony PEG-NZ90 | Read This First Operating Instructions - Page 92
with the built-in camera of the CLIÉ handheld or playing back movies on your CLIÉ handheld using "Image Converter" software on your computer. Preparation for use: Installed Requires a "Memory Stick" media b For details, refer to the "CLIÉ Application Manual" installed on your computer. 92 - Sony PEG-NZ90 | Read This First Operating Instructions - Page 93
the Macromedia Flash contents. Some Flash contents for computers may not be played back normally on your CLIÉ handheld. Preparation for use: Installed Requires a "Memory Stick" media b For details, refer to the "CLIÉ Application Manual" installed on your computer. Listening to music with your CLI - Sony PEG-NZ90 | Read This First Operating Instructions - Page 94
played back with your CLIÉ handheld in your computer. The application is also used for transferring music files to a "Memory Stick" media. Preparation for use: Must be installed Installation CD-ROM Menu "CLIÉ Audio" b For details, refer to the "CLIÉ Application Manual" and Help files of "SonicStage - Sony PEG-NZ90 | Read This First Operating Instructions - Page 95
use: Installed b For details, refer to the "CLIÉ Application Manual" installed on your computer. Taking handwritten memos using the stylus Application to be used CLIE Memo CLIÉ handheld Summary For taking handwritten memos using the stylus. Preparation for use: Installed b For details, refer to the - Sony PEG-NZ90 | Read This First Operating Instructions - Page 96
save and recall calculations with the calculator's memory. Preparation for use: Installed b For details, refer to the "CLIÉ Application Manual" installed on your computer. Sending and receiving e-mail messages Application to be used CLIE Mail CLIÉ handheld Summary For sending and receiving e-mail - Sony PEG-NZ90 | Read This First Operating Instructions - Page 97
to the "CLIÉ Application Manual" installed on your computer. Exchanging data between your CLIÉ handheld and "Memory Stick" media Application to be used CLIE Files CLIÉ handheld Summary For exchanging data (copy, move, delete) between your CLIÉ handheld and "Memory Stick" media inserted in the CLI - Sony PEG-NZ90 | Read This First Operating Instructions - Page 98
a "Memory Stick" media in your CLIÉ handheld without using a HotSync® operation. Preparation for use: Requires a "Memory Stick" media Memory Stick Import: Installed Memory Stick Export: Must be installed Installation CD-ROM Menu "CLIÉ Utilities" b For details, refer to the "CLIÉ Application Manual - Sony PEG-NZ90 | Read This First Operating Instructions - Page 99
documents such as Microsoft Word/Excel data on your CLIÉ handheld. Preparation for use: Must be installed Requires a "Memory Stick" media Installation CD-ROM Menu "CLIÉ Desktop" - "CLIÉ Add-ons" b For details, refer to the "CLIÉ Application Manual" installed on your computer. 99 Using applications - Sony PEG-NZ90 | Read This First Operating Instructions - Page 100
and follow the on-screen instructions. b For details, refer to the "CLIÉ Application Manual" and Help files of "Intellisync Lite" installed on your computer. Sending/Receiving messages and data via a connected GSM wireless device Application to be used SMS CLIÉ handheld Summary For sending/receiving - Sony PEG-NZ90 | Read This First Operating Instructions - Page 101
Preventing problems Making a backup is recommended We recommend that you make a backup of your data in case of any unexpected trouble. Backing up your data will ensure that it will be saved on the CLIÉ handheld even when you have to perform a hard reset. Making a backup using the Memory Stick Backup - Sony PEG-NZ90 | Read This First Operating Instructions - Page 102
application. • Read "Troubleshooting Q&A" carefully. • Double-click the CLIÉ Info icon, select Manuals and read the details about the applications. Step 2 Refer to the Sony CLIÉ handheld Support website. On the Sony CLIÉ handheld Support website (http://www.ita.sel.sony.com/support/clie/), you can - Sony PEG-NZ90 | Read This First Operating Instructions - Page 103
have questions or problems, please refer to one of the following for a solution: ■ Read This First (this guide), Handbook (supplied), and Troubleshooting Q&A (supplied) describes how to use your CLIÉ handheld. ■ Sony CLIÉ handheld support website http://www.sony.com/peg/support/ Provides the latest - Sony PEG-NZ90 | Read This First Operating Instructions - Page 104
or damage your CLIÉ handheld's screen or the Graffiti® writing area. Always use the supplied stylus or a plastic-tipped cradle may lose their adhesion if they become dirty. If this occurs, wipe the rubber feet with a soft damp cloth to restore their adhesion. About cleaning • Clean your CLIÉ handheld - Sony PEG-NZ90 | Read This First Operating Instructions - Page 105
you use your CLIÉ handheld, or applications used. b For details, refer to "Specifications" on page 107. Conserving the battery • Turn off the CLIÉ handheld will automatically turn off after a short period of inactivity. b For details, refer to "Customizing your Sony CLIÉ handheld (Preferences): - Sony PEG-NZ90 | Read This First Operating Instructions - Page 106
on the screen, and operations for "Memory Stick" media or backlight adjustment become unavailable. If this occurs, perform a HotSync® operation to make a backup all the data of your CLIÉ handheld to your computer. Then charge your CLIÉ handheld using the cradle to prevent accidental data loss. • If - Sony PEG-NZ90 | Read This First Operating Instructions - Page 107
Specifications CLIÉ handheld OS Palm OS® 5 (ver.5.0) CPU PXA250 200 MHz Memory 16 MB (RAM) User memory range: approx. 11 MB External input/output Interface connector IrDA (1.2) IR port for AV control Bluetooth "Memory Stick g) (including the supplied stylus and battery) Operating temperature 41 ºF - Sony PEG-NZ90 | Read This First Operating Instructions - Page 108
using a 128MB "Memory Stick" media, sold separately) SP mode: Approx. 190 minutes LP mode: Approx. 520 minutes Power requirements AC power adapter (supplied): DC 5.2 V (dedicated connector) (The supplied AC cord is for AC 120 V) Battery: Smart Lithium Battery Pack (1,200 mAh) Battery life Operating - Sony PEG-NZ90 | Read This First Operating Instructions - Page 109
the CLIÉ handheld display Image file: 320 × 480, 320 × 240, 160 × 120 dots Movie file: 426 × 320, 320 × 240 160 × 112 dots Formats (when viewing) Image file: JPEG (DCF format) Movie file: Movie Player format, MPEG Movie format Maximum movie recording time (when using 128MB "Memory Stick" media, sold - Sony PEG-NZ90 | Read This First Operating Instructions - Page 110
file recording capacity (when using a 128MB "Memory Stick" media in tne standard mode) 1600 × refer to the Sony CLIÉ handheld Support website (http://www.ita.sel.sony.com/ support/clie/) and select antenna's performance, and operating system or software application, etc. 2) Bluetooth standard profiles - Sony PEG-NZ90 | Read This First Operating Instructions - Page 111
installed on your computer to be able to use the Palm Desktop for CLIÉ software and software supplied on the CD-ROM: • OS: Microsoft Windows 98 Second Edition, Windows device such as a mouse or touchpad Design and specifications are subject to change without notice. 111 Additional information - Sony PEG-NZ90 | Read This First Operating Instructions - Page 112
Using the Stylus 29 Battery Charging 21 Considerations 105 Inserting 19 Removing 20 Brightness adjustment icon 45 C Calculator 96 Camera 33 CAPTURE Button 32 CLIE Album 90 CLIE Camera S 89 CLIE Files 97 CLIE Launcher 47 CLIE Mail 96 CLIE Memo 95 CLIE Remote Commander 97 CLIE Viewer - Sony PEG-NZ90 | Read This First Operating Instructions - Page 113
Hard reset 41 Soft reset 40 S Scroll Button 35 Set date 26 Set time 25 Setting up a network card 81 SMS 100 Software keyboard 46 SonicStage 1.5 94 Sound Converter 2 99 Sound Utility 98 Specifications 107 Status bar 44 Stylus 24, 29 Continued on next page 113 Additional information - Sony PEG-NZ90 | Read This First Operating Instructions - Page 114
39 Removing the Network Card 39 World Alarm Clock 97 U USB port 68 Using the Bluetooth™ function . . . .82 Using Voice Recorder 74 Contents of this manual are printed on chlorine-free paper using VOC (Volatile Organic Compound)-free vegetable-oil-based ink. 114 - Sony PEG-NZ90 | Read This First Operating Instructions - Page 115
- Sony PEG-NZ90 | Read This First Operating Instructions - Page 116
For the latest information on support and accessories, check our official Sony CLIÉ website http://www.sony.com/clie/
-
 1
1 -
 2
2 -
 3
3 -
 4
4 -
 5
5 -
 6
6 -
 7
7 -
8
-
9
-
10
-
11
-
12
-
13
-
14
-
15
-
16
-
17
-
18
-
19
-
20
-
21
-
22
-
23
-
24
-
25
-
26
-
27
-
28
-
29
-
30
-
31
-
32
-
33
-
34
-
35
-
36
-
37
-
38
-
39
-
40
-
41
-
42
-
43
-
44
-
45
-
46
-
47
-
48
-
49
-
50
-
51
-
52
-
53
-
54
-
55
-
56
-
57
-
58
-
59
-
60
-
61
-
62
-
63
-
64
-
65
-
66
-
67
-
68
-
69
-
70
-
71
-
72
-
73
-
74
-
75
-
76
-
77
-
78
-
79
-
80
-
81
-
82
-
83
-
84
-
85
-
86
-
87
-
88
-
89
-
90
-
91
-
92
-
93
-
94
-
95
-
96
-
97
-
98
-
99
-
100
-
101
-
102
-
103
-
104
-
105
-
106
-
107
-
108
-
109
-
110
-
111
-
112
-
113
-
114
-
115
-
116
 |
 |
4-670-644-
11
(1)
Personal Entertainment Organizer
PEG-NZ90
© 2003 Sony Corporation
Read
This
First
Operating Instructions
Checking the package contents
Sony CLIÉ
™
handheld components
Charging your Sony
CLIÉ
™
handheld
Performing the initial
settings
Basic operations of your
Sony CLIÉ
™
handheld
1
2
3
4
Enjoying your CLIÉ
™
handheld
Using applications
Taking images/movies
Using your CLIÉ
™
handheld
with your computer
5
6