Sony SR60 Handycam Handbook - Page 98
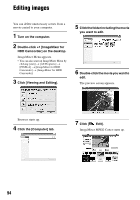
Saving images in the Playlist to a DVD
 |
UPC - 027242698970
View all Sony SR60 manuals
Add to My Manuals
Save this manual to your list of manuals |
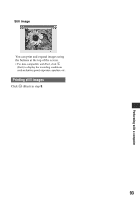
Page 98 highlights
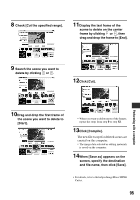
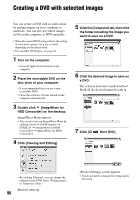
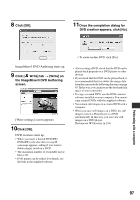
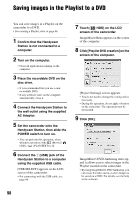
Saving images in the Playlist to a DVD You can save images in a Playlist on the camcorder to a DVD. • For creating a Playlist, refer to page 66. 1 Confirm that the Handycam Station is not connected to a computer. 2 Turn on the computer. • Close all applications running on the computer. 3 Place the recordable DVD on the disc drive. • It is recommended that you use a new recordable DVD. • If any software starts on the computer automatically, close it. 4 Connect the Handycam Station to the wall outlet using the supplied AC Adaptor. 5 Set the camcorder onto the Handycam Station, then slide the POWER switch to turn on. • You can perform this operation, when whichever position of the (Movie) / (Still) / (PLAY/EDIT) is lit. 6 Connect the (USB) jack of the Handycam Station to a computer using the supplied USB cable. [USB SELECT] appears on the LCD screen of the camcorder. • For connecting with the USB cable, see page 84. 7 Touch [ HDD] on the LCD screen of the camcorder. ImageMixer Menu appears on the screen of the computer. 8 Click [Playlist DVD creation] on the screen of the computer. [Project Settings] screen appears. • You do not need to change the setting unless necessary. • During the operation, do not apply vibration on the camcorder. The operation may be terminated. 9 Click [OK]. ImageMixer3 DVD Authoring starts up, and it allows you to select images in the Playlist created on the camcorder. • By using ImageMixer3 DVD Authoring, you can create the index menu or select images to be saved on a DVD. For details, see the help in the software. 98
-
 1
1 -
2
-
3
-
4
-
5
-
6
-
7
-
8
-
9
-
10
-
11
-
12
-
13
-
14
-
15
-
16
-
17
-
18
-
19
-
20
-
21
-
22
-
23
-
24
-
25
-
26
-
27
-
28
-
29
-
30
-
31
-
32
-
33
-
34
-
35
-
36
-
37
-
38
-
39
-
40
-
41
-
42
-
43
-
44
-
45
-
46
-
47
-
48
-
49
-
50
-
51
-
52
-
53
-
54
-
55
-
56
-
57
-
58
-
59
-
60
-
61
-
62
-
63
-
64
-
65
-
66
-
67
-
68
-
69
-
70
-
71
-
72
-
73
-
74
-
75
-
76
-
77
-
78
-
79
-
80
-
81
-
82
-
83
-
84
-
85
-
86
-
87
-
88
-
89
-
90
-
91
-
92
-
 93
93 -
 94
94 -
 95
95 -
 96
96 -
 97
97 -
 98
98 -
 99
99 -
 100
100 -
 101
101 -
 102
102 -
 103
103 -
104
-
105
-
106
-
107
-
108
-
109
-
110
-
111
-
112
-
113
-
114
-
115
-
116
-
117
-
118
-
119
-
120
-
121
-
122
-
123
-
124
-
125
-
126
-
127
-
128
-
129
-
130
-
131
-
132
 |
 |
