Sony UWPV6/4244 Operating Instructions - Page 29
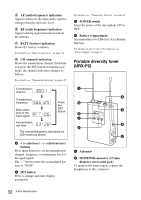
Hand-held microphone (UTX-H2), AF audio frequency indication
 |
View all Sony UWPV6/4244 manuals
Add to My Manuals
Save this manual to your list of manuals |
Page 29 highlights
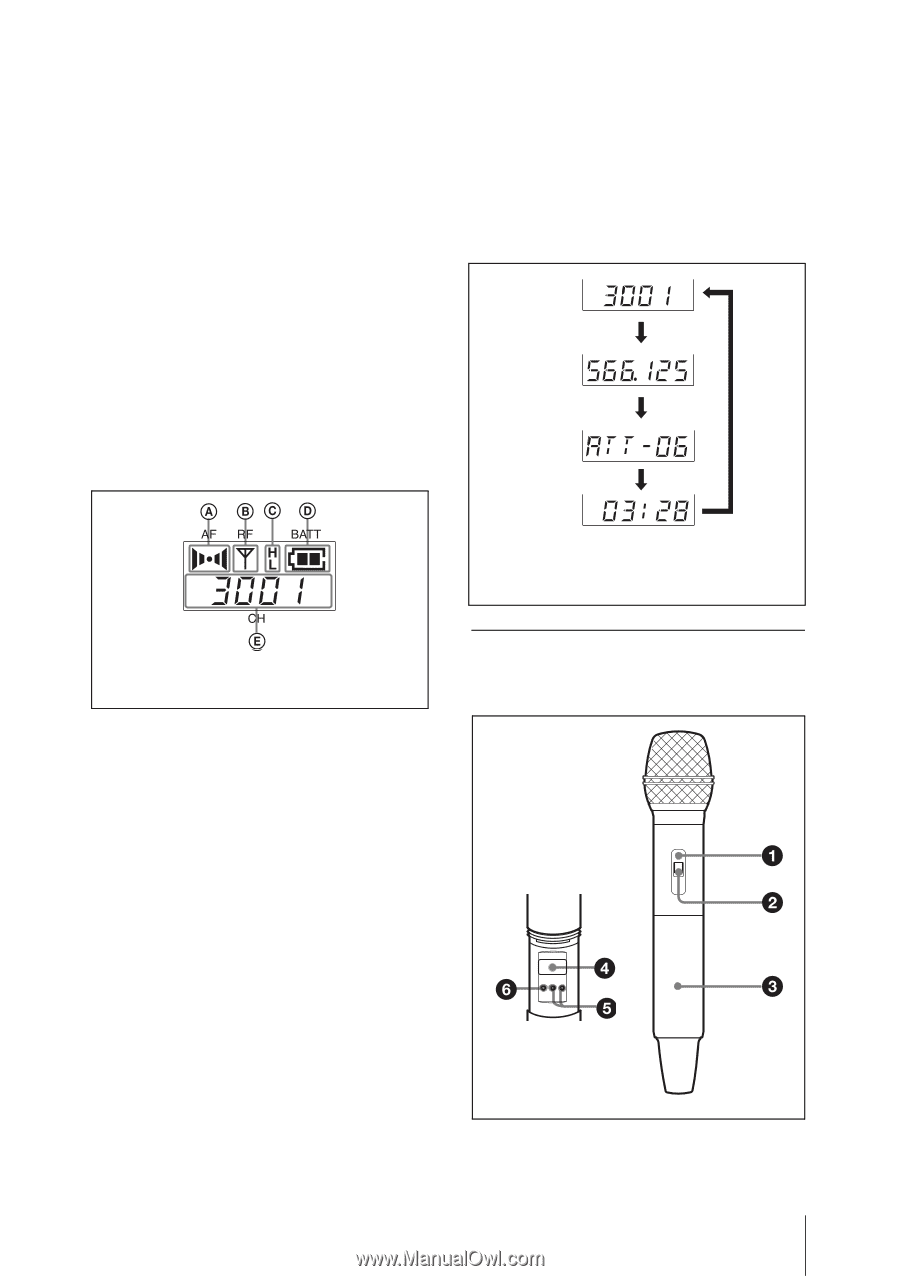
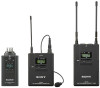
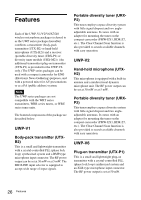
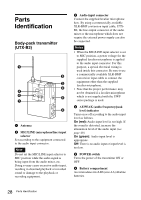
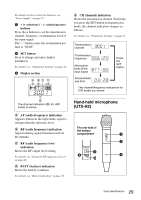
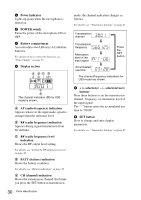
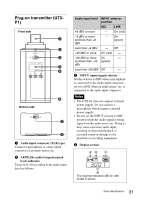
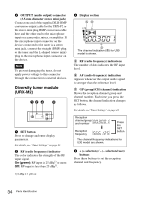
For details on how to insert the batteries, see "Power Supply" on page 35. g + (+ selection) / - (- selection/reset) buttons Press these buttons to set the transmission channel, frequency, or attenuation level of the input signal. The "-" button resets the accumulated use time to "00:00". h SET button Press to change and enter display parameters. For details, see "Transmitter Settings" on page 47. i Display section E CH (channel) indication Shows the transmission channel. Each time you press the SET button in transmission mode, the channel indication changes as follows. For details, see "Transmitter Settings" on page 47. Transmission channel Transmission frequency Attenuation level of the input signal Press the SET button. Accumulated use time The channel/frequency indications for U30 model are shown. The channel indication (E) for U30 model is shown. A AF (audio frequency) indication Appears whenever the input audio signal is stronger than the reference level. B RF (radio frequency) indication Appears during signal transmission from the antenna. C RF (radio frequency) level indication Shows the RF output level setting. For details, see "Setting the RF output power level" on page 48. D BATT (battery) indication Shows the battery condition. For details, see "Battery indication" on page 36. Hand-held microphone (UTX-H2) The rear side of the battery compartment 29 Parts Identification
-
 1
1 -
2
-
3
-
4
-
5
-
6
-
7
-
8
-
9
-
10
-
11
-
12
-
13
-
14
-
15
-
16
-
17
-
18
-
19
-
20
-
21
-
22
-
23
-
 24
24 -
 25
25 -
 26
26 -
 27
27 -
 28
28 -
 29
29 -
 30
30 -
 31
31 -
 32
32 -
 33
33 -
 34
34 -
35
-
36
-
37
-
38
-
39
-
40
-
41
-
42
-
43
-
44
-
45
-
46
-
47
-
48
-
49
-
50
-
51
-
52
-
53
-
54
-
55
-
56
-
57
-
58
-
59
-
60
-
61
-
62
-
63
 |
 |