Sony UWPV6/4244 Operating Instructions - Page 43
Tuner Settings, Setting the reception channel - pdf
 |
View all Sony UWPV6/4244 manuals
Add to My Manuals
Save this manual to your list of manuals |
Page 43 highlights
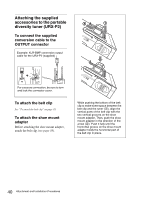
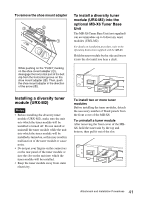
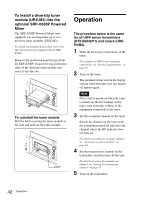
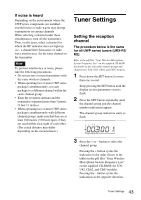
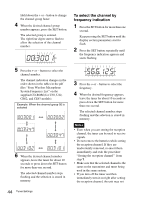
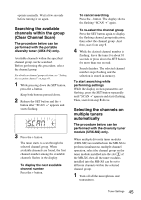
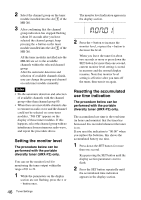
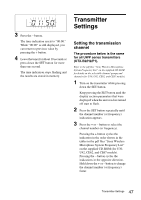
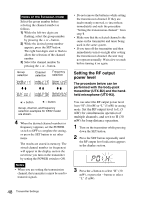
If noise is heard Depending on the environment where the UWP series components are installed, external noise or radio waves may disrupt transmission on certain channels. When selecting a channel under these circumstances, turn off the transmitter. Then, on the tuner, select a channel for which the RF indicator does not light up (i.e., a channel free from noise or radio wave interference). Set the same channel on the transmitter. Note To prevent interference or noise, please take the following precautions. • Do not use two or more transmitters with the same wireless channels. • When operating two or more UWP series packages simultaneously, set each package to a different channel within the same channel group. • Keep the reception antenna and the transmitter separated more than 3 meters (9 feet 11 inches). • When operating two or more UWP series packages simultaneously with different channel groups, make sure that they are at least 100 meters (330 feet) apart, if they are used within clear sight of each other. (The actual distance may differ depending on the circumstances.) Tuner Settings Setting the reception channel The procedure below is the same for all UWP series tuners (URX-P2/ M2). Refer to the pdf files "Sony Wireless Microphone System Frequency List" on the supplied CD-ROM for details on the selectable channel groups and channels (for U30, U42, CE62, and CE67 models). 1 Press down the SET button for more than one second. Keep pressing the SET button until the display section parameters start to flash. 2 Press the SET button repeatedly until the channel group and the channel number indications appear. The channel group indication starts to flash. 3 Press the + or - button to select the channel group. Pressing the + button cycles the indication in the order shown in the tables in the pdf files "Sony Wireless Microphone System Frequency List" on the supplied CD-ROM (for U30, U42, CE62, and CE67 models). Pressing the - button cycles the indications in the opposite direction. 43 Tuner Settings
-
 1
1 -
2
-
3
-
4
-
5
-
6
-
7
-
8
-
9
-
10
-
11
-
12
-
13
-
14
-
15
-
16
-
17
-
18
-
19
-
20
-
21
-
22
-
23
-
24
-
25
-
26
-
27
-
28
-
29
-
30
-
31
-
32
-
33
-
34
-
35
-
36
-
37
-
 38
38 -
 39
39 -
 40
40 -
 41
41 -
 42
42 -
 43
43 -
 44
44 -
 45
45 -
 46
46 -
 47
47 -
 48
48 -
49
-
50
-
51
-
52
-
53
-
54
-
55
-
56
-
57
-
58
-
59
-
60
-
61
-
62
-
63
 |
 |