Sony UWPV6/4244 Operating Instructions - Page 41
Installing a diversity tuner module (URX-M2), To install a diversity tuner, module URX-M2 into
 |
View all Sony UWPV6/4244 manuals
Add to My Manuals
Save this manual to your list of manuals |
Page 41 highlights
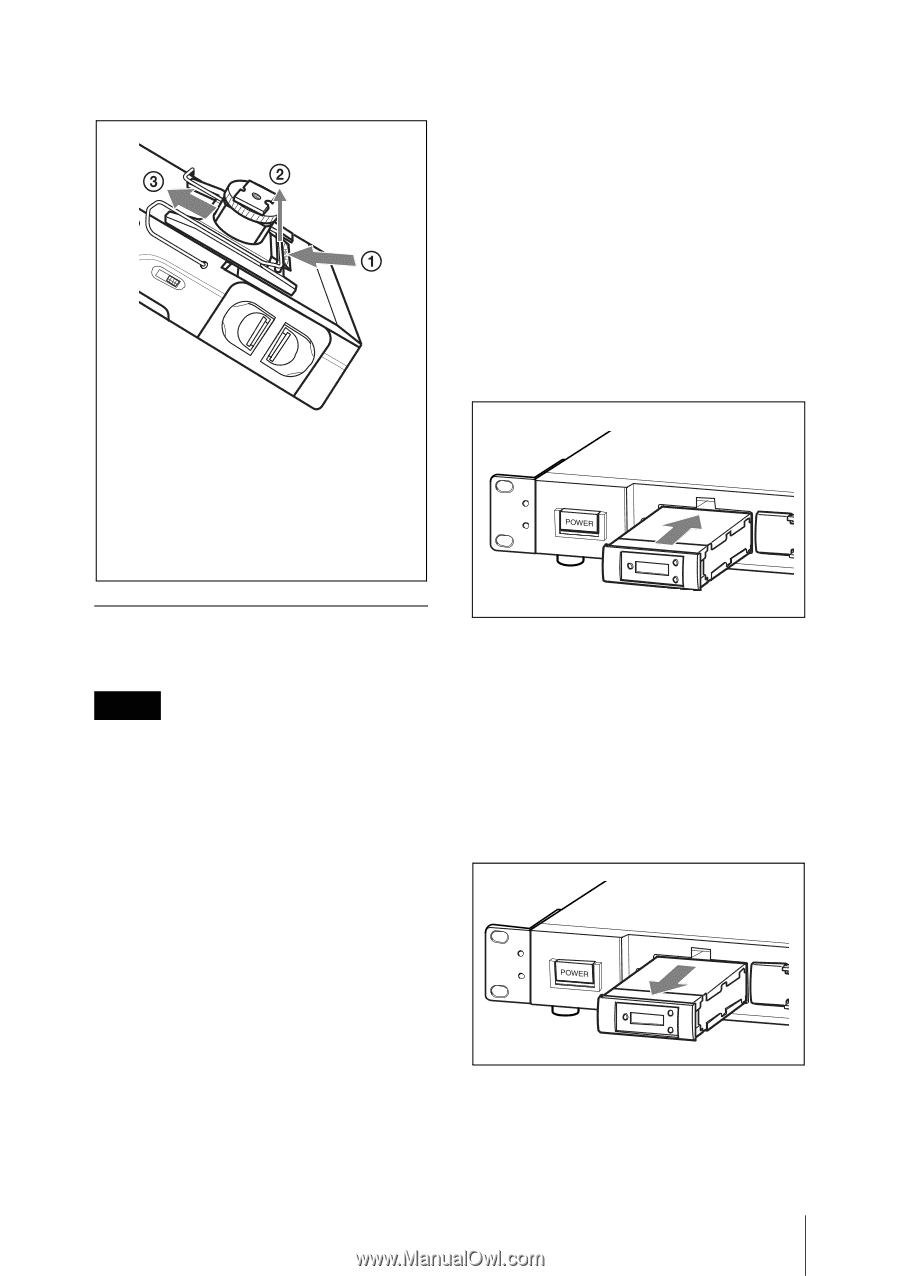
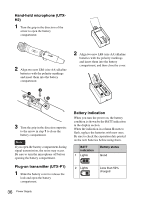
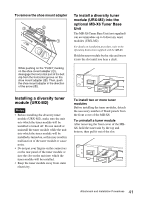
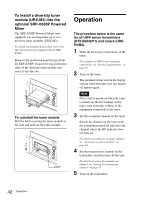
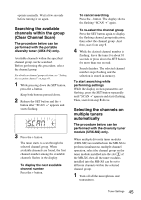
To remove the shoe mount adapter To install a diversity tuner module (URX-M2) into the optional MB-X6 Tuner Base Unit The MB-X6 Tuner Base Unit (not supplied) can accommodate up to 6 diversity tuner modules (URX-M2). For details on installation procedure, refer to the Operating Instructions supplied with the MB-X6. Hold the tuner module by the side and insert it into the slot until you hear a click. While pushing on the "PUSH" marking on the shoe mount adapter (1), disengage the horizontal part of the belt clip from the horizontal groove on the shoe mount adapter (2). Then, push the shoe mount adapter in the direction of the arrow (3). Installing a diversity tuner module (URX-M2) Notes • Before installing the diversity tuner module (URX-M2), make sure the unit into which the tuner module will be installed is turned off. Do not install or uninstall the tuner module while the unit into which the tuner module will be installed is turned on, as this may result in malfunction of the tuner module or cause noise. • Do not put your fingers on the connectors on the rear panel of the tuner module or into the slot on the unit into which the tuner module will be installed. • Keep the tuner module away from static electricity. To install two or more tuner modules Before installing the tuner modules, detach the necessary number of blank panels from the front cover of the MB-X6. To uninstall a tuner module After removing the front cover of the MBX6, hold the tuner unit by the top and bottom, then pull it out of the slot. 41 Attachment and Installation Procedures
-
 1
1 -
2
-
3
-
4
-
5
-
6
-
7
-
8
-
9
-
10
-
11
-
12
-
13
-
14
-
15
-
16
-
17
-
18
-
19
-
20
-
21
-
22
-
23
-
24
-
25
-
26
-
27
-
28
-
29
-
30
-
31
-
32
-
33
-
34
-
35
-
 36
36 -
 37
37 -
 38
38 -
 39
39 -
 40
40 -
 41
41 -
 42
42 -
 43
43 -
 44
44 -
 45
45 -
 46
46 -
47
-
48
-
49
-
50
-
51
-
52
-
53
-
54
-
55
-
56
-
57
-
58
-
59
-
60
-
61
-
62
-
63
 |
 |