Sony UWPV6/4244 Operating Instructions - Page 49
Setting the attenuation level of the audio input, Resetting the accumulated use time indication
 |
View all Sony UWPV6/4244 manuals
Add to My Manuals
Save this manual to your list of manuals |
Page 49 highlights
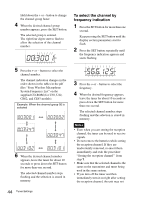
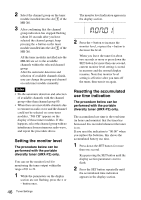
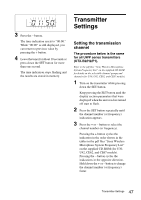
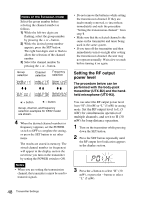
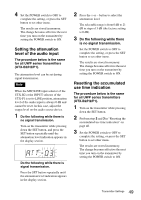
4 Set the POWER switch to OFF to complete the setting, or press the SET button to set other items. The results are stored in memory. The change becomes effective the next time you turn on the transmitter by setting the POWER switch to ON. Setting the attenuation level of the audio input The procedure below is the same for all UWP series transmitters (UTX-B2/H2/P1). The attenuation level can be set during signal transmission. Note When the MIC/LINE input selector of the UTX-B2 or the INPUT selector of the UTX-P1 is set to LINE position, attenuation level of the audio input is always 0 dB and cannot be reset. In this case, adjust the output level on the audio source device. 1 Do the following while there is no signal transmission. Turn on the transmitter while pressing down the SET button, and press the SET button repeatedly until the attenuation level indication appears in the display section. Do the following while there is signal transmission. Press the SET button repeatedly until the attenuation level indication appears in the display section. 2 Press the + or - button to select the attenuation level. The selectable range is from 0 dB to 21 dB in steps of 3 dB (the factory setting is 0 dB). 3 Do the following while there is no signal transmission. Set the POWER switch to OFF to complete the setting, or press the SET button to set other items. The results are stored in memory. The change becomes effective the next time you turn on the transmitter by setting the POWER switch to ON. Resetting the accumulated use time indication The procedure below is the same for all UWP series transmitters (UTX-B2/H2/P1). 1 Turn on the transmitter while pressing down the SET button. 2 Perform step 2 and 3 in "Resetting the accumulated use time indication" on page 46. 3 Set the POWER switch to OFF to complete the setting, or press the SET button to set other items. The results are stored in memory. The change becomes effective the next time you turn on the transmitter by setting the POWER switch to ON. 49 Transmitter Settings
-
 1
1 -
2
-
3
-
4
-
5
-
6
-
7
-
8
-
9
-
10
-
11
-
12
-
13
-
14
-
15
-
16
-
17
-
18
-
19
-
20
-
21
-
22
-
23
-
24
-
25
-
26
-
27
-
28
-
29
-
30
-
31
-
32
-
33
-
34
-
35
-
36
-
37
-
38
-
39
-
40
-
41
-
42
-
43
-
 44
44 -
 45
45 -
 46
46 -
 47
47 -
 48
48 -
 49
49 -
 50
50 -
 51
51 -
 52
52 -
 53
53 -
 54
54 -
55
-
56
-
57
-
58
-
59
-
60
-
61
-
62
-
63
 |
 |