TP-Link TL-WR841N User Guide
TP-Link TL-WR841N Manual
 |
UPC - 845973051242
View all TP-Link TL-WR841N manuals
Add to My Manuals
Save this manual to your list of manuals |
TP-Link TL-WR841N manual content summary:
- TP-Link TL-WR841N | User Guide - Page 1
TL-WR841N TL-WR841ND Wireless N Router Rev: 1.0.1 1910010029 - TP-Link TL-WR841N | User Guide - Page 2
& TRADEMARKS Specifications are subject to change without notice. is a registered trademark of TP-LINK TECHNOLOGIES CO., LTD. Other brands the equipment and receiver. • Connect the equipment into an outlet on a circuit different from that to which the receiver is connected. • Consult the dealer or - TP-Link TL-WR841N | User Guide - Page 3
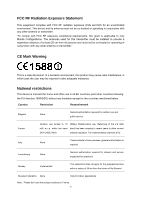
to only Mobile Configurations. The antennas used for this transmitter must be installed to provide a separation distance of at least 20 cm from all is required Luxembourg None General authorization required for network and service supply(not for spectrum) Norway Implemented This subsection does - TP-Link TL-WR841N | User Guide - Page 4
Requirements...6 2.2 Installation Environment Requirements 6 2.3 Connecting the Router ...6 Chapter 3. Quick Installation Guide ...8 3.1 TCP/IP configuration...8 3.2 Quick Installation Guide ...10 Chapter 4. Configuring the Router ...14 4.1 Login ...14 4.2 Status ...14 4.3 Quick Setup ...16 4.4 QSS - TP-Link TL-WR841N | User Guide - Page 5
43 4.9.2 IP Filtering ...44 4.9.3 Domain Filtering ...47 4.9.4 MAC Filtering...49 4.10 Static Routing...50 4.11 Dynamic DNS ...52 4.12 System Tools...53 4.12.1 Time Setting ...53 4.12.2 Firmware ...54 4.12.3 Factory Defaults ...55 4.12.4 Backup & Restore 55 4.12.5 Reboot...56 4.12.6 Password...56 - TP-Link TL-WR841N | User Guide - Page 6
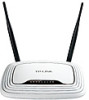
TL-WR841N/TL-WR841ND Wireless N Router Package Contents The following items should be found in your package: ¾ TL-WR841N/TL-WR841ND Wireless N Router ¾ DC Power Adapter for TL-WR841N/TL-WR841ND Wireless N Router ¾ Quick Installation Guide ¾ Resource CD for TL-WR841N/TL-WR841ND Wireless N Router, - TP-Link TL-WR841N | User Guide - Page 7
TL-WR841N/841ND Wireless N Router provides complete data privacy. Flexible Access Control The TL-WR841N/TL-WR841ND Wireless N Router provides flexible access control, so that parents or network administrators can establish restricted access policies for children or staff. It also supports Virtual - TP-Link TL-WR841N | User Guide - Page 8
Dynamic IP/Static IP/PPPoE Internet access. ¾ Supports Virtual Server, Special Application and DMZ host. ¾ Supports UPnP, Dynamic DNS, Static Routing. ¾ Provide Automatic-connection and Scheduled Connection on certain time to the Internet ¾ Built-in NAT and DHCP server supporting static IP address - TP-Link TL-WR841N | User Guide - Page 9
1.4 Panel Layout 1.4.1 The Front Panel TL-WR841N/TL-WR841ND Wireless N Router Figure 1-1 Front Panel sketch The Router's LEDs and the QSS button are located on the front panel (View from left to right). Name Power System WLAN WAN, LAN 1-4 QSS Status Indication - TP-Link TL-WR841N | User Guide - Page 10
with this TL-WR841N/TL-WR841ND Wireless N Router. ¾ LAN 1,2,3,4: These ports (1, 2, 3, 4) connect the router to the local PC(s) ¾ WAN: This WAN port is where you will connect the DSL/cable Modem, or Ethernet ¾ Reset button There are two ways to reset to the router's factory defaults: 1) Use - TP-Link TL-WR841N | User Guide - Page 11
TL-WR841N/TL-WR841ND Wireless N Router Chapter 2. Connecting the Router 2.1 System Requirements ¾ Broadband Internet Access Service (DSL/Cable/Ethernet) ¾ One DSL/Cable Modem that has an RJ45 connector (which is not necessary if the router is connected directly to the Ethernet.) ¾ PCs with a working - TP-Link TL-WR841N | User Guide - Page 12
TL-WR841N/TL-WR841ND Wireless N Router 5. Connect the DSL/Cable Modem to the WAN port on the router, shown in Figure 2-1. 6. Connect the DC power adapter to the DC power socket on the router, and the other end into an electrical outlet. The router will start to work automatically. 7. Power on your - TP-Link TL-WR841N | User Guide - Page 13
Quick Setup Wizard within minutes. 3.1 TCP/IP configuration The default IP address of the TL-WR841ND Wireless N Router is 192.168.1.1. And the default Subnet Mask is 255.255.255.0. These values can be changed as you desire. In this guide, we use all the default values for description. Connect the - TP-Link TL-WR841N | User Guide - Page 14
TL-WR841N/TL-WR841ND Wireless N Router Figure 3-1 Success result of Ping command ¾ If the result displayed is similar to the Figure 3-2, it means the connection between your PC and the router is failed. Figure 3-2 Failure result of Ping command Please check the connection following these steps: 1. - TP-Link TL-WR841N | User Guide - Page 15
the TL-WR841ND Wireless N Router. The Web-based utility can be used on any Windows, Macintosh or UNIX OS with a Web browser. 1. To access the configuration utility, open a web-browser and type in the default address http://192.168.1.1 in the address field of the browser. Figure 3-3 Login the router - TP-Link TL-WR841N | User Guide - Page 16
TL-WR841N/TL-WR841ND Wireless N Router 3. Click Next, and then Choose WAN Connection Type page will appear, shown in Figure 3-6. Figure 3-6 Choose WAN Connection Type The router supports three popular ways to connect to Internet. Please select one compatible with your ISP. Click Next to enter the - TP-Link TL-WR841N | User Guide - Page 17
TL-WR841N/TL-WR841ND Wireless N Router Figure 3-8 Quick Setup - Static IP ¾ IP Address - This is the WAN IP address as seen by external users on the Internet (including your ISP). Enter the IP address into the field. ¾ Subnet Mask - The Subnet Mask is used for the WAN IP address, it is usually 255. - TP-Link TL-WR841N | User Guide - Page 18
. ¾ Channel - This field determines which operating frequency will be used. The default channel is set to 6. It is not necessary to change the wireless channel unless you notice interference problems with another nearby access point ¾ Channel width - Select any channel width from the pull-down list - TP-Link TL-WR841N | User Guide - Page 19
TL-WR841N/TL-WR841ND Wireless N Router Chapter 4. Configuring the Router This chapter will show each Web page's key functions and the configuration way. 4.1 Login After your successful login, you will see the eleven main menus on the left of the Web-based utility. On the right, there are the - TP-Link TL-WR841N | User Guide - Page 20
TL-WR841N/TL-WR841ND Wireless N Router Figure 4-1 Router Status 15 - TP-Link TL-WR841N | User Guide - Page 21
TL-WR841N/TL-WR841ND Wireless N Router 4.3 Quick Setup Please refer to Section 3.2: "Quick Installation Guide." 4.4 QSS This section will guide you add a new wireless device to an existing network quickly by QSS (Quick Secure Setup) function. a). Choose menu "QSS", you will see the next screen ( - TP-Link TL-WR841N | User Guide - Page 22
TL-WR841N/TL-WR841ND Wireless N Router method, you can add it to the network by PBC with the following two methods. Method One: Step 1: Press the QSS button on the front panel of the router. Step 2: For the configuration of the wireless adapter, please choose Push the button on my access point in - TP-Link TL-WR841N | User Guide - Page 23
TL-WR841N/TL-WR841ND Wireless N Router Figure 4-3 Add A New Device Step 2: Choose Press the button of the new device in two minutes and click Connect. Step 3: For the configuration of the wireless adapter, please choose Push the button on my access point in the configuration utility of the QSS as - TP-Link TL-WR841N | User Guide - Page 24
TL-WR841N/TL-WR841ND Wireless N Router Step 2: Choose Enter the new device's PIN and enter the PIN code of the wireless adapter in the field behind PIN in the above figure. Then click Connect. ) Note: The PIN code of the adapter is always displayed on the QSS configuration screen Step 3: For the - TP-Link TL-WR841N | User Guide - Page 25
TL-WR841N/TL-WR841ND Wireless N Router code. Here takes the PIN code 12345670 of this router for example). Step 2: For the configuration of the wireless adapter, please choose Enter a PIN from my access point in the configuration utility of the QSS as below, and enter the PIN code of the Router into - TP-Link TL-WR841N | User Guide - Page 26
router or reset it in dotted-decimal notation (factory default: 192.168.1.1). ¾ Subnet Mask - An address code that determines the size of the network. Normally use 255.255.255.0 as the subnet mask. ) Note: a. If you change the IP Address of LAN, you must use the new IP Address to login the router - TP-Link TL-WR841N | User Guide - Page 27
TL-WR841N/TL-WR841ND Wireless N Router DHCP server will change accordingly at the same time,while the Virtual Server and DMZ Host will not take effect until they are re-configured. 4.5.2 WAN Choose menu "Network→WAN", you can configure the IP parameters of the WAN on the screen below. 1. If your ISP - TP-Link TL-WR841N | User Guide - Page 28
-WR841N/TL-WR841ND Wireless N Router If you find error when you go to a Web site after entering the DNS addresses, it is likely that your DNS servers are set up improperly. You should contact your ISP to get DNS server addresses. ¾ Get IP with Unicast DHCP - A few ISPs' DHCP servers do not support - TP-Link TL-WR841N | User Guide - Page 29
TL-WR841N/TL-WR841ND Wireless N Router Figure 4-8 WAN - PPPoE ¾ User Name/Password - Enter the User Name and Password provided by your ISP. These fields are case-sensitive. ¾ Connect on Demand - In this mode, the Internet connection can be terminated automatically after a specified inactivity period - TP-Link TL-WR841N | User Guide - Page 30
Interval - The router will detect Access Concentrator online at every interval. The default value is "0". You can input the value between "0"and "120". The value "0" means no detect. ¾ DNS IP address - If your ISP does not automatically assign DNS addresses to the router during login, please click - TP-Link TL-WR841N | User Guide - Page 31
TL-WR841N/TL-WR841ND Wireless N Router 4.5.3 MAC Clone Choose menu "Network→MAC Clone", you can configure the MAC address of the WAN on the screen below, Figure 4-10: Figure 4-10 MAC Address Clone Some ISPs require that you register the MAC Address of your adapter. Changes are rarely needed here. ¾ - TP-Link TL-WR841N | User Guide - Page 32
in your network. Considering your wireless network security, the default SSID is set to be TP-LINK_xxxxxx (xxxxxx indicates the last unique six numbers of each Router's MAC address). This value is case-sensitive. For example, TP-LINK is NOT the same as tp-link. ¾ Region - Select your region from - TP-Link TL-WR841N | User Guide - Page 33
to change the wireless channel unless you notice interference problems with another nearby access point ¾ Channel width - Select any channel width from the pull-down list. The default setting is automatic, which can adjust the channel width for your clients automatically. ¾ Enable Wireless Router - TP-Link TL-WR841N | User Guide - Page 34
TL-WR841N/TL-WR841ND Wireless N Router Figure 4-13 Wireless Security ¾ Disable Security - If you do not want to use wireless security, select this check box, but it's recommended strongly to choose one of the following modes to enable security. ¾ WEP - It is based on the IEEE 802.11 standard. • Type - TP-Link TL-WR841N | User Guide - Page 35
IP - Enter the IP address of the Radius Server. • Radius Port - Enter the port that radius service used. • Radius Password - Enter the password for the Radius Server. • Group Key Update Period - Specify the group key update interval in seconds. The value should be 30 or above. Enter 0 to disable - TP-Link TL-WR841N | User Guide - Page 36
TL-WR841N/TL-WR841ND Wireless N Router • PSK Passphrase - You can enter a Passphrase between 8 and 63 characters. • Group Key Update Period - Specify the group key update interval in seconds. The value should be 30 or above. Enter 0 to disable the update. Be sure to click the Save button to save - TP-Link TL-WR841N | User Guide - Page 37
TL-WR841N/TL-WR841ND Wireless N Router Figure 4-15 Add or Modify Wireless MAC Address Filtering entry To add or modify a MAC Address Filtering entry, follow these instructions: 1. Enter the appropriate MAC Address into the MAC Address field. The format of the MAC Address is XX-XX-XX-XX-XX-XX (X is - TP-Link TL-WR841N | User Guide - Page 38
TL-WR841N/TL-WR841ND Wireless N Router to access for Filtering Rules. 3. Delete all or disable all entries if there are any entries already. 4. Click the Add New... button and enter the MAC address 00-0A-EB-00-07-BE/00-0A-EB-00-07-5F in the MAC Address field, then enter wireless station A/B in the - TP-Link TL-WR841N | User Guide - Page 39
TL-WR841N/TL-WR841ND Wireless N Router ¾ Fragmentation Threshold - This value is the maximum size determining whether packets will be fragmented. Setting the Fragmentation Threshold too low may result in poor network performance since excessive packets. 2346 is the default setting and is recommended - TP-Link TL-WR841N | User Guide - Page 40
TL-WR841N/TL-WR841ND Wireless N Router You cannot change any of the values on this page. To update this page and to show the current connected wireless stations, click on the Refresh button. If the numbers of connected wireless stations go beyond one page, click the Next button to go to the next - TP-Link TL-WR841N | User Guide - Page 41
TL-WR841N/TL-WR841ND Wireless N Router computer. ¾ Start IP Address - This field specifies the first of the addresses in the IP address pool. 192.168.1.100 is the default start address. ¾ End IP Address - This field specifies the last of the addresses in the IP address pool. 192.168.1.199 is the - TP-Link TL-WR841N | User Guide - Page 42
TL-WR841N/TL-WR841ND Wireless N Router You cannot change any of the values on this page. To update this page and to show the current attached devices, click the Refresh button. 4.7.3 Address Reservation Choose menu "DHCP→Address Reservation", you can view and add a reserved addresses for clients via - TP-Link TL-WR841N | User Guide - Page 43
. TL-WR841N/TL-WR841ND Wireless N Router Click the Enable/ Disabled All button to make all entries enabled/disabled Click the Delete All button to delete all entries Click the Next button to go to the next page and Click the Previous button to return the previous page. 4.8 Forwarding Figure - TP-Link TL-WR841N | User Guide - Page 44
/TL-WR841ND Wireless N Router ¾ IP Address - The IP Address of the PC providing the service application. ¾ Protocol - The protocol used for this application, either TCP, UDP, or All (all protocols supported by the router). ¾ Status - The status of this entry either Enabled or Disabled. To setup - TP-Link TL-WR841N | User Guide - Page 45
TL-WR841N/TL-WR841ND Wireless N Router Click the Next button to go to the next page and click the Previous button to return the previous page. ) Note: If you set the virtual server of service port as 80, you must set the Web management port on System Tools -> Remote Management page to be any other - TP-Link TL-WR841N | User Guide - Page 46
-WR841N/TL-WR841ND Wireless N Router 3010-3030. ¾ Incoming Protocol - The protocol used for Incoming Ports Range, either TCP or UDP, or ALL (all protocols supported by the router). ¾ Status - The status of this entry either Enabled or Disabled. To add a new rule, enter the following data on the Port - TP-Link TL-WR841N | User Guide - Page 47
special-purpose service such as Internet gaming or videoconferencing. DMZ host forwards all the ports at the same time. Any PC whose port is being forwarded must have its DHCP client function disabled and should have a new static IP Address assigned to it because its IP Address may change when using - TP-Link TL-WR841N | User Guide - Page 48
TL-WR841N/TL-WR841ND Wireless N Router Figure 4-29 UPnP Setting ¾ Current UPnP Status - UPnP can be enabled or disabled by clicking the Enable or Disable button. As allowing this may present a risk to security, this feature is disabled by default. ¾ Current UPnP Settings List - This table displays - TP-Link TL-WR841N | User Guide - Page 49
TL-WR841N/TL-WR841ND Wireless N Router Figure 4-31 Firewall ¾ Enable Firewall - the general firewall switch is on or off. ¾ Enable IP Address Filtering - set IP Address Filtering is enabled or disabled. There are two default filtering rules of IP Address Filtering, either Allow or Deny passing - TP-Link TL-WR841N | User Guide - Page 50
TL-WR841N/TL-WR841ND Wireless N Router Figure 4-32 IP address Filtering ¾ Effective Time - This is the time or the range of time for the entry to take effect. For example, 1800 - 2200, it means that the entry will take effect from 18:00 to 22:00. ¾ LAN IP - This is the LAN IP address or the range of - TP-Link TL-WR841N | User Guide - Page 51
TL-WR841N/TL-WR841ND Wireless N Router your local network during the time of 1800 to 2200; And wish to make the PCs with IP addresses 192.168.1.8 to 192.168.1.12 unable to visit the website of IP address 202.96.134.12 all the day, while other PCs have no limit. You can configure the rules as follows - TP-Link TL-WR841N | User Guide - Page 52
TL-WR841N/TL-WR841ND Other configurations for the entries: Wireless N Router Click the Delete button to delete the entry. Click the Enable All button to enable all the entries. Click the Disable All button to disable you to control access to certain websites on the Internet by specifying their - TP-Link TL-WR841N | User Guide - Page 53
TL-WR841N/TL-WR841ND Wireless N Router To Add a Domain filtering entry: For example: if you want to block the PCs on your LAN from accessing websites www.xxyy.com.cn, www.aabbcc.com and websites with end of .net on the Internet additional entries, repeat steps 1-4. After Disable All button to disable - TP-Link TL-WR841N | User Guide - Page 54
TL-WR841N/TL-WR841ND Wireless N Router 4.9.4 MAC Filtering Choose menu "Security→MAC Address Filtering", you can configure the MAC Address filtering rule in the next screen (shown in Figure 4-36). The MAC Address Filtering feature allows you to control access to the Internet by users on your local - TP-Link TL-WR841N | User Guide - Page 55
TL-WR841N/TL-WR841ND Wireless N Router 3. Enter the appropriate MAC address and descriptions, and then choose the enabled status. 4. Finally, click Save to make the rule take effect. To add additional entries, repeat steps 1-4. After you finish the configurations, you will see the rules in the table - TP-Link TL-WR841N | User Guide - Page 56
WR841N/TL-WR841ND Wireless N Router Figure 4-38 Static Routing To add static routing entries: 1. Click Add New... shown in Figure 4-38, you will see the following screen. Figure 4-39 Add or Modify a Static Route Entry 2. Enter the following data: ¾ Destination IP Address - The Destination IP Address - TP-Link TL-WR841N | User Guide - Page 57
TL-WR841N/TL-WR841ND Wireless N Router Click the Previous button to view the information in the previous screen, click the Next button to view the information in the next screen. 4.11 Dynamic DNS Choose menu "Dynamic DNS", you can configure the Dynamic DNS function in the next screen (shown in - TP-Link TL-WR841N | User Guide - Page 58
4.12 System Tools TL-WR841N/TL-WR841ND Wireless N Router Figure 4-41 The System Tools menu Choose menu "System Tools", you can see the submenus under the main menu: Time Settings, Firmware, Factory Defaults, Backup & Restore, Reboot, Password, System Log, Remote Management and Statistics. Click - TP-Link TL-WR841N | User Guide - Page 59
file must accord with the Router's current hardware version. To upgrade the router's firmware, follow these instructions below: 1. Download a more recent firmware upgrade file from the TP-LINK website (www.tp-link.com). 2. Type the path and file name of the update file into the "File" field. Or - TP-Link TL-WR841N | User Guide - Page 60
configurations of the Router to factory defaults on the following screen Figure 4-44 Restore Factory Default Click the Restore button to reset all configuration settings to their default values. • The default User Name: admin • The default Password: admin • The default IP Address: 192.168.1.1 • The - TP-Link TL-WR841N | User Guide - Page 61
TL-WR841N/TL-WR841ND Wireless N Router ¾ Click the Backup button to save all configuration settings as a backup file in your local computer. ¾ To upgrade the router's configuration, follow these instructions: • Click the Browse button to locate the update file for the device, or enter the exact path - TP-Link TL-WR841N | User Guide - Page 62
TL-WR841N/TL-WR841ND Wireless N Router Figure 4-47 Password It is recommended strongly that you should change the factory default user name and password of the router, because all users who try to access the router's Web-based utility or Quick Setup will be prompted for the router's default user - TP-Link TL-WR841N | User Guide - Page 63
will use when accessing your router from the Internet. The default IP address is 0.0.0.0. It means this function is disabled. To enable this function, change the default IP address to another IP address as desired. ) Note: 1) To access the router, you will type your router's WAN IP address into your - TP-Link TL-WR841N | User Guide - Page 64
TL-WR841N/TL-WR841ND Wireless N Router Figure 4-50 Statistics ¾ Current Statistics Status - Enable or Disable. The default value is disabled. To enable, click the Enable button. ¾ Packets Statistics Interval - The default value is 10. Select a value between 5 and 60 seconds in the pull-down list. - TP-Link TL-WR841N | User Guide - Page 65
Appendix A: FAQ TL-WR841N/TL-WR841ND Wireless N Router 1. How do I configure the router to access Internet by ADSL users? 1) First, configure the ADSL Modem configured in RFC1483 bridge model. 2) Connect the Ethernet cable from your ADSL Modem to the WAN port on the router. The telephone cord - TP-Link TL-WR841N | User Guide - Page 66
TL-WR841N/TL-WR841ND Wireless N Router 2. How do I configure the router to access Internet by Ethernet users? 1) Login to the router, click the "Network" menu on the left of your browser, and click "WAN" submenu. On the WAN page, select "Dynamic IP" for "WAN Connection Type", finish by clicking " - TP-Link TL-WR841N | User Guide - Page 67
TL-WR841N/TL-WR841ND Wireless N Router Figure A-5 Add or Modify a Virtual server Entry ) Note: Your Netmeeting partner should call your WAN IP, which is displayed on the "Status" page. 4) How to enable DMZ Host: Login to the router, click the "Forwarding" menu on the left of your browser, and click - TP-Link TL-WR841N | User Guide - Page 68
WR841ND Wireless N Router Figure A-7 Remote Management ) Note: If the above configuration takes effect, to configure to the router by typing http://192.168.1.1:88 (the router's LAN IP address: Web Management Port) in the address field of the Web browser. 3) Login to the router, click the "Forwarding - TP-Link TL-WR841N | User Guide - Page 69
TL-WR841N/TL-WR841ND Wireless N Router 3) Make sure the wireless stations have right KEY for encryption when the router is encrypted. 4) If the wireless connection is ready, but you can't access the router, check the IP Address of your wireless stations. 64 - TP-Link TL-WR841N | User Guide - Page 70
TL-WR841N/TL-WR841ND Wireless N Router Appendix B: Configuring the PCs In this section, we'll introduce how to install and configure the TCP/IP correctly in Windows XP. First make sure your Ethernet Adapter is working, refer to the adapter's manual if needed. 1. Install TCP/IP component 1) On the - TP-Link TL-WR841N | User Guide - Page 71
TL-WR841N/TL-WR841ND Wireless N Router Figure B-2 5) The following TCP/IP Properties window will display and the IP Address tab is open on this window by default. Now you have two ways to configure the TCP/IP protocol below: ¾ Setting IP address automatically Select Obtain an IP address - TP-Link TL-WR841N | User Guide - Page 72
TL-WR841N/TL-WR841ND Wireless N Router Figure B-3 ¾ Setting IP address manually 1 Select Use the following IP address radio button. And the following items available 2 If the router's LAN IP address is 192.168.1.1, type IP address is 192.168.1.x (x is from 2 to 254), and Subnet mask is 255.255.255 - TP-Link TL-WR841N | User Guide - Page 73
TL-WR841N/TL-WR841ND Wireless N Router Figure B-4 68 - TP-Link TL-WR841N | User Guide - Page 74
TL-WR841N/TL-WR841ND Wireless N Router Appendix C: Specifications General Standards Protocols Ports IEEE 802.3, 802.3u, 802.11b, 802.11g and 802.11n (draft 2.0) TCP/IP, PPPoE, DHCP, ICMP, NAT, SNTP One 10/100M Auto-Negotiation WAN RJ45 port, Four 10/100M Auto-Negotiation LAN RJ45 ports supporting - TP-Link TL-WR841N | User Guide - Page 75
TL-WR841N/TL-WR841ND Wireless N Router Internet Service Provider) - A company that provides access to the Internet. ¾ MTU (Maximum Transmission Unit) - The size in bytes of the largest packet that can be transmitted. ¾ NAT (Network Address Translation) - NAT technology translates IP addresses - TP-Link TL-WR841N | User Guide - Page 76
TL-WR841N/TL-WR841ND Wireless N Router ¾ PPPoE (Point to Point Protocol over Ethernet) - PPPoE is a protocol for connecting remote hosts to the Internet over an always-on connection by simulating a dial-up connection. ¾ SSID - A Service Set Identification is a thirty-two character (maximum)
-
 1
1 -
 2
2 -
 3
3 -
 4
4 -
 5
5 -
 6
6 -
 7
7 -
8
-
9
-
10
-
11
-
12
-
13
-
14
-
15
-
16
-
17
-
18
-
19
-
20
-
21
-
22
-
23
-
24
-
25
-
26
-
27
-
28
-
29
-
30
-
31
-
32
-
33
-
34
-
35
-
36
-
37
-
38
-
39
-
40
-
41
-
42
-
43
-
44
-
45
-
46
-
47
-
48
-
49
-
50
-
51
-
52
-
53
-
54
-
55
-
56
-
57
-
58
-
59
-
60
-
61
-
62
-
63
-
64
-
65
-
66
-
67
-
68
-
69
-
70
-
71
-
72
-
73
-
74
-
75
-
76
 |
 |
TL-WR841N
TL-WR841ND
Wireless N Router
Rev: 1.0.1
1910010029