Toshiba D-VR4XSU Owners Manual - Page 52
Recording a TV program
 |
View all Toshiba D-VR4XSU manuals
Add to My Manuals
Save this manual to your list of manuals |
Page 52 highlights
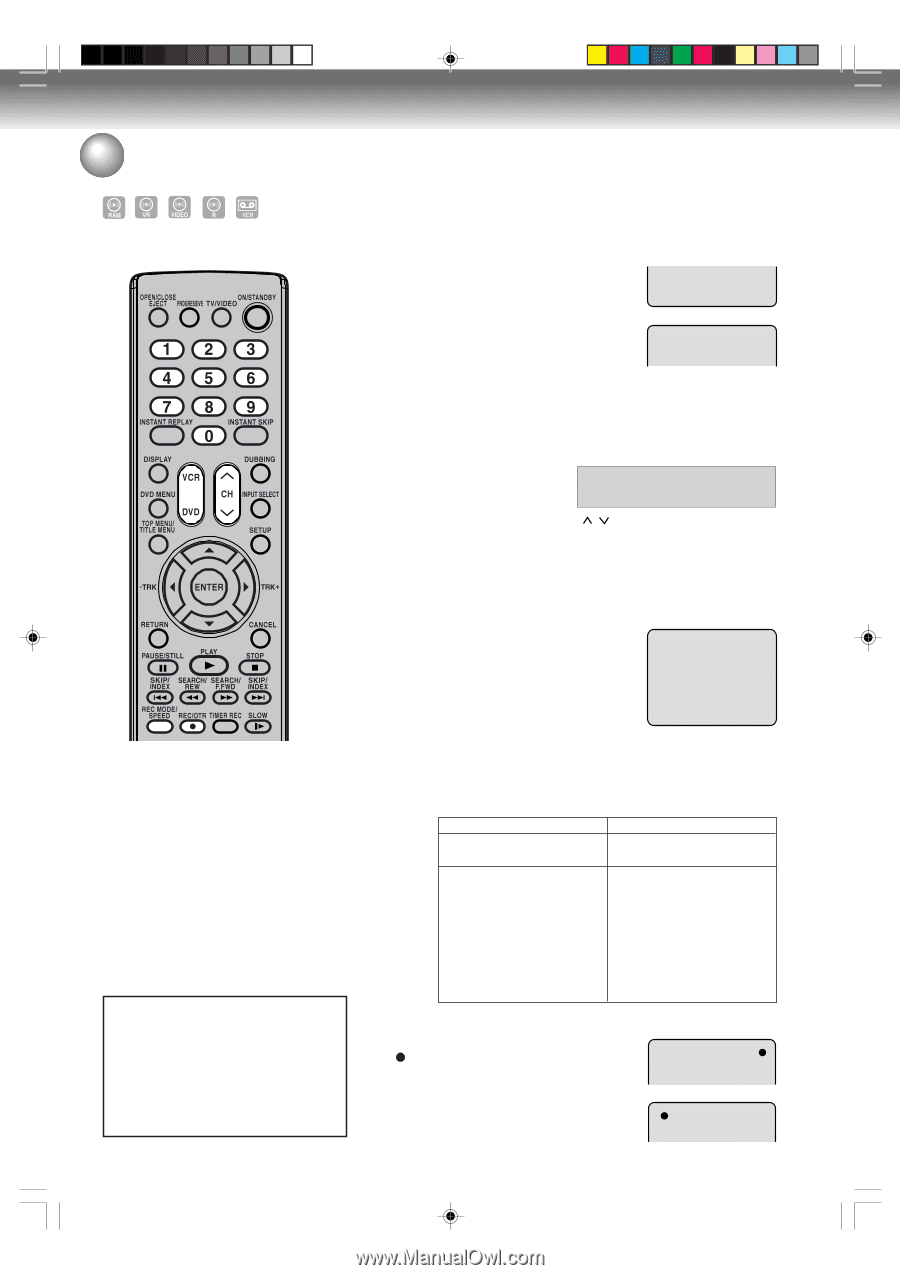
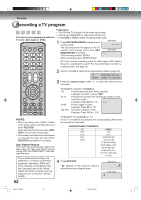
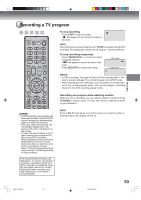
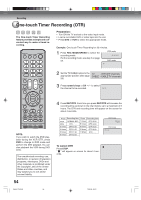
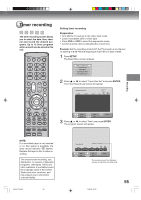
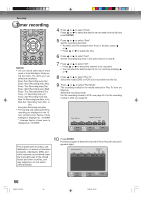
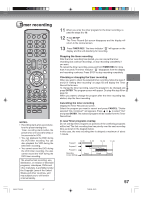
Recording Recording a TV program You can record programs you watch on TV onto video tapes or DVDs. Preparation: • Turn ON the TV and set it to the video input mode. • Load a recordable DVD or video tape into the unit. • Press DVD or VCR to select the appropriate mode. 1 Press REC MODE/SPEED to select the recording mode. VCR mode 00 : 00 : 00 SP The recording mode will appear on the TV monitor and change every time REC DVD mode MODE/SPEED is pressed. SP VCR recording modes: SP/SLP DVD recording modes: XP/SP/LP/SLP SP is the normal recording mode for video tapes. SLP offers 3 times the recording time as SP. For more information on DVD recording modes, see page 50. 2 Set the TV/CABLE option to the appropriate position (page 25). TV - VHF/UHF channels CABLE - CABLE TV channels 3 Press the numeric keys or CH / to select the channel to be recorded. TO SELECT Cable TV CHANNELS: 1-9 Press 0 twice and then 1-9 as required. Example: To select 2, Press "002". 10-12 Press 0 first and then the remaining 2 digits in order from left to right. Example: Press 012 for "12". CH 110 13-99 Press 2 digits in order. Example: Press 22 for "22". 100-125 Press the 3 digits in order. Example: Press 110 for "110". NOTES: • When recording onto a DVD, it takes some time to start recording when you press REC/OTR. Recording starts when you press REC/ OTR to record onto a video tape. • If the erase prevention tab of video tapes is removed, the tape will eject when REC/OTR is pressed for recording. Auto Rewind feature This VCR will automatically rewind the tape when the tape has ended (except during OTR and TIMER REC). It will also eject the tape. The unauthorized recording, use, distribution, or revision of television programs, videotapes, DVDs and other materials, is prohibited under the Copyright Laws of the United States and other countries, and may subject you to civil and/or criminal liability. TO SELECT TV CHANNELS 1-12: If only 1 or 2 buttons are pressed, the corresponding channel will be selected in 2 seconds. VHF/UHF/CABLE CHANNELS TV VHF 2-13 UHF 14-69 CABLE VHF 2-13 STD/HRC/IRC 14-36 (A) (W) 37-59 (AA) (WW) 60-85 (AAA) (ZZZ) 86-94 (86) (94) 95-99 (A-5) (A-1) 100-125 (100)(125) 01 (5A) 4 Press REC/OTR. " " appears on the screen for about 4 seconds and recording will start. VCR mode CH 110 DVD mode 52 2H5-01 P45-52 52 7/25/05, 23:22
-
 1
1 -
2
-
3
-
4
-
5
-
6
-
7
-
8
-
9
-
10
-
11
-
12
-
13
-
14
-
15
-
16
-
17
-
18
-
19
-
20
-
21
-
22
-
23
-
24
-
25
-
26
-
27
-
28
-
29
-
30
-
31
-
32
-
33
-
34
-
35
-
36
-
37
-
38
-
39
-
40
-
41
-
42
-
43
-
44
-
45
-
46
-
 47
47 -
 48
48 -
 49
49 -
 50
50 -
 51
51 -
 52
52 -
 53
53 -
 54
54 -
 55
55 -
 56
56 -
 57
57 -
58
-
59
-
60
-
61
-
62
-
63
-
64
-
65
-
66
-
67
-
68
-
69
-
70
-
71
-
72
-
73
-
74
-
75
-
76
-
77
-
78
-
79
-
80
-
81
-
82
-
83
-
84
-
85
-
86
-
87
-
88
-
89
-
90
-
91
-
92
 |
 |