Yamaha PSR-S950 Reference Manual - Page 79
Press the [F] REGISTRATION SEQUENCE ENABLE button to turn the Registration
 |
View all Yamaha PSR-S950 manuals
Add to My Manuals
Save this manual to your list of manuals |
Page 79 highlights
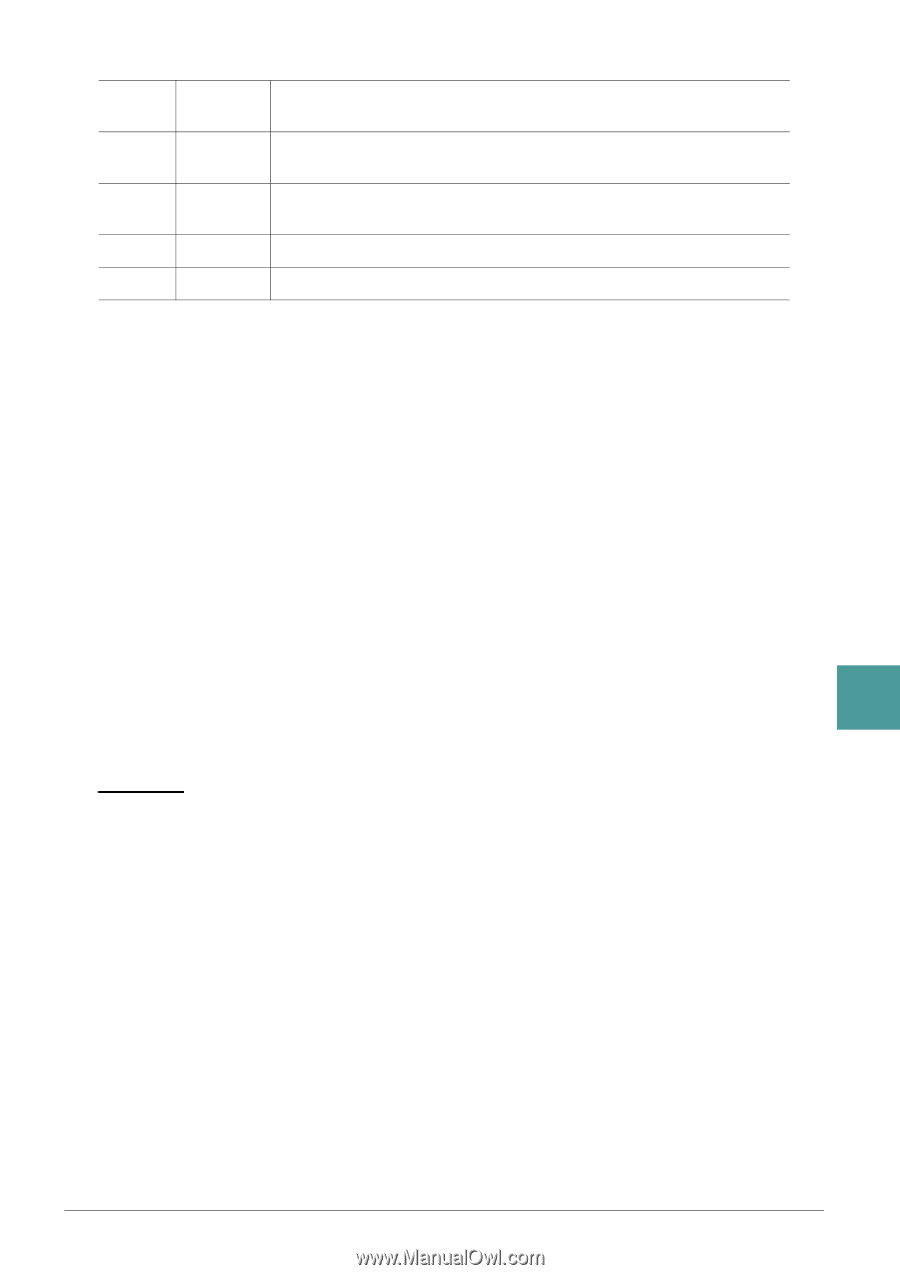
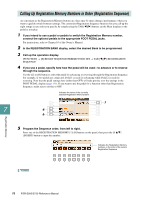
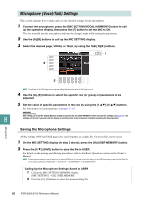
[1 ]- CURSOR [4 ] [5 ] REPLACE [6 ] INSERT [7 ] DELETE [8 ] CLEAR Moves the cursor. Replaces the number at the cursor position with the currently selected Registration Memory number. Inserts the number of the currently selected Registration Memory number to the cursor position. Deletes the number at the cursor position. Deletes all numbers in the sequence. 6 Use the [E] (SEQUENCE END) button to determine how Registration Sequence behaves when reaching the end of the sequence. • STOP Pressing the TAB [F] button or the "advance" pedal has no effect. The sequence is "stopped." • TOP The sequence starts again at the beginning. • NEXT BANK The sequence automatically moves to the beginning of the next Registration Memory Bank in the same folder. 7 Press the [F] (REGISTRATION SEQUENCE ENABLE) button to turn the Registration Sequence function on. 8 Press the [EXIT] button to exit from the operation display. After the confirmation message appears, press the [G] (YES) button to store the Registration Sequence program temporarily. 9 Press the REGIST BANK [+] and [-] buttons simultaneously to call up the REGISTRATION BANK display, then press the [6 ] (Save) button to save the current Registration Bank. 7 This operation is necessary because the Registration Sequence program can be saved to a Registration Bank. NOTICE For future recall, make sure to execute the Save operation. Failing to do so results in the loss of the Registration Sequence program. Registration Memory PSR-S950/S750 Reference Manual 79
-
 1
1 -
2
-
3
-
4
-
5
-
6
-
7
-
8
-
9
-
10
-
11
-
12
-
13
-
14
-
15
-
16
-
17
-
18
-
19
-
20
-
21
-
22
-
23
-
24
-
25
-
26
-
27
-
28
-
29
-
30
-
31
-
32
-
33
-
34
-
35
-
36
-
37
-
38
-
39
-
40
-
41
-
42
-
43
-
44
-
45
-
46
-
47
-
48
-
49
-
50
-
51
-
52
-
53
-
54
-
55
-
56
-
57
-
58
-
59
-
60
-
61
-
62
-
63
-
64
-
65
-
66
-
67
-
68
-
69
-
70
-
71
-
72
-
73
-
 74
74 -
 75
75 -
 76
76 -
 77
77 -
 78
78 -
 79
79 -
 80
80 -
 81
81 -
 82
82 -
 83
83 -
 84
84 -
85
-
86
-
87
-
88
-
89
-
90
-
91
-
92
-
93
-
94
-
95
-
96
-
97
-
98
-
99
-
100
-
101
-
102
-
103
-
104
-
105
-
106
-
107
-
108
-
109
-
110
-
111
-
112
-
113
-
114
-
115
-
116
-
117
-
118
 |
 |