Yamaha PocketrakCX Reference Manual - Page 17
Changing Recording mode, Turning the ALC (Auto Level Control) on and off
 |
UPC - 086792893440
View all Yamaha PocketrakCX manuals
Add to My Manuals
Save this manual to your list of manuals |
Page 17 highlights
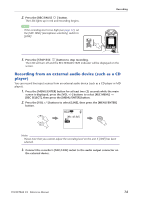
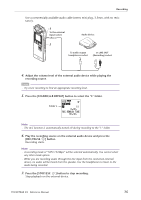
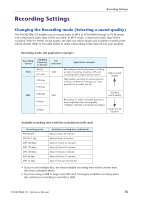
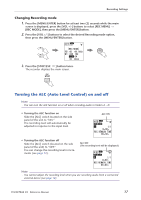
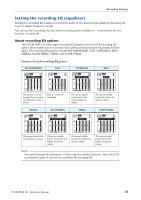
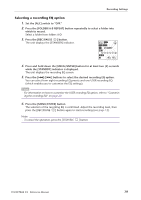
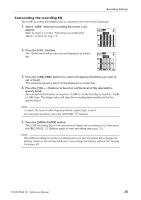
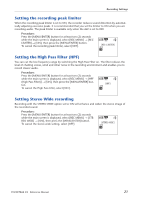
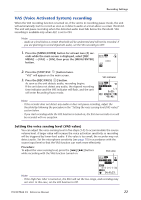
Recording Settings Changing Recording mode 1. Press the [MENU/ENTER] button for at least two (2) seconds while the main screen is displayed, press the [VOL +/-] buttons to select [REC MENU] → [REC MODE], then press the [MENU/ENTER] button. 2. Press the [VOL +/-] buttons to select the desired Recording mode option, then press the [MENU/ENTER] button. VOL MENU ENTER 3. Press the [STOP/ESC ] button twice. The recorder displays the main screen. ESC STOP Turning the ALC (Auto Level Control) on and off Note: · You can turn the ALC function on or off when recording audio to folders A - D. • Turning the ALC function on Slide the [ALC] switch located on the side panel of the unit to "ON." The recording level will automatically be adjusted in response to the input level. ALC ON • Turning the ALC function off Slide the [ALC] switch (located on the side panel of the unit) to "OFF." You can change the recording level in increments (see page 12). ALC OFF (The recording level will be displayed.) Note: · You cannot adjust the recording level when you are recording audio from a connected external device (see page 14). POCKETRAK CX Reference Manual 17
-
 1
1 -
2
-
3
-
4
-
5
-
6
-
7
-
8
-
9
-
10
-
11
-
 12
12 -
 13
13 -
 14
14 -
 15
15 -
 16
16 -
 17
17 -
 18
18 -
 19
19 -
 20
20 -
 21
21 -
 22
22 -
23
-
24
-
25
-
26
-
27
-
28
-
29
-
30
-
31
-
32
-
33
-
34
-
35
-
36
-
37
-
38
-
39
-
40
-
41
-
42
-
43
-
44
-
45
-
46
-
47
-
48
-
49
-
50
-
51
-
52
-
53
-
54
-
55
-
56
-
57
-
58
-
59
-
60
-
61
-
62
-
63
-
64
-
65
-
66
-
67
-
68
-
69
-
70
-
71
-
72
-
73
-
74
-
75
-
76
-
77
-
78
-
79
-
80
-
81
-
82
-
83
 |
 |
