eMachines W3650 8512635 - eMachines Desktop Hardware Reference Guide - Page 53
four screws to secure the power supply to the case.
 |
View all eMachines W3650 manuals
Add to My Manuals
Save this manual to your list of manuals |
Page 53 highlights
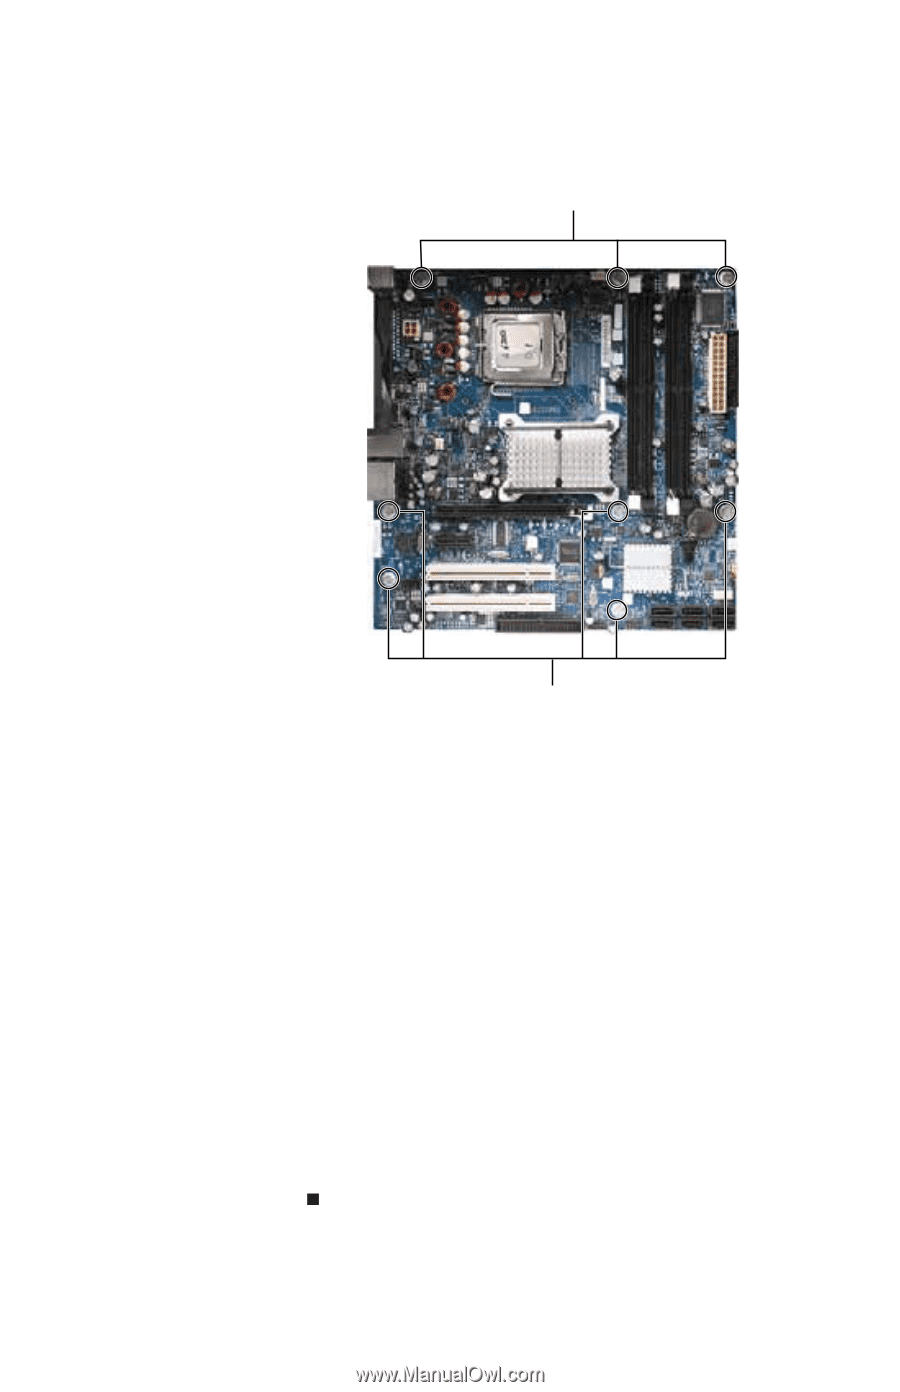
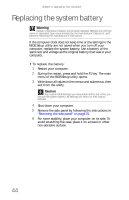
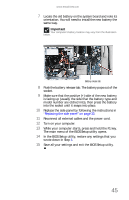
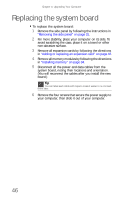
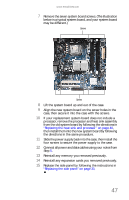
www.emachines.com 7 Remove the seven system board screws. (The illustration below is a typical system board, and your system board may be different.) Screws Screws 8 Lift the system board up and out of the case. 9 Align the new system board on the screw holes in the case, then secure it into the case with the screws. 10 If your replacement system board does not include a processor, remove the processor and heat sink assembly from the old system board by following the directions in "Replacing the heat sink and processor" on page 40, then install them into the new system board by following the directions in the same procedure. 11 Slide the power supply back into the case, then install the four screws to secure the power supply to the case. 12 Connect all power and data cables using your notes from Step 5. 13 Reinstall any memory you removed previously. 14 Reinstall any expansion cards you removed previously. 15 Replace the side panel by following the instructions in "Replacing the side panel" on page 33. 47
-
 1
1 -
2
-
3
-
4
-
5
-
6
-
7
-
8
-
9
-
10
-
11
-
12
-
13
-
14
-
15
-
16
-
17
-
18
-
19
-
20
-
21
-
22
-
23
-
24
-
25
-
26
-
27
-
28
-
29
-
30
-
31
-
32
-
33
-
34
-
35
-
36
-
37
-
38
-
39
-
40
-
41
-
42
-
43
-
44
-
45
-
46
-
47
-
 48
48 -
 49
49 -
 50
50 -
 51
51 -
 52
52 -
 53
53 -
 54
54 -
 55
55 -
 56
56 -
 57
57 -
 58
58 -
59
-
60
-
61
-
62
-
63
-
64
-
65
-
66
-
67
-
68
-
69
-
70
-
71
-
72
-
73
-
74
-
75
-
76
-
77
-
78
-
79
-
80
-
81
-
82
-
83
-
84
-
85
-
86
-
87
-
88
-
89
-
90
-
91
-
92
-
93
-
94
-
95
-
96
-
97
-
98
-
99
-
100
-
101
-
102
-
103
-
104
-
105
-
106
-
107
-
108
-
109
-
110
-
111
-
112
-
113
-
114
-
115
-
116
-
117
-
118
-
119
-
120
-
121
-
122
 |
 |