3M MP220 Operation Guide - Page 108
Rows and Columns, Inserting Rows and Columns, Deleting Rows and Columns
 |
View all 3M MP220 manuals
Add to My Manuals
Save this manual to your list of manuals |
Page 108 highlights
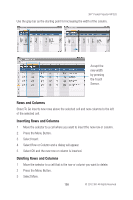
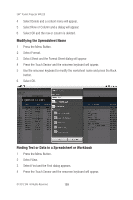
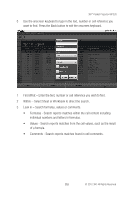
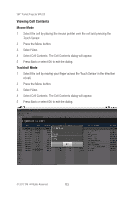
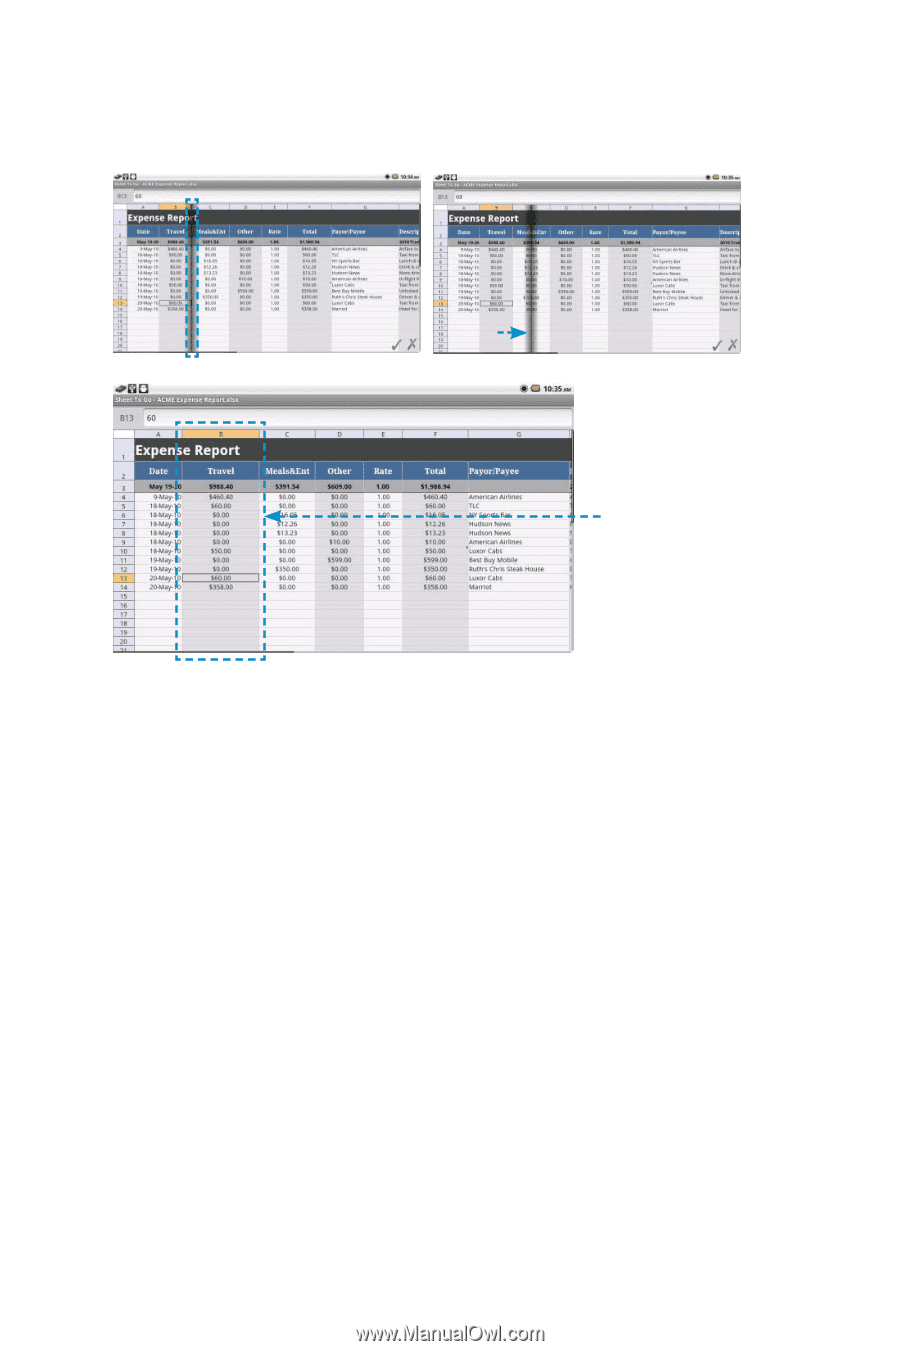
3M™ Pocket Projector MP220 Use the gray bar as the starting point for increasing the width of the column. Accept the new width by pressing the Touch Sensor. Rows and Columns Sheet To Go inserts new rows above the selected cell and new columns to the left of the selected cell. Inserting Rows and Columns 1 Move the selector to a cell where you want to insert the new row or column. 2 Press the Menu Button. 3 Select Insert. 4 Select Row or Column and a dialog will appear. 5 Select OK and the new row or column is inserted. Deleting Rows and Columns 1 Move the selector to a cell that is the row or column you want to delete. 2 Press the Menu Button. 3 Select More. 108 © 2012 3M. All Rights Reserved.
-
 1
1 -
2
-
3
-
4
-
5
-
6
-
7
-
8
-
9
-
10
-
11
-
12
-
13
-
14
-
15
-
16
-
17
-
18
-
19
-
20
-
21
-
22
-
23
-
24
-
25
-
26
-
27
-
28
-
29
-
30
-
31
-
32
-
33
-
34
-
35
-
36
-
37
-
38
-
39
-
40
-
41
-
42
-
43
-
44
-
45
-
46
-
47
-
48
-
49
-
50
-
51
-
52
-
53
-
54
-
55
-
56
-
57
-
58
-
59
-
60
-
61
-
62
-
63
-
64
-
65
-
66
-
67
-
68
-
69
-
70
-
71
-
72
-
73
-
74
-
75
-
76
-
77
-
78
-
79
-
80
-
81
-
82
-
83
-
84
-
85
-
86
-
87
-
88
-
89
-
90
-
91
-
92
-
93
-
94
-
95
-
96
-
97
-
98
-
99
-
100
-
101
-
102
-
 103
103 -
 104
104 -
 105
105 -
 106
106 -
 107
107 -
 108
108 -
 109
109 -
 110
110 -
 111
111 -
 112
112 -
 113
113 -
114
-
115
-
116
-
117
-
118
-
119
-
120
-
121
-
122
-
123
-
124
-
125
-
126
-
127
-
128
-
129
-
130
-
131
-
132
-
133
-
134
-
135
-
136
-
137
-
138
-
139
-
140
-
141
-
142
-
143
-
144
-
145
-
146
-
147
-
148
-
149
-
150
 |
 |
108
3M
™
Pocket Projector MP220
© 2012 3M. All Rights Reserved.
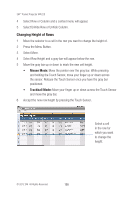
Use the gray bar as the starting point for increasing the width of the column.
Accept the
new width
by pressing
the Touch
Sensor.
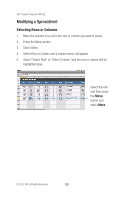
Rows and Columns
Sheet To Go inserts new rows above the selected cell and new columns to the left
of the selected cell.
Inserting Rows and Columns
1
Move the selector to a cell where you want to insert the new row or column.
2
Press the Menu Button.
3
Select Insert.
4
Select Row or Column and a dialog will appear.
5
Select OK and the new row or column is inserted.
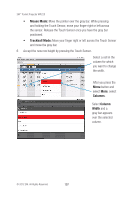
Deleting Rows and Columns
1
Move the selector to a cell that is the row or column you want to delete.
2
Press the Menu Button.
3
Select More.