Alcatel OS6855-24 User Guide - Page 102
Redundant Chassis Power with PoE OS6855-14/P14, DC-PoE Power Supply Mounting
 |
View all Alcatel OS6855-24 manuals
Add to My Manuals
Save this manual to your list of manuals |
Page 102 highlights
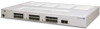
Rack-Mounting OS6855-14/P14 and OS6855-U10 Switches Mounting OS6855-14/P14 and OS6855-U10 Switches Redundant Chassis Power with PoE (OS6855-14/P14) For switches using redundant chassis power with PoE, an additional power supply tray is required. This power supply tray is included with all shipments for which redundant chassis power and PoE have been specified as requirements. To install the second power supply tray, see steps 11 through 15 below. 11 Insert the two tabs at the base of the tray into the slots provided at the bottom-rear portion of the switch chassis. Insert tab Insert tab 12 Be sure that the two holes in the tray are aligned with the threaded holes in the rear panel of the chassis and secure the tray to the switch using the two attachment screws (provided). 13 Place the PoE power supplies into the power supply tray with the connector cables facing forward. 14 Position the power supply retaining strap over the PoE power supplies. Insert the retaining strap's tabs into the notches located on the left and right sides of each power supply. Again, be sure that the tabs are completely inserted in the power supply notches and that the end flanges of the retaining strap fit inside the walls of the power supply tray. 15 Secure the retaining strap to the power supply tray using the attachment screws (provided). See the "DC-PoE Power Supply Mounting" on page 4-13 or "PS-I185AC-P (SDR-240-55) Power Supply Mounting" on page 4-14 for information on installing those power supplies. 16 Plug the power supply cord into the female AC connector located on the back of each power supply brick. Note. For PoE configurations, the system power supplies will already have power cords plugged into the AC connectors. Plug the power supply cord into the female AC connector in each PoE power supply, as applicable. Note. Use only the power cord(s) supplied with your OmniSwitch. The power supply's female AC connector includes a small notch that restricts the installation of many standard, non-OS6855 AC power cords. Never force the power cord into the female AC connector. page 4-10 OmniSwitch 6855 Series Hardware Users Guide September 2011
-
 1
1 -
2
-
3
-
4
-
5
-
6
-
7
-
8
-
9
-
10
-
11
-
12
-
13
-
14
-
15
-
16
-
17
-
18
-
19
-
20
-
21
-
22
-
23
-
24
-
25
-
26
-
27
-
28
-
29
-
30
-
31
-
32
-
33
-
34
-
35
-
36
-
37
-
38
-
39
-
40
-
41
-
42
-
43
-
44
-
45
-
46
-
47
-
48
-
49
-
50
-
51
-
52
-
53
-
54
-
55
-
56
-
57
-
58
-
59
-
60
-
61
-
62
-
63
-
64
-
65
-
66
-
67
-
68
-
69
-
70
-
71
-
72
-
73
-
74
-
75
-
76
-
77
-
78
-
79
-
80
-
81
-
82
-
83
-
84
-
85
-
86
-
87
-
88
-
89
-
90
-
91
-
92
-
93
-
94
-
95
-
96
-
 97
97 -
 98
98 -
 99
99 -
 100
100 -
 101
101 -
 102
102 -
 103
103 -
 104
104 -
 105
105 -
 106
106 -
 107
107 -
108
-
109
-
110
-
111
-
112
-
113
-
114
-
115
-
116
-
117
-
118
-
119
-
120
-
121
-
122
-
123
-
124
-
125
-
126
-
127
-
128
-
129
-
130
-
131
-
132
-
133
-
134
-
135
-
136
-
137
-
138
-
139
-
140
-
141
-
142
-
143
-
144
-
145
-
146
-
147
-
148
-
149
-
150
-
151
-
152
-
153
-
154
-
155
-
156
-
157
-
158
-
159
-
160
-
161
-
162
-
163
-
164
-
165
-
166
-
167
-
168
-
169
-
170
-
171
-
172
-
173
-
174
-
175
-
176
-
177
-
178
-
179
-
180
-
181
-
182
-
183
-
184
-
185
-
186
-
187
-
188
-
189
-
190
-
191
-
192
-
193
-
194
-
195
-
196
-
197
-
198
-
199
-
200
-
201
-
202
-
203
-
204
 |
 |
