Alcatel OS6855-24 User Guide - Page 112
Table-Mounting OS6855-14/P14 and OS6855- U10 Switches, General Table-Mounting Guidelines - mnt
 |
View all Alcatel OS6855-24 manuals
Add to My Manuals
Save this manual to your list of manuals |
Page 112 highlights
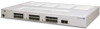
Table-Mounting OS6855-14/P14 and OS6855-U10 Switches Mounting OS6855-14/P14 and OS6855-U10 Switches Table-Mounting OS6855-14/P14 and OS6855U10 Switches General Table-Mounting Guidelines OmniSwitch 6855 Series switches can be installed freestanding as tabletop-mounted units. If you will be table-mounting your switch(es), refer to the important guidelines below before installing. • When choosing a location for the switch, be sure that adequate clearance has been provided for chassis air flow and access to the front, back, and sides of the chassis. For recommended clearances, refer to "Recommended Clearances" on page 4-3. • The power cord for OmniSwitch 6855 switches measures two (2) meters (approximately 6.5 feet) in length. When table mounting the switch, be sure that the mounting location is within the reach of all the required power sources. • A table-mount kit containing additional brackets is required (Kit No. OS6855-MNT). Positioning the Power Supply Tray(s) When table-mounting the switch, the power supply tray may be positioned either at the left side of the chassis or directly behind the chassis. This section will detail steps for installing the power supply tray directly behind the OS6855 chassis. For instructions on installing the power supply tray at the left side of the chassis, refer to steps 1 through 17, beginning on page 4-5. When complete, return to this section for additional table-mounting steps. Installation 1 To install the switch as a tabletop unit, begin by removing the S-bracket located at the left-rear portion of the switch chassis. Once removed, set the bracket and attachment screws aside and store in a safe place in case another mounting configuration is preferred at a later date. Remove the side S-bracket from the chassis by removing the two chassis attachment screws. page 4-20 OmniSwitch 6855 Series Hardware Users Guide September 2011
-
 1
1 -
2
-
3
-
4
-
5
-
6
-
7
-
8
-
9
-
10
-
11
-
12
-
13
-
14
-
15
-
16
-
17
-
18
-
19
-
20
-
21
-
22
-
23
-
24
-
25
-
26
-
27
-
28
-
29
-
30
-
31
-
32
-
33
-
34
-
35
-
36
-
37
-
38
-
39
-
40
-
41
-
42
-
43
-
44
-
45
-
46
-
47
-
48
-
49
-
50
-
51
-
52
-
53
-
54
-
55
-
56
-
57
-
58
-
59
-
60
-
61
-
62
-
63
-
64
-
65
-
66
-
67
-
68
-
69
-
70
-
71
-
72
-
73
-
74
-
75
-
76
-
77
-
78
-
79
-
80
-
81
-
82
-
83
-
84
-
85
-
86
-
87
-
88
-
89
-
90
-
91
-
92
-
93
-
94
-
95
-
96
-
97
-
98
-
99
-
100
-
101
-
102
-
103
-
104
-
105
-
106
-
 107
107 -
 108
108 -
 109
109 -
 110
110 -
 111
111 -
 112
112 -
 113
113 -
 114
114 -
 115
115 -
 116
116 -
 117
117 -
118
-
119
-
120
-
121
-
122
-
123
-
124
-
125
-
126
-
127
-
128
-
129
-
130
-
131
-
132
-
133
-
134
-
135
-
136
-
137
-
138
-
139
-
140
-
141
-
142
-
143
-
144
-
145
-
146
-
147
-
148
-
149
-
150
-
151
-
152
-
153
-
154
-
155
-
156
-
157
-
158
-
159
-
160
-
161
-
162
-
163
-
164
-
165
-
166
-
167
-
168
-
169
-
170
-
171
-
172
-
173
-
174
-
175
-
176
-
177
-
178
-
179
-
180
-
181
-
182
-
183
-
184
-
185
-
186
-
187
-
188
-
189
-
190
-
191
-
192
-
193
-
194
-
195
-
196
-
197
-
198
-
199
-
200
-
201
-
202
-
203
-
204
 |
 |
