Alcatel OS6855-24 User Guide - Page 120
Industrial Environment Mounting Options, General Industrial Environment Mounting Guidelines
 |
View all Alcatel OS6855-24 manuals
Add to My Manuals
Save this manual to your list of manuals |
Page 120 highlights
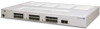
Industrial Environment Mounting Options Mounting OS6855-14/P14 and OS6855-U10 Switches Industrial Environment Mounting Options General Industrial Environment Mounting Guidelines • Wall-Mounting is supported on the OS6855-14, OS6855-P14, and OS6855-U10 in an industrial environment. • DIN rail mounting is supported on the OS6855-P14 in an industrial environment. • When choosing a location for the switch, be sure that adequate clearance has been provided for chassis air flow and access to the front, back, and sides of the chassis. For recommended clearances, refer to "Recommended Clearances" on page 4-3. • The power cord for the switches measures approximately two (2) meters (approximately 6.5 feet) in length. When wall mounting the switch, be sure that the mounting location is within the reach of all the required power sources. In addition, the power cord must not be attached to the building surface (e.g., with U-brackets, cord retainer clips, or other fasteners), nor run through walls, ceiling, floors and similar openings in the building structure. • In order to ensure that damage to the power cord does not occur, steps must be taken to provide proper routing of the power cord, as well as proper access to the switch's power source (i.e., grounded outlet). Refer to the guidelines listed below for additional details. General Wall-Mounting Guidelines • A wall-mount kit containing additional brackets is required (Kit No. OS6855-MNT). • For wall mounting, it is recommended that the chassis assembly is oriented sideways, with the chassis front panel facing left or right, as shown in the diagram below. • Be sure that the wall section and wall attachment screws (not provided) have the required strength to easily support the chassis assembly. A complete chassis assembly-with mounting brackets, power supply tray, and redundant power supplies-weighs approximately 12 lbs. • For each mounting hole the use of #10 or 5mm screws long enough to penetrate any soft surfaces, such as sheetrock or drywall, and securely attach to a hard surface such as a wall stud is recommended. • Two people will be required to wall mount the switch: one person to hold the chassis assembly in place and one person to mark the locations for the mounting screws. General DIN Rail Mounting Guidelines • The PS-I185AC-P (SDR-240-55) contains an integrated DIN rail bracket allowing the power supply to be mounted directly onto a DIN rail. • The PS-I40AC power supply contains three threaded holes for the attachment of a DIN rail bracket allowing the power supply to be mounted directly on a DIN rail. (Kit No. OS6855-DIN-BKT) • The PS-I40DC2448E, PS-75I42DC48-P, PS-I66AC-P power supplies must first be mounted in a power supply tray, then the entire tray and/or chassis can be DIN rail mounted using the optional DIN rail mounting kit. (Kit No. OS6855-DIN-MNT) • For DIN rail mounting, it is recommended that the chassis assembly is oriented sideways, with the chassis front panel facing left or right, as shown in the diagram below. page 4-28 OmniSwitch 6855 Series Hardware Users Guide September 2011
-
 1
1 -
2
-
3
-
4
-
5
-
6
-
7
-
8
-
9
-
10
-
11
-
12
-
13
-
14
-
15
-
16
-
17
-
18
-
19
-
20
-
21
-
22
-
23
-
24
-
25
-
26
-
27
-
28
-
29
-
30
-
31
-
32
-
33
-
34
-
35
-
36
-
37
-
38
-
39
-
40
-
41
-
42
-
43
-
44
-
45
-
46
-
47
-
48
-
49
-
50
-
51
-
52
-
53
-
54
-
55
-
56
-
57
-
58
-
59
-
60
-
61
-
62
-
63
-
64
-
65
-
66
-
67
-
68
-
69
-
70
-
71
-
72
-
73
-
74
-
75
-
76
-
77
-
78
-
79
-
80
-
81
-
82
-
83
-
84
-
85
-
86
-
87
-
88
-
89
-
90
-
91
-
92
-
93
-
94
-
95
-
96
-
97
-
98
-
99
-
100
-
101
-
102
-
103
-
104
-
105
-
106
-
107
-
108
-
109
-
110
-
111
-
112
-
113
-
114
-
 115
115 -
 116
116 -
 117
117 -
 118
118 -
 119
119 -
 120
120 -
 121
121 -
 122
122 -
 123
123 -
 124
124 -
 125
125 -
126
-
127
-
128
-
129
-
130
-
131
-
132
-
133
-
134
-
135
-
136
-
137
-
138
-
139
-
140
-
141
-
142
-
143
-
144
-
145
-
146
-
147
-
148
-
149
-
150
-
151
-
152
-
153
-
154
-
155
-
156
-
157
-
158
-
159
-
160
-
161
-
162
-
163
-
164
-
165
-
166
-
167
-
168
-
169
-
170
-
171
-
172
-
173
-
174
-
175
-
176
-
177
-
178
-
179
-
180
-
181
-
182
-
183
-
184
-
185
-
186
-
187
-
188
-
189
-
190
-
191
-
192
-
193
-
194
-
195
-
196
-
197
-
198
-
199
-
200
-
201
-
202
-
203
-
204
 |
 |
