Alcatel OS6855-24 User Guide - Page 97
Rack-Mounting OS6855-14/P14 and OS6855- U10 Switches, General Rack-Mounting Guidelines
 |
View all Alcatel OS6855-24 manuals
Add to My Manuals
Save this manual to your list of manuals |
Page 97 highlights
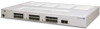
Mounting OS6855-14/P14 and OS6855-U10 Switches Rack-Mounting OS6855-14/P14 and OS6855-U10 Switches Rack-Mounting OS6855-14/P14 and OS6855U10 Switches General Rack-Mounting Guidelines If you will be rack-mounting your switch(es), refer to the important guidelines below before installing. • It is recommended that two people install the switch assembly on the rack-one person to hold the chassis and position it on the rack, and a second person to secure the chassis to the rack using attachment screws. (Please note that Alcatel-Lucent does not provide rack-mount screws. Use the screws supplied by the rack vendor.) • To prevent a rack from becoming top heavy, it is recommended that you install heavier equipment at the bottom of the rack, whenever possible. • Review page 4-3 for recommended chassis clearances before installing. • If you are installing the switch on a relay rack, be sure to install and secure the rack per the rack manufacturer's specifications. Positioning the Power Supply Tray(s) When rack mounting the switch, the power supply tray is positioned at the left side of the unit assembly by default. This allows the chassis and power supply assembly to span the full width of the rack. If both redundant chassis power and Power over Ethernet (PoE) are to be used an additional power supply tray must be mounted immediately behind the switch chassis. Refer to the table on page 4-4 for additional power supply requirements. Detailed instructions for installing power supplies and power supply trays are provided in this section. Installation 1 To mount a single chassis in a rack, begin by removing the S-bracket located at the left-rear portion of the switch chassis. Once removed, set the bracket and attachment screws aside; they will need to be reinstalled later. Remove the side S-bracket from the chassis by removing the two chassis attachment screws. Set the bracket and attachment screws aside. OmniSwitch 6855 Series Hardware Users Guide September 2011 page 4-5
-
 1
1 -
2
-
3
-
4
-
5
-
6
-
7
-
8
-
9
-
10
-
11
-
12
-
13
-
14
-
15
-
16
-
17
-
18
-
19
-
20
-
21
-
22
-
23
-
24
-
25
-
26
-
27
-
28
-
29
-
30
-
31
-
32
-
33
-
34
-
35
-
36
-
37
-
38
-
39
-
40
-
41
-
42
-
43
-
44
-
45
-
46
-
47
-
48
-
49
-
50
-
51
-
52
-
53
-
54
-
55
-
56
-
57
-
58
-
59
-
60
-
61
-
62
-
63
-
64
-
65
-
66
-
67
-
68
-
69
-
70
-
71
-
72
-
73
-
74
-
75
-
76
-
77
-
78
-
79
-
80
-
81
-
82
-
83
-
84
-
85
-
86
-
87
-
88
-
89
-
90
-
91
-
 92
92 -
 93
93 -
 94
94 -
 95
95 -
 96
96 -
 97
97 -
 98
98 -
 99
99 -
 100
100 -
 101
101 -
 102
102 -
103
-
104
-
105
-
106
-
107
-
108
-
109
-
110
-
111
-
112
-
113
-
114
-
115
-
116
-
117
-
118
-
119
-
120
-
121
-
122
-
123
-
124
-
125
-
126
-
127
-
128
-
129
-
130
-
131
-
132
-
133
-
134
-
135
-
136
-
137
-
138
-
139
-
140
-
141
-
142
-
143
-
144
-
145
-
146
-
147
-
148
-
149
-
150
-
151
-
152
-
153
-
154
-
155
-
156
-
157
-
158
-
159
-
160
-
161
-
162
-
163
-
164
-
165
-
166
-
167
-
168
-
169
-
170
-
171
-
172
-
173
-
174
-
175
-
176
-
177
-
178
-
179
-
180
-
181
-
182
-
183
-
184
-
185
-
186
-
187
-
188
-
189
-
190
-
191
-
192
-
193
-
194
-
195
-
196
-
197
-
198
-
199
-
200
-
201
-
202
-
203
-
204
 |
 |
