Alcatel OS6855-24 User Guide - Page 98
Redundant Chassis Power, For switches using redundant chassis power
 |
View all Alcatel OS6855-24 manuals
Add to My Manuals
Save this manual to your list of manuals |
Page 98 highlights
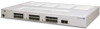
Rack-Mounting OS6855-14/P14 and OS6855-U10 Switches Mounting OS6855-14/P14 and OS6855-U10 Switches 2 Attach the S-bracket that was removed at step 1 to the right-rear portion of the power supply tray, as shown. Use the single power supply tray attachment screw (provided). S-bracket Re-attach the S-bracket removed at step one to the power supply tray, as shown. Power supply tray 3 Next, plug the connector cable from your power supply into the PS1 port located in the back of the switch chassis, as shown. PS1 port Rear of chassis Connector cable 4 If no additional power supplies are required, skip to step 5. Otherwise, refer to the additional information on the following configurations: redundant chassis power, PoE, and redundant chassis power with PoE. Redundant Chassis Power For switches using redundant chassis power, a second power supply is required. For this configuration, plug the connector cable from the second power supply into the PS2 port on the rear panel of the chassis. When complete, continue to step 5. page 4-6 OmniSwitch 6855 Series Hardware Users Guide September 2011
-
 1
1 -
2
-
3
-
4
-
5
-
6
-
7
-
8
-
9
-
10
-
11
-
12
-
13
-
14
-
15
-
16
-
17
-
18
-
19
-
20
-
21
-
22
-
23
-
24
-
25
-
26
-
27
-
28
-
29
-
30
-
31
-
32
-
33
-
34
-
35
-
36
-
37
-
38
-
39
-
40
-
41
-
42
-
43
-
44
-
45
-
46
-
47
-
48
-
49
-
50
-
51
-
52
-
53
-
54
-
55
-
56
-
57
-
58
-
59
-
60
-
61
-
62
-
63
-
64
-
65
-
66
-
67
-
68
-
69
-
70
-
71
-
72
-
73
-
74
-
75
-
76
-
77
-
78
-
79
-
80
-
81
-
82
-
83
-
84
-
85
-
86
-
87
-
88
-
89
-
90
-
91
-
92
-
 93
93 -
 94
94 -
 95
95 -
 96
96 -
 97
97 -
 98
98 -
 99
99 -
 100
100 -
 101
101 -
 102
102 -
 103
103 -
104
-
105
-
106
-
107
-
108
-
109
-
110
-
111
-
112
-
113
-
114
-
115
-
116
-
117
-
118
-
119
-
120
-
121
-
122
-
123
-
124
-
125
-
126
-
127
-
128
-
129
-
130
-
131
-
132
-
133
-
134
-
135
-
136
-
137
-
138
-
139
-
140
-
141
-
142
-
143
-
144
-
145
-
146
-
147
-
148
-
149
-
150
-
151
-
152
-
153
-
154
-
155
-
156
-
157
-
158
-
159
-
160
-
161
-
162
-
163
-
164
-
165
-
166
-
167
-
168
-
169
-
170
-
171
-
172
-
173
-
174
-
175
-
176
-
177
-
178
-
179
-
180
-
181
-
182
-
183
-
184
-
185
-
186
-
187
-
188
-
189
-
190
-
191
-
192
-
193
-
194
-
195
-
196
-
197
-
198
-
199
-
200
-
201
-
202
-
203
-
204
 |
 |
