Apple MC349LL/A User Manual - Page 108
VoiceOver Gestures, Practice gestures, Navigate and Read
 |
View all Apple MC349LL/A manuals
Add to My Manuals
Save this manual to your list of manuals |
Page 108 highlights
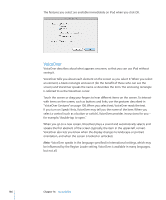
VoiceOver Gestures When VoiceOver is turned on, it changes the gestures you use to control iPad, so that you can hear descriptions without activating buttons. These VoiceOver gestures let you move around the screen and control the individual elements that you select. Some VoiceOver gestures use two, three, or four fingers to tap or flick. For best results when using more than one finger, relax and let your fingers touch the screen with some space between them. There are many ways to enter VoiceOver gestures. For example, you can two-finger tap by using either two fingers on one hand, or one finger on each hand. You can also use your thumbs. Try different techniques to discover what works best for you. If your gestures don't work, try quicker movements, especially for double-tapping and flicking gestures. To flick, try quickly brushing the screen with your finger or fingers. Practice gestures: In Settings, choose General > Accessibility > VoiceOver > Practice Gestures, then tap the Practice VoiceOver Gestures button. Practice the gestures described in "VoiceOver Settings," below. When you finish practicing, tap Done. Make single-finger flicking gestures quickly, to distinguish them from dragging gestures. Here's a summary of VoiceOver gestures: Navigate and Read ÂÂ Tap: Speak item. ÂÂ Flick right or left: Select the next or previous item. ÂÂ Flick up or down: The effect varies depending on the Rotor Control setting. See "Using VoiceOver" on page 110. ÂÂ Two-finger tap: Stop speaking the current item. ÂÂ Two-finger flick up: Read all, from the top of the screen. ÂÂ Two-finger flick down: Read all, from the current position. ÂÂ Three-finger flick up or down: Scroll one page at a time. ÂÂ Three-finger flick right or left: Go to the next or previous page (such as the Home screen or Safari). ÂÂ Three-finger tap: Speak the scroll status (which page or rows are visible). ÂÂ Four-finger flick up or down: Go to the first or last element on a page. ÂÂ Four-finger flick right or left: Go to the next or previous section (for example, on a webpage). 108 Chapter 16 Accessibility
-
 1
1 -
2
-
3
-
4
-
5
-
6
-
7
-
8
-
9
-
10
-
11
-
12
-
13
-
14
-
15
-
16
-
17
-
18
-
19
-
20
-
21
-
22
-
23
-
24
-
25
-
26
-
27
-
28
-
29
-
30
-
31
-
32
-
33
-
34
-
35
-
36
-
37
-
38
-
39
-
40
-
41
-
42
-
43
-
44
-
45
-
46
-
47
-
48
-
49
-
50
-
51
-
52
-
53
-
54
-
55
-
56
-
57
-
58
-
59
-
60
-
61
-
62
-
63
-
64
-
65
-
66
-
67
-
68
-
69
-
70
-
71
-
72
-
73
-
74
-
75
-
76
-
77
-
78
-
79
-
80
-
81
-
82
-
83
-
84
-
85
-
86
-
87
-
88
-
89
-
90
-
91
-
92
-
93
-
94
-
95
-
96
-
97
-
98
-
99
-
100
-
101
-
102
-
 103
103 -
 104
104 -
 105
105 -
 106
106 -
 107
107 -
 108
108 -
 109
109 -
 110
110 -
 111
111 -
 112
112 -
 113
113 -
114
-
115
-
116
-
117
-
118
-
119
-
120
-
121
-
122
-
123
-
124
-
125
-
126
-
127
-
128
-
129
-
130
-
131
-
132
-
133
-
134
-
135
-
136
-
137
-
138
-
139
-
140
-
141
-
142
-
143
-
144
-
145
-
146
-
147
-
148
-
149
-
150
-
151
-
152
-
153
-
154
 |
 |
