Archos AV700 User Manual - Page 27
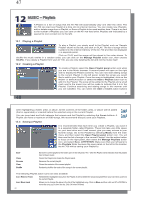
Settings, Record, Incremental Recording, Music, Browse Hard Drive, Launch Audiocorder, Browse hard
 |
UPC - 690590507159
View all Archos AV700 manuals
Add to My Manuals
Save this manual to your list of manuals |
Page 27 highlights
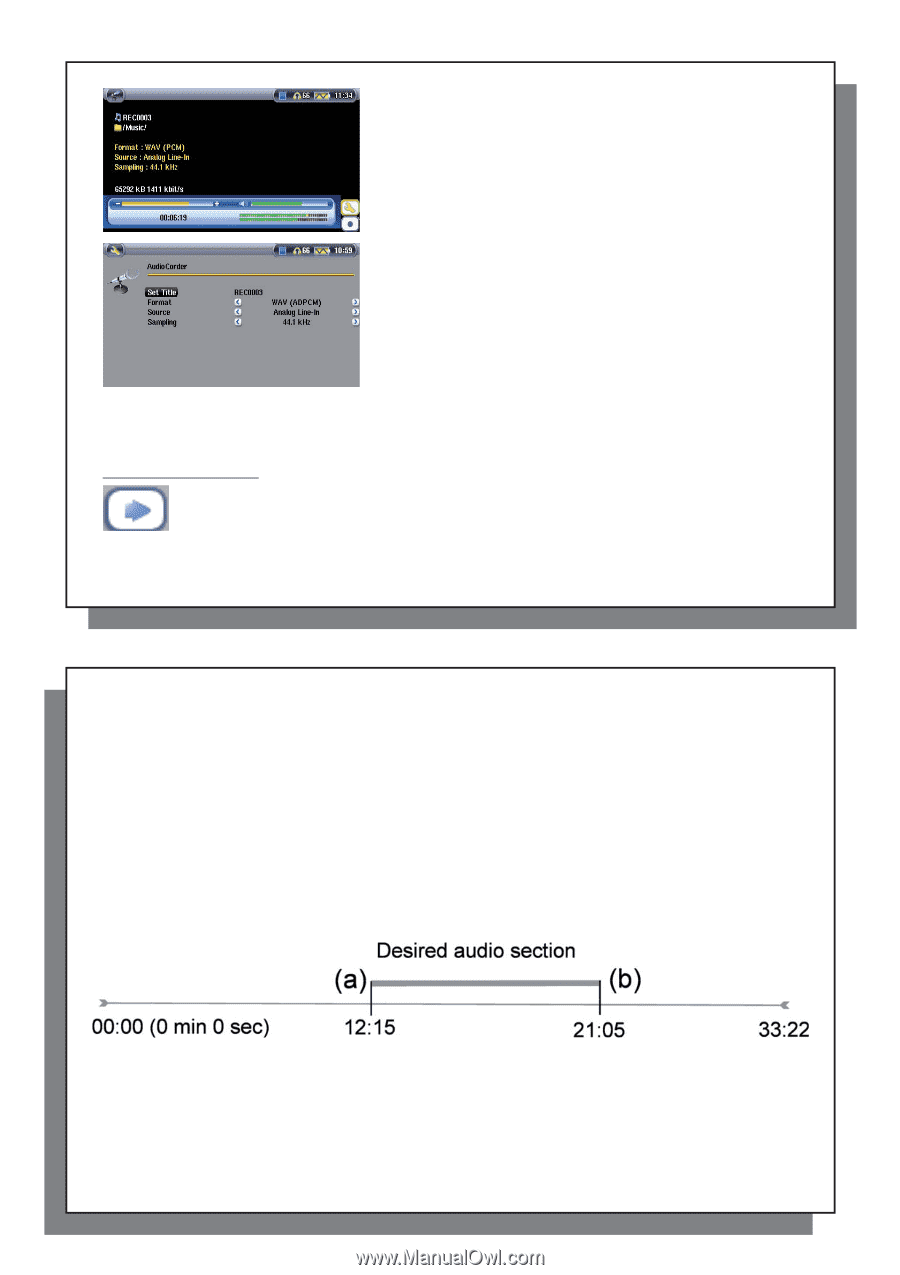
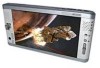
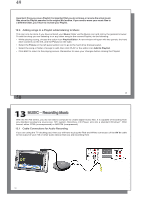
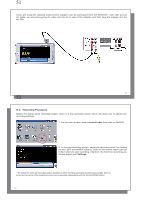
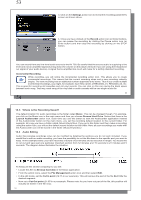
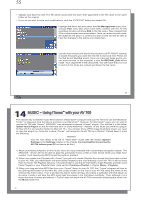
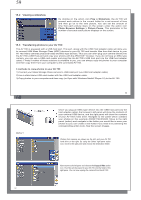
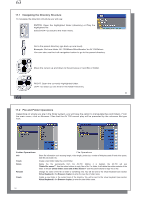
53 3. Click on the Settings action icon to reveal the recording parameters screen as shown above. 4. Once you have clicked on the Record action icon (or Enter button), you can pause the recording by clicking the Pause action icon (or Enter button) and then stop the recording by clicking on the STOP button. You can record from any line-level audio source to the AV 700. Be careful that the source audio is supplying a line level and not an amplified signal (turning down the volume on the player will work if you are using the headphone out signal of your audio device). A signal that is amplified too much will make for a terribly distorted recording. Incremental Recording While recording, you will notice the incremental recording action icon. This allows you to create incremental recordings. This means that the current recording stops and a new recording instantly begins. The next recording has an additional number appended to its name. Thus if you create multiple incremental recordings, you might, for example, have files names of REC0000_01, REC0000_02, etc. This is good for recording old cassettes and old vinyl records. You can click on this icon during the blank space between each song. That way, each song of the vinyl disk or audio cassette will be one single music file. 53 54 13.3 Where is the Recording Saved? The default location for audio recordings is the folder called Music. This can be changed though. For example, you click on the Music icon in the main menu and then you choose Browse Hard Drive. Notice that there is the Launch Audiocorder action icon. Each time you use this button to start the Audiocorder application instead of the AudioCorder button on the main menu, you set the recording default location to the current folder. For example, let's say you have a folder called /Music/Vinyls/Soul. If you go to this folder and then make a recording using the action icon, you will set the default record location to this folder. Now, all your recordings you make with the Audiocorder icon will be saved in the folder /Music/Vinyls/Soul. 13.4 Audio Editing Audio files (analog recordings only) can be modified by deleting the sections you do not wish included. If you would like to edit an audio recording, you have the possibility to cut the file down to the specific part you want to keep. In the example below, you have recorded a lecture of 33 minutes and 22 seconds in length. You would like to cut out and save just one particular important section from 12 minutes and 15 seconds to 21 minutes and 5 seconds. The diagram below illustrates the situation. To keep just this section (cropping it), you will: • Locate this file via Browse hard disk in the Music application. • From the action icons, select the File Management action icon and then select Edit. • In the edit mode, set the Cut In point (12:15 in our example). This will remove the part of the file BEFORE the desired segment. • Now set a Cut Out point (21:05 in our example. Please note: As you have cut part of the file, this position will actually be earlier in the file now). 54
-
 1
1 -
2
-
3
-
4
-
5
-
6
-
7
-
8
-
9
-
10
-
11
-
12
-
13
-
14
-
15
-
16
-
17
-
18
-
19
-
20
-
21
-
 22
22 -
 23
23 -
 24
24 -
 25
25 -
 26
26 -
 27
27 -
 28
28 -
 29
29 -
 30
30 -
 31
31 -
 32
32 -
33
-
34
-
35
-
36
-
37
-
38
-
39
-
40
-
41
-
42
-
43
-
44
-
45
-
46
-
47
-
48
-
49
-
50
-
51
-
52
-
53
-
54
-
55
 |
 |