Asus V75 V75 User's Manual for English Edition - Page 33
Viewing an MMS Message, Using Templates
 |
View all Asus V75 manuals
Add to My Manuals
Save this manual to your list of manuals |
Page 33 highlights
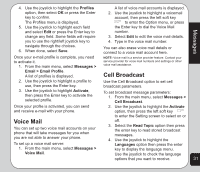
3. Use the joystick to highlight the Add To send the MMS message: Number or Add E-mail option then press 1. Press the right soft key to display the Enter key to confirm. the Send menu. You can either add an e-mail address or 2. Use the joystick to highlight a Send number manually, or press the left soft option, then press the enter key to Messages key to search from the phonebook. confirm. 4. After you have entered the recipient(s), select OK > Option > Done. Viewing an MMS Message 5. Use the joystick to highlight and select Cc, and Bcc recipients. Enter recipients in these fields in the same way as the To field. Some MMS messages are longer than the screen. To move up or down a page, press and hold the up or down joystick key. 6. Use the joystick to highlight the Subject Using Templates field then press the enter key to confirm. 7. Use the keypad to enter a subject. Stored on your phone are templates that contain texts, images, and sounds. You To create a slide: can create MMS messages based on these 1. To create a slide, use the joystick to templates. You can also edit any of the existing highlight the Edit Content field then templates. press the enter key to confirm. You can enter text in the same way as you would for an SMS message. To use a template: 1. From the main menu, select Messages > MMS > Templates. 2. Press the left soft key to display the Option menu. 3. Use the joystick to highlight an option and press the enter key to confirm. You can add an image, add an audio file, attach a file, or change the input method. 4. When your message is complete, highlight the Done option with the joystick, then press the enter key to confirm. You have just created one slide. Repeat A list of available templates appears. 2. Highlight a template, then select Options. Select View to preview the template. Select Properties to view fields and the size of the template. Select Write Message to edit the message. 3. Edit the To, Cc, Bcc, and Subject fields as described in the previous procedure. 29 the process to add more slides.
-
 1
1 -
2
-
3
-
4
-
5
-
6
-
7
-
8
-
9
-
10
-
11
-
12
-
13
-
14
-
15
-
16
-
17
-
18
-
19
-
20
-
21
-
22
-
23
-
24
-
25
-
26
-
27
-
 28
28 -
 29
29 -
 30
30 -
 31
31 -
 32
32 -
 33
33 -
 34
34 -
 35
35 -
 36
36 -
 37
37 -
 38
38 -
39
-
40
-
41
-
42
-
43
-
44
-
45
-
46
-
47
-
48
-
49
-
50
-
51
-
52
-
53
-
54
-
55
-
56
-
57
-
58
-
59
-
60
-
61
-
62
-
63
-
64
-
65
-
66
-
67
-
68
-
69
-
70
-
71
-
72
-
73
-
74
-
75
-
76
-
77
-
78
 |
 |
