Asus V75 V75 User's Manual for English Edition - Page 48
Photo capture settings
 |
View all Asus V75 manuals
Add to My Manuals
Save this manual to your list of manuals |
Page 48 highlights
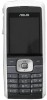
A list of stored images is displayed. 2. Use the joystick to scroll through the 2. To view an enlarged thumbnail, highlight available choices, then press Enter to an image and press the Enter key. You apply the setting. can browse photos in this enlarged view using the up and down joystick keys. Effect 3. Press the left soft key to display the Option menu. You can view, send, rename, delete, and sort photos. You can also set the default storage to handset or memory card. You can also set the image as the main wallpaper, screen saver, power on/off animation, or set to a phonebook entry for easy recognition of a contact. Use the Effect option to apply photo effects as you capture photos. For example, you can capture photos with a photo negative effect, alter colors, or make the photo look like a sketched drawing. To apply photo effects: 1. While in capture mode, select Option > Effect. A list of photo effects appears. Photo capture settings 2. Use the joystick to scroll through the available choices, then press Enter to The camera can be configured to capture apply the setting. images of different size and quality. You can also capture photos with frames or special Frame effects, take multi-capture photos, use a timer, set the default storage location, or apply advanced settings To access photo capture settings: Put the camera into capture mode, as described in the "Taking Photos" section of this manual, then select Option. Use the Add Frame option to add frames to pictures you capture. NOTE: The Frame option applies only to 176 x 220 image size. To apply frames to photos: 1. While in capture mode, select Option > Frame. 2. Highlight a frame from the list. A list of photo capture settings then appears. You can use the up and down joystick Image Size keys to scroll through the other frames to view them all. To set the image size: 44 1. While in capture mode, select Option > Image Size. 3. To select a frame, press the Enter key. The selected frame is then displayed on the capture screen.
-
 1
1 -
2
-
3
-
4
-
5
-
6
-
7
-
8
-
9
-
10
-
11
-
12
-
13
-
14
-
15
-
16
-
17
-
18
-
19
-
20
-
21
-
22
-
23
-
24
-
25
-
26
-
27
-
28
-
29
-
30
-
31
-
32
-
33
-
34
-
35
-
36
-
37
-
38
-
39
-
40
-
41
-
42
-
 43
43 -
 44
44 -
 45
45 -
 46
46 -
 47
47 -
 48
48 -
 49
49 -
 50
50 -
 51
51 -
 52
52 -
 53
53 -
54
-
55
-
56
-
57
-
58
-
59
-
60
-
61
-
62
-
63
-
64
-
65
-
66
-
67
-
68
-
69
-
70
-
71
-
72
-
73
-
74
-
75
-
76
-
77
-
78
 |
 |
