Brother International BAS-416A Instruction Manual - English - Page 71
Setting, point
 |
View all Brother International BAS-416A manuals
Add to My Manuals
Save this manual to your list of manuals |
Page 71 highlights
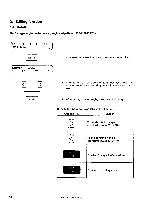
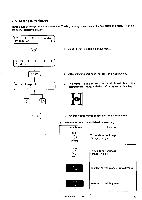
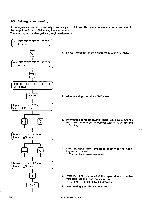
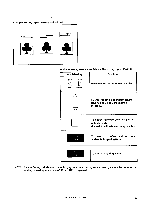
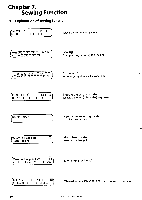
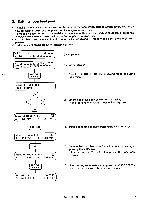
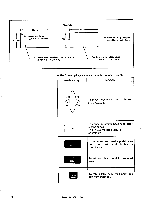
2. Setting hoop feed point • To make the removal and attachment of the embroidery hoop easier, besides current needle position, a new position can be set as a hoop feed point in range of movable area. • To make an operation such as material attachment smooth while the machine suspends, pressing the key can move the hoop to the hoop feed point anytime. • It is possible to set or not automatic hoop feed after sewing. (This cannot be set every registered pattern.) A feed hoop point can be set every registered pattern. Set STR P. Co. O O N No.17OOOOOOOO (sewing mode) R St:OODOEICI Co: El❑ N No.OOOOOOOOO (during suspension) HOOP) FEED 1. Press the key in sewing mode or during suspension. "Return > Hoop Feed Hoop Feeding DI 2. Set the hoop feed point by pressing the jog key. The coordinates of X and Y axes will be displayed. ( Move to Hoop > ENT Lti X : 095 mm Y : 067 mm ENTER Move to Hoop > ENT El) ( X : 110 mm Y : 083 mm Move to Hoop > ENT 14/X : 110 mm Y : 083 mm HOOP FEED [Set STR P. Co. O O N No.171OOOOOOOO 3. Decide hoop feed point by pressing the key. 4. Set whether hoop feed is performed or not after sewing by pressing the key. -After setting, an El mark will appear in the upper-right corner. 5. After setting coordinate value, press the key. The machine will return to sewing mode. BAS416A.BES-1210AC 61
-
 1
1 -
2
-
3
-
4
-
5
-
6
-
7
-
8
-
9
-
10
-
11
-
12
-
13
-
14
-
15
-
16
-
17
-
18
-
19
-
20
-
21
-
22
-
23
-
24
-
25
-
26
-
27
-
28
-
29
-
30
-
31
-
32
-
33
-
34
-
35
-
36
-
37
-
38
-
39
-
40
-
41
-
42
-
43
-
44
-
45
-
46
-
47
-
48
-
49
-
50
-
51
-
52
-
53
-
54
-
55
-
56
-
57
-
58
-
59
-
60
-
61
-
62
-
63
-
64
-
65
-
 66
66 -
 67
67 -
 68
68 -
 69
69 -
 70
70 -
 71
71 -
 72
72 -
 73
73 -
 74
74 -
 75
75 -
 76
76 -
77
-
78
-
79
-
80
-
81
-
82
-
83
-
84
-
85
-
86
-
87
-
88
-
89
-
90
-
91
-
92
-
93
-
94
-
95
-
96
-
97
-
98
-
99
-
100
-
101
-
102
-
103
-
104
-
105
-
106
-
107
-
108
-
109
-
110
-
111
-
112
-
113
-
114
 |
 |
