Brother International BES-100E BE-100 Workbook - English - Page 41
Fill-Stitching
 |
View all Brother International BES-100E manuals
Add to My Manuals
Save this manual to your list of manuals |
Page 41 highlights
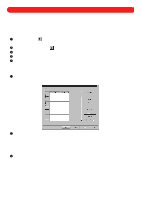
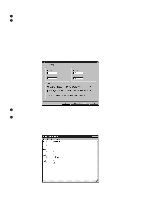
Chapter 15: Fill-Stitching Fill stitches are used for sewing text in order to prevent long satin stitches and avoid pullouts. We recommend using fill stitches when sewing very large characters. To select fill stitching: 1 Using the Move tool ( ), select the text shape that you wish to change. "Dancing ants" (moving dashes) appear around the shape. 2 Press the Enter key. The Text Properties dialog box appears. 3 Click the Stitches tab. 4 In the Type drop-down list, select "Fill". NOTE: The Length and Offset settings in the Fill group box (on the Stitches tab) allow the length and offset of the fill stitches to be adjusted. The length of a fill stitch is the distance between needle penetrations. Lengthening the stitch length lowers the stitch count. The offset is the percentage that each row is offset from the next. This adjusts the sewing pattern of fill stitching, so that when set to 30%, it resembles brickwork. The settings for obtaining a desirable pattern can be memorized so that they can be used again. For more information about memorizing settings, see Memorizing settings in chapter 34. To be sure that all letters in the text will be fill-stitched, select the Use satin/fill type check box in the Glyph default overrides group box. A check mark will appear. 5 Click the OK button. 38
-
 1
1 -
2
-
3
-
4
-
5
-
6
-
7
-
8
-
9
-
10
-
11
-
12
-
13
-
14
-
15
-
16
-
17
-
18
-
19
-
20
-
21
-
22
-
23
-
24
-
25
-
26
-
27
-
28
-
29
-
30
-
31
-
32
-
33
-
34
-
35
-
 36
36 -
 37
37 -
 38
38 -
 39
39 -
 40
40 -
 41
41 -
 42
42 -
 43
43 -
 44
44 -
 45
45 -
 46
46 -
47
-
48
-
49
-
50
-
51
-
52
-
53
-
54
-
55
-
56
-
57
-
58
-
59
-
60
-
61
-
62
-
63
-
64
-
65
-
66
-
67
-
68
-
69
-
70
-
71
-
72
-
73
-
74
-
75
-
76
-
77
-
78
-
79
-
80
-
81
-
82
-
83
-
84
-
85
-
86
-
87
-
88
-
89
-
90
-
91
-
92
-
93
-
94
-
95
-
96
-
97
-
98
-
99
-
100
-
101
-
102
-
103
-
104
-
105
-
106
-
107
-
108
-
109
-
110
-
111
-
112
-
113
-
114
-
115
-
116
-
117
-
118
-
119
 |
 |
